


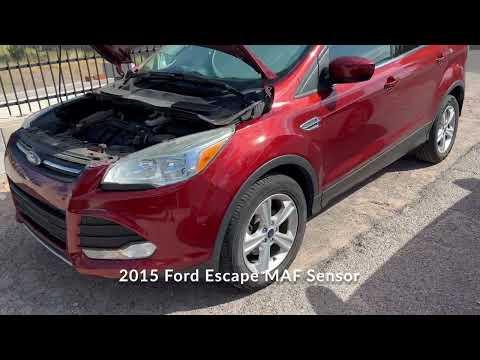







How to Replace the MAF Sensor on a 2013-2016 Ford Escape (Trim: S | Engine: Inline 4 2.5L)
Beginner-friendly steps with required tools, parts, torque specs, safety tips, and testing for 2013, 2014, 2015, 2016
How to Replace the MAF Sensor on a 2013-2016 Ford Escape (Trim: S | Engine: Inline 4 2.5L)
Beginner-friendly steps with required tools, parts, torque specs, safety tips, and testing for 2013, 2014, 2015, 2016


🔧 Escape - Mass Air Flow Sensor Replacement
This is a beginner-friendly repair. The MAF sensor sits in the air-intake tube near the air-filter box and measures the air entering the engine. Replacement means unplugging one connector, removing two small screws, and transferring nothing if the new sensor includes its seal. howtoo.com
Difficulty Level: Beginner | Estimated Time: 20-40 minutes
Assumption: These instructions cover replacing the removable sensor cartridge, not the complete intake tube.
⚠️ Safety & Precautions
- 🧊 Let the engine cool before working beside the intake and radiator area.
- 🔑 Switch the ignition completely off and keep the key away from the vehicle.
- 🧤 Never touch the exposed sensing wires or film inside either MAF sensor.
- 🚫 Don’t use brake cleaner, carburetor cleaner, compressed air, or shop towels on the sensor element.
- 🔋 Battery disconnection isn’t normally required for this repair.
🔧 Required Tools
You'll need the following tools for this repair:
- Torx T20 screwdriver
- 1/4-inch drive inch-pound torque wrench
- Torx T20 socket
- Small flat-blade screwdriver
- LED flashlight
- OBD-II scan tool
- Nitrile mechanic gloves
- Safety glasses
An inch-pound torque wrench measures very small fastener loads without stripping delicate plastic threads.
🔩 Required Parts
HowToo sells all the parts you need for this repair:
- Mass air flow sensor - Qty: 1
- MAF sensor O-ring or sealing gasket - Qty: 1, if not included with the sensor
The matching MAF sensor aisle is open in the parts list. Compare the new sensor’s connector, locating tab, and seal with the old one before installation.
📋 Before You Begin
- 🅿️ Park your Escape on level ground, shift into Park, and apply the parking brake.
- 🧊 Turn the engine off and allow it to cool for at least 20 minutes.
- 📸 Take a clear picture of the original sensor orientation and electrical connector.
- 🧹 Wipe loose dust from around the sensor so it can’t fall into the intake.
- 🔍 Check the intake tube for cracks, loose clamps, or disconnected hoses. An air leak can imitate a failed MAF sensor.
🔨 Step-by-Step Instructions
Follow these steps in order:
Step 1: Locate the MAF sensor
- Use the LED flashlight to follow the air-intake tube away from the air-filter box.
- Find the small sensor inserted into the tube with an electrical connector and two Torx screws.
- Confirm you’re working on the MAF sensor, not a sensor mounted on the intake manifold.
Step 2: Disconnect the electrical connector
- Press or slide the connector’s locking tab with your fingers.
- Pull the connector straight away from the sensor. Hold the connector body, not its wires.
- If the tab is stubborn, use the small flat-blade screwdriver to gently release the lock.
- Inspect the terminals for water, corrosion, bent pins, or wires pulling out of the connector.
Step 3: Remove the old MAF sensor
- Use the Torx T20 screwdriver to loosen the two retaining screws.
- Keep downward pressure on the screwdriver so the bit doesn’t damage the screw heads.
- Remove both screws and place them somewhere clean.
- Pull the sensor straight out while gently rocking its plastic body.
- Don’t twist against the sensing element or insert a tool into the opening.
- Tiny screws love disappearing into engine bays.
Step 4: Inspect the opening and seal
- Use the LED flashlight to check whether the old O-ring or gasket remained in the intake tube.
- Remove an old loose seal with your fingers. Don’t scratch the plastic sealing surface.
- Don’t spray cleaner into the open intake or leave the opening uncovered.
Step 5: Install the new sensor
- Verify that the new MAF sensor has the same connector, mounting pattern, and locating shape as the removed sensor.
- Fit the supplied O-ring or gasket flat against the new sensor.
- Hold the sensor by its plastic body and insert it in the same direction shown in your reference picture.
- Don’t force it. If it won’t sit flush, remove it and check the locating tab and seal.
Step 6: Tighten the retaining screws
- Start both screws by hand to prevent cross-threading.
- Use the Torx T20 socket and 1/4-inch drive inch-pound torque wrench for final tightening.
- Tighten each screw gradually, alternating between them.
- Torque to 2 Nm (18 in-lbs). The small screws and plastic housing are easy to strip. howtoo.com
Step 7: Reconnect the wiring
- Push the electrical connector onto the sensor until the lock clicks.
- Gently tug the connector body to verify it’s secured.
- Check that the wiring isn’t stretched, pinched, or touching a hot component.
Step 8: Check the complete intake system
- Use the LED flashlight to inspect the intake tube between the air-filter box and throttle body.
- Make sure every tube is fully seated and every clamp is secure.
- Confirm that no tools, screws, or cleaning materials remain in the engine compartment.
Step 9: Clear stored fault codes
- Connect the OBD-II scan tool to the diagnostic port beneath the driver’s side dashboard.
- Switch the ignition on without starting the engine.
- Read and record the stored codes before clearing them.
- Clear the codes, switch the ignition off, and disconnect the scan tool.
- If you don’t have a scan tool, the light may switch off after several successful drive cycles, but recording the original code is better diagnostic practice.
✅ After Repair
- 🚙 Start the engine and let it idle for two minutes without pressing the accelerator.
- 👂 Listen for hissing or whistling around the intake tube, which indicates an air leak.
- ⚠️ Stop the engine if it runs extremely rough, stalls repeatedly, or the check-engine light flashes.
- 🛣️ Take a gentle 10-15 minute test drive and verify smooth idle and normal throttle response.
- 🔍 Recheck for codes with the OBD-II scan tool after the test drive.
- 🧰 If the same code returns, inspect the connector and intake for leaks before replacing more parts. A fault code identifies a circuit problem, not automatically a bad sensor.
💰 DIY vs Shop Cost
Shop Cost: $200-$450 (parts + labor)
DIY Cost: $94-$147 for a new sensor from the current parts list, before shipping and taxes
You Save: Approximately $50-$350 by doing it yourself!
Local labor charges around Sonīpat vary. This repair normally takes a shop approximately 0.5-1.0 hour.
🎯 Ready to get started?
HowToo makes it easy: same-day/2-day shipping on every part, plus all the tools and specialty tools you need! Check out the parts and tools sections below to add everything to your cart.
