







How to Replace the MAF Sensor on a 2012-2020 Chevrolet Impala (Trim: LT | Engine: V6 3.6L)
Step-by-step instructions with required tools, parts, torque specs, and code-clearing tips for 2012, 2013, 2015, 2016, 2017, 2018, 2019
How to Replace the MAF Sensor on a 2012-2020 Chevrolet Impala (Trim: LT | Engine: V6 3.6L)
Step-by-step instructions with required tools, parts, torque specs, and code-clearing tips for 2012, 2013, 2015, 2016, 2017, 2018, 2019


🔧 Impala - Mass Air Flow Sensor Replacement
The mass air flow (MAF) sensor measures the air entering your Impala’s engine. Replacing a faulty sensor can correct rough running, hesitation, poor fuel economy, and MAF-related trouble codes.
Difficulty Level: Beginner | Estimated Time: 20-30 minutes
⚠️ Safety & Precautions
- ⚠️ Turn the ignition off and keep the key away from the vehicle before disconnecting the sensor.
- 🧤 Allow the engine to cool because nearby engine components may be hot.
- 🚫 Never touch the sensing elements inside the new MAF sensor.
- 🔋 Battery disconnection is not required for this repair.
- 💧 Do not use throttle-body, brake, or carburetor cleaner on the sensor.
🔧 Required Tools
You'll need the following tools for this repair:
- Torx T20 screwdriver
- 1/4-inch drive inch-pound torque wrench
- 1/4-inch drive Torx T20 bit socket
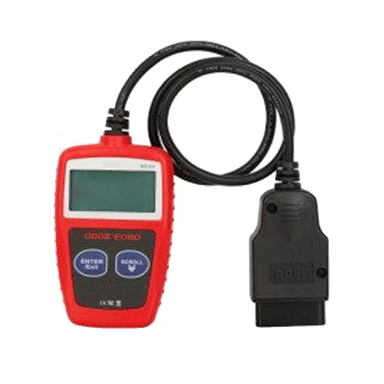
- OBD-II scan tool
- Nitrile mechanic gloves
- Safety glasses
- Clean lint-free cloth
🔩 Required Parts
HowToo sells all the parts you need for this repair:
- Mass air flow sensor with sealing ring - Qty: 1
- Mass air flow sensor sealing ring - Qty: 1 if not supplied with sensor
📋 Before You Begin
- 🚗 Park your Impala on level ground, select Park, apply the parking brake, and open the hood.
- ⏳ Switch the ignition off and wait at least two minutes before unplugging the sensor.
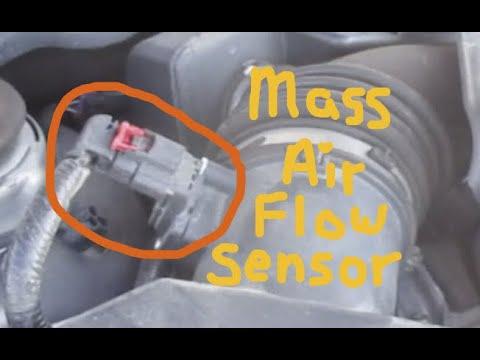
- 📍 Locate the MAF sensor in the air-intake outlet immediately after the engine air-filter housing.
- 🔎 Compare the replacement sensor’s connector, mounting holes, and airflow orientation with the original sensor.
🔨 Step-by-Step Instructions
Follow these steps in order:
Step 1: Locate and inspect the MAF sensor
- Use a clean lint-free cloth to remove loose dirt around the sensor and connector.
- Identify the MAF sensor mounted in the plastic air-intake housing beside the air-filter box.
- Do not allow dirt to fall through the sensor opening and into the intake.
Step 2: Disconnect the electrical connector
- Use your fingers to pull the connector’s locking tab back, if fitted.
- Press the release tab and pull the connector straight away from the sensor.
- Do not pull on the wires. If it resists, press the release tab more firmly while gently moving the connector.
- Take a photo before removing anything.
Step 3: Remove the old MAF sensor
- Use a Torx T20 screwdriver to remove the two MAF sensor retaining screws.
- Keep the screws clean because they are normally reused.
- Lift the sensor straight out while gently rocking its plastic body.
- Do not pry against the air-intake housing or drop debris into the opening.
Step 4: Prepare the replacement sensor
- Use a clean lint-free cloth to wipe the sensor mounting surface.
- Verify that the new sealing ring is seated evenly on the replacement sensor.
- Hold the sensor by its plastic body. Do not touch the small sensing elements inside it.
- Match the new sensor’s position and airflow orientation to the original sensor.
Step 5: Install the new MAF sensor
- Lower the sensor squarely into the intake opening without forcing it.
- Start both retaining screws by hand to avoid damaging the plastic threads.
- Use a 1/4-inch drive inch-pound torque wrench and Torx T20 bit socket to tighten the screws evenly.
- Torque to 2 Nm (18 in-lbs). Do not overtighten the screws.
Step 6: Reconnect the electrical connector
- Push the electrical connector onto the sensor until its release tab clicks.
- Push the connector locking tab fully into its locked position, if fitted.
- Gently pull on the connector body to verify that it is secure.
Step 7: Clear stored trouble codes
- Connect an OBD-II scan tool to the diagnostic connector below the driver-side dashboard.
- Switch the ignition on without starting the engine.
- Use the OBD-II scan tool to select Powertrain > Diagnostic Trouble Codes > Clear Codes.
- Switch the ignition off and disconnect the scan tool.
Step 8: Start and inspect the engine
- Start the engine and let it idle without pressing the accelerator for approximately three minutes.
- Listen for a hissing sound that could indicate an intake-air leak around the sensor.
- Verify that the engine idles smoothly and the malfunction indicator lamp remains off.
✅ After Repair
- ✅ Confirm that the MAF connector is locked and both retaining screws remain secure.
- 🚘 Take a 10-15 minute test drive using gentle acceleration and normal cruising speeds.
- 🔍 Use the OBD-II scan tool to check for returning codes after the test drive.
- ⚠️ If codes P0101, P0102, or P0103 return, inspect the air filter, intake duct, connector terminals, and wiring before replacing additional parts.
- 🧠 A separate programming or calibration procedure is not normally required.
💰 DIY vs Shop Cost
Shop Cost: ₹12,000-₹28,000 (parts + labor)
DIY Cost: ₹7,000-₹20,000 (parts only)
You Save: ₹5,000-₹8,000 by doing it yourself!
Labor and imported-part prices around Sonīpat can vary considerably. This repair takes a shop approximately 0.3-0.5 hour.
🎯 Ready to get started?
HowToo makes it easy: same-day/2-day shipping on every part, plus all the tools and specialty tools you need! Check out the parts and tools sections below to add everything to your cart.