







How to Replace the MAF Sensor on a 2007-2023 Ford F-150
Step-by-step mass air flow sensor replacement with tools, parts, safety tips, and testing for 2007, 2008, 2009, 2010, 2011, 2012, 2013, 2014, 2015, 2016, 2017, 2018, 2019, 2020, 2021, 2022, 2023
How to Replace the MAF Sensor on a 2007-2023 Ford F-150
Step-by-step mass air flow sensor replacement with tools, parts, safety tips, and testing for 2007, 2008, 2009, 2010, 2011, 2012, 2013, 2014, 2015, 2016, 2017, 2018, 2019, 2020, 2021, 2022, 2023


🔧 F-150 - Mass Air Flow Sensor Replacement
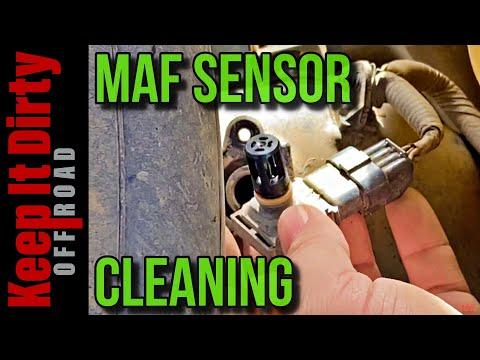
This is a straightforward job. The MAF sensor sits in the clean-air outlet near the air-filter housing and measures how much air enters the engine. The Motorcraft sensor is my first choice at $104.80, while the Hitachi original-equipment option is $89.67.
Difficulty Level: Beginner | Estimated Time: 20-40 minutes
Assumption: These steps cover the removable sensor fitted into the factory air-filter outlet tube.
⚠️ Safety & Precautions
- ⚠️ Let the engine cool and keep the ignition completely off.
- ⚠️ Never start your F-150 with the MAF removed or the intake tube open.
- ⚠️ Keep dust, screws and tools out of the intake. Small debris can damage the turbochargers.
- ⚠️ Don’t touch the sensing elements inside the new sensor.
- ⚠️ Battery disconnection isn’t normally required for this repair.
🔧 Required Tools
You'll need the following tools for this repair:
- Torx T20 screwdriver
- 1/4-inch drive inch-pound torque wrench
- 1/4-inch drive Torx T20 socket
- 10mm socket
- 1/4-inch drive ratchet
- Soft nylon cleaning brush
- Clean microfiber cloth
- Nitrile gloves
- Safety glasses
🔩 Required Parts
HowToo sells all the parts you need for this repair:
- Mass air flow sensor - Qty: 1
- MAF sensor seal - Qty: 1 if not included with sensor
I'd put the Motorcraft Mass Air Flow Sensor on the counter first. The Hitachi Original Equipment Mass Air Flow Sensor is the value pick. Cheap airflow electronics can create more diagnostic work than they save. Nobody enjoys chasing a brand-new bad part.
📋 Before You Begin
- 🅿️ Park on level ground, select Park and apply the parking brake.
- 🔑 Switch the ignition off and move the key or key fob away from your F-150.
- 🧹 Clean loose dirt from the air-filter housing and intake tube with the soft nylon brush.
- 📱 Photograph the sensor orientation and connector routing before removing anything.
- 🔎 Inspect the intake tube for cracks and check the connector for corrosion or damaged terminals.
🔨 Step-by-Step Instructions
Follow these steps in order:
Step 1: Open and inspect the intake area
- Open the hood and locate the air-filter housing on the passenger side of the engine compartment.
- Find the MAF sensor and its electrical connector on the clean-air outlet from the filter housing. Ford identifies this as the mass-airflow connector location on the outlet tube. fordservicecontent.com)
- Use the soft nylon cleaning brush and microfiber cloth to remove loose dirt around the sensor.
- Clean first. Dirt loves open intakes.
Step 2: Disconnect the MAF electrical connector
- Move the connector’s locking clip to the unlocked position with your fingers.
- Press the release tab and pull the connector straight backward. Pull on the connector body, not the wires.
- If access is tight, use the 10mm socket and ratchet only to loosen the intake-tube clamp, then reposition the tube slightly.
- Ford specifies unlocking the clip before squeezing and removing the connector. fordservicecontent.com
Step 3: Remove the old sensor
- Use the Torx T20 screwdriver to loosen the two sensor retaining screws evenly.
- Keep one hand under each screw as it comes out so it cannot fall into the engine compartment.
- Pull the sensor straight out without twisting it against the plastic housing.
- Remove the old seal if it remains in the opening.
- Don’t spray cleaner into the open intake tube.
Step 4: Compare the replacement sensor
- Place the sensors beside each other without touching either sensing element.
- Confirm the electrical connector, mounting holes, probe shape and airflow orientation match.
- Verify the new seal is installed correctly and isn’t folded or damaged.
Step 5: Install the new MAF sensor
- Insert the new sensor in the same orientation as the old sensor. Don’t force it.
- Start both screws by hand using the Torx T20 screwdriver.
- Tighten the screws alternately until the sensor sits evenly against the housing.
- Torque note: A sensor-screw specification wasn’t available in Ford’s owner-facing procedure. Tighten only lightly with the short Torx T20 screwdriver. Don’t crush or crack the plastic flange.
Step 6: Reconnect the intake and wiring
- If you loosened the intake tube, fully seat it over the air-filter housing.
- Use the 10mm socket and ratchet to tighten the tube clamp until snug. Ford specifically warns against overtightening this clamp. fordservicecontent.com)
- Push the electrical connector onto the sensor until it clicks.
- Return the locking clip to its locked position.
- Gently tug the connector body to confirm it’s secure.
Step 7: Perform a final inspection
- Use the flashlight to inspect the sensor flange, intake tube and air-filter housing.
- Confirm no tools, screws or cloths remain in the engine compartment.
- Verify every intake connection is fully seated and the wiring isn’t stretched.
✅ After Repair
- ✅ Start the engine and let it idle for three to five minutes without pressing the accelerator.
- ✅ Listen for hissing around the intake tube, which can indicate an air leak.
- ✅ Confirm the engine idles smoothly and the check-engine light doesn’t flash.
- ✅ If you have an OBD-II scan tool, clear the stored MAF-related trouble code after recording it.
- ✅ Take a short, gentle test drive and recheck the connector and intake clamp afterward.
- ✅ If the same code returns, inspect the connector, wiring, air filter and intake tube before replacing more parts.
💰 DIY vs Shop Cost
Shop Cost: $180-$320 parts and labor
DIY Cost: $69-$105 for the sensor
You Save: Approximately $75-$215 by doing it yourself!
Shop labor rates vary but typically run $100-$150/hour. This repair takes a shop approximately 0.3-0.6 hour.
🎯 Ready to get started?
HowToo makes it easy: same-day/2-day shipping on every part, plus all the tools and specialty tools you need! Check out the parts and tools sections below to add everything to your cart.