







How to Replace the MAF Sensor on a 2004-2024 Nissan TITAN (Trim: PRO-4X | Engine: V8 5.6L | Body: Extended Cab Pickup)
Step-by-step mass air flow sensor guide with tools, parts, torque specs, and safety tips for 2004, 2005, 2006, 2007, 2008, 2009, 2010
How to Replace the MAF Sensor on a 2004-2024 Nissan TITAN (Trim: PRO-4X | Engine: V8 5.6L | Body: Extended Cab Pickup)
Step-by-step mass air flow sensor guide with tools, parts, torque specs, and safety tips for 2004, 2005, 2006, 2007, 2008, 2009, 2010


🔧 TITAN - Mass Air Flow Sensor Replacement
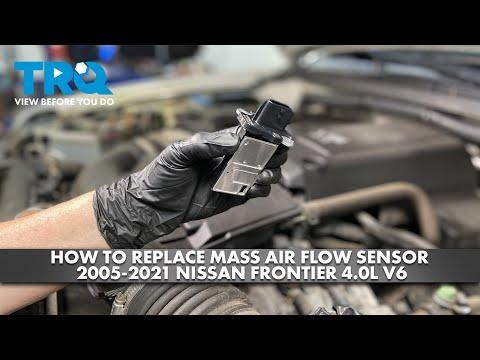
The mass air flow sensor, often called the MAF sensor, measures how much air enters the engine so your TITAN can calculate the correct fuel amount. Replacing it is a beginner-friendly job because it is mounted in the air intake tube near the air filter box.
Difficulty Level: Beginner | Estimated Time: 15-30 minutes
⚠️ Safety & Precautions
- 🔋 Disconnecting the battery is recommended before unplugging the MAF sensor connector.
- 🔥 Work only with the engine off and cool.
- 🧤 Do not touch the small sensing wires inside the MAF sensor. They are delicate.
- ⚠️ Do not use brake cleaner, carb cleaner, or shop air on the MAF sensor.
- 🔍 Make sure no dirt falls into the intake tube while the sensor is removed.
🔧 Required Tools
You'll need the following tools for this repair:
- 10mm wrench
- Phillips #2 screwdriver
- Tamper-resistant Torx T20 screwdriver
- Flat-blade screwdriver
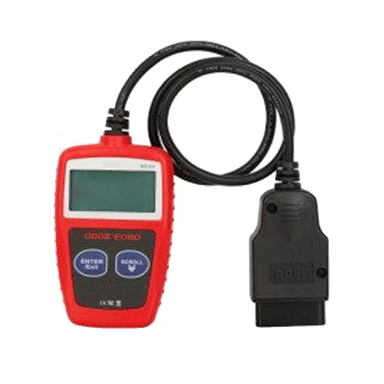
- OBD2 scan tool
- Mechanic gloves
- Safety glasses
A tamper-resistant Torx T20 screwdriver has a small hole in the tip to fit security-style Torx screws.
🔩 Required Parts
HowToo sells all the parts you need for this repair:
- Mass air flow sensor - Qty: 1
- MAF sensor seal or O-ring - Qty: 1
- Mass air flow sensor cleaner - Qty: 1
📋 Before You Begin
- 🅿️ Park your TITAN on level ground and set the parking brake.
- 🔑 Turn the ignition fully off and remove the key.
- 🔋 Use a 10mm wrench to disconnect the negative battery cable.
- ⏳ Wait 2 minutes before unplugging the MAF sensor connector.
- 📍 Open the hood and locate the air filter box on the passenger side of the engine bay. The MAF sensor is mounted in the intake tube just after the air filter box.
🔨 Step-by-Step Instructions
Follow these steps in order:
Step 1: Locate the MAF Sensor
- Use safety glasses and mechanic gloves before working under the hood.
- Find the air filter box on the passenger side of your TITAN.
- Follow the large black intake tube from the air filter box toward the engine.
- The MAF sensor is the small plastic sensor with an electrical connector mounted into that tube.
- Take a photo before unplugging anything.
Step 2: Unplug the Electrical Connector
- Use a flat-blade screwdriver to gently lift the connector lock tab if it is tight.
- Press the release tab with your thumb and pull the connector straight off.
- Do not pull on the wires.
- Inspect the connector for bent pins, green corrosion, or oil contamination.
Step 3: Remove the Old MAF Sensor
- Use a tamper-resistant Torx T20 screwdriver to remove the two MAF sensor screws.
- If your replacement or installed sensor uses Phillips screws, use a Phillips #2 screwdriver instead.
- Pull the MAF sensor straight out of the intake tube.
- Do not twist hard. The seal can make it feel stuck.
Step 4: Inspect the Intake Opening
- Use your eyes only to check the MAF sensor opening in the intake tube.
- Make sure the old seal or O-ring did not stay stuck in the tube.
- Do not drop screws, dirt, or tools into the intake tube.
- If needed, use a clean dry finger to remove loose dirt around the outside edge only.
Step 5: Prepare the New MAF Sensor
- Compare the new MAF sensor to the old sensor before installing it.
- Make sure the new MAF sensor seal or O-ring is seated evenly.
- If the new sensor has protective packaging over the sensing element, remove it by hand.
- Do not touch the sensing element inside the sensor.
Step 6: Install the New MAF Sensor
- Slide the new MAF sensor straight into the intake tube by hand.
- Make sure it sits flat against the mounting surface.
- Use a tamper-resistant Torx T20 screwdriver to install the two screws.
- If Phillips screws are used, use a Phillips #2 screwdriver.
- Torque to 2-3 Nm (18-27 in-lbs)
- Do not overtighten. The plastic housing can crack.
Step 7: Reconnect the Electrical Connector
- Push the connector onto the MAF sensor until it clicks.
- Use your hand to gently tug the connector and confirm it is locked.
- Check that the wiring is not stretched, pinched, or rubbing on the intake tube.
Step 8: Reconnect the Battery
- Use a 10mm wrench to reconnect the negative battery cable.
- Tighten the terminal until snug.
- Do not overtighten the battery terminal.
Step 9: Clear Codes and Start the Engine
- Use an OBD2 scan tool to clear any stored MAF-related codes.
- Start the engine and let it idle for 2-3 minutes.
- The idle may adjust slightly while the engine computer relearns airflow.
- If the engine stalls or runs rough, turn it off and recheck the connector and intake tube clamps.
✅ After Repair
- 🚗 Test drive your TITAN for 10-15 minutes with gentle acceleration.
- 🔍 Recheck for trouble codes using the OBD2 scan tool.
- 👂 Listen for hissing sounds from the intake tube, which can mean an air leak.
- 📊 If codes return, inspect the air filter, intake tube clamps, wiring connector, and vacuum leaks before replacing more parts.
💰 DIY vs Shop Cost
Shop Cost: $250-$450 (parts + labor)
DIY Cost: $80-$220 (parts only)
You Save: $150-$250 by doing it yourself!
Shop labor rates vary but typically run $100-$150/hour. This repair takes a shop approximately 0.5-1.0 hours.
🎯 Ready to get started?
HowToo makes it easy: same-day/2-day shipping on every part, plus all the tools and specialty tools you need! Check out the parts and tools sections below to add everything to your cart.