

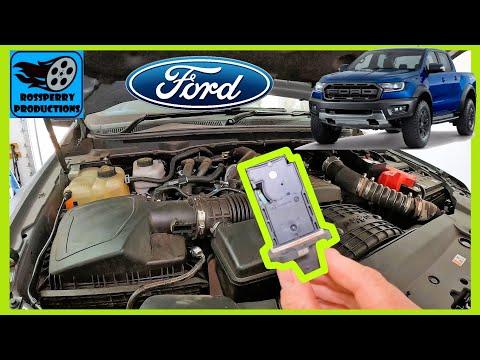







How to Replace the MAF Sensor on a 2004-2023 Ford Ranger (Trim: XL | Engine: Inline 4 2.3L)
Step-by-step mass air flow sensor guide with tools, parts, torque specs, and safety tips for 2004, 2005
How to Replace the MAF Sensor on a 2004-2023 Ford Ranger (Trim: XL | Engine: Inline 4 2.3L)
Step-by-step mass air flow sensor guide with tools, parts, torque specs, and safety tips for 2004, 2005


🔧 Ranger - Mass Air Flow Sensor Replacement
The mass air flow sensor, often called the MAF sensor, measures how much air enters the engine so the computer can calculate fuel delivery. On your Ranger, replacing it is a straightforward beginner-friendly job because the sensor is mounted in the air intake tube near the air filter box.
Difficulty Level: Beginner | Estimated Time: 15-30 minutes
⚠️ Safety & Precautions
- ⚠️ Work with the engine off and cool so you do not touch hot intake or turbo-related parts.
- ⚠️ Disconnect the negative battery cable before unplugging the MAF sensor to reduce the chance of setting electrical faults.
- ⚠️ Do not touch the sensing wires inside the MAF sensor. They are delicate and can be damaged easily.
- ⚠️ Keep dirt, leaves, and tools out of the intake tube while the sensor is removed.
🔧 Required Tools
You'll need the following tools for this repair:
- 8mm socket
- 1/4-inch ratchet
- Torx T20 screwdriver
- Small flathead screwdriver
- Inch-pound torque wrench
- Nitrile gloves
- Safety glasses
🔩 Required Parts
HowToo sells all the parts you need for this repair:
- Mass air flow sensor - Qty: 1
📋 Before You Begin
- Park your Ranger on level ground and shift to Park.
- Set the parking brake.
- Open the hood and let the engine cool.
- Put on safety glasses and nitrile gloves.
- A Torx screwdriver has a star-shaped tip; it fits the small star-head screws used on many sensors.
- An inch-pound torque wrench is a small torque wrench used for delicate fasteners so they are not overtightened.
🔨 Step-by-Step Instructions
Follow these steps in order:
Step 1: Disconnect the Battery
- Use an 8mm socket and 1/4-inch ratchet to loosen the negative battery cable clamp.
- Lift the negative cable off the battery terminal and move it aside so it cannot spring back into contact.
- Black cable is negative.
Step 2: Find the MAF Sensor
- Stand at the front of your Ranger and look at the air filter box on the driver-side/front area of the engine bay.
- The MAF sensor is installed in the air intake duct near the air filter box and has an electrical connector plugged into it.
- Use a small flathead screwdriver only if needed to gently help release the connector lock.
Step 3: Unplug the Electrical Connector
- Press the connector release tab with your thumb.
- If the tab is stiff, use a small flathead screwdriver to gently lift the lock while pulling the connector straight back.
- Do not pull on the wires.
- Pull the plastic plug only.
Step 4: Remove the MAF Sensor Screws
- Use a Torx T20 screwdriver to remove the two small screws holding the MAF sensor to the intake tube.
- Set the screws in a safe place if your replacement sensor does not include new screws.
- Keep the screwdriver straight so the screw heads do not strip.
Step 5: Remove the Old MAF Sensor
- Gently pull the MAF sensor straight out of the intake tube by hand.
- Do not twist hard or pry against the plastic intake tube.
- Check that the sealing O-ring came out with the old sensor or is seated correctly on the new sensor.
- Do not touch sensor wires.
Step 6: Install the New MAF Sensor
- Line up the new mass air flow sensor with the opening in the intake tube.
- Push it straight in by hand until it sits flat against the mounting surface.
- Make sure the connector points the same way as the old sensor.
Step 7: Tighten the MAF Sensor Screws
- Start both screws by hand first so they do not cross-thread.
- Use a Torx T20 screwdriver to snug the screws evenly.
- If using an inch-pound torque wrench, tighten the screws gently to Torque to 2.5 Nm (22 in-lbs).
- Do not overtighten. The intake tube is plastic and can crack.
Step 8: Reconnect the Electrical Connector
- Push the electrical connector onto the new MAF sensor until it clicks.
- Lightly tug the connector by hand to confirm it is locked in place.
Step 9: Reconnect the Battery
- Place the negative battery cable back onto the negative battery terminal.
- Use an 8mm socket and 1/4-inch ratchet to tighten the clamp.
- Tighten it snugly; do not crush the terminal.
Step 10: Start and Check the Engine
- Start your Ranger and let it idle for 2-3 minutes.
- Listen for air hissing near the sensor, which can mean the sensor is not seated flat.
- If the engine runs rough at first, let it idle briefly while the computer relearns airflow readings.
✅ After Repair
- ✅ Confirm the check engine light is off after a few drive cycles if the MAF sensor was the cause.
- ✅ If a scan tool is available, clear stored MAF-related codes after installation.
- ✅ Road test your Ranger gently for 10-15 minutes and confirm normal throttle response.
- ✅ Recheck the connector and mounting screws if the engine idles rough, stalls, or sets another airflow code.
💰 DIY vs Shop Cost
Shop Cost: $250-$450 (parts + labor)
DIY Cost: $80-$220 (parts only)
You Save: $170-$230 by doing it yourself!
Shop labor rates vary but typically run $100-$150/hour. This repair takes a shop approximately 0.5-1.0 hour.
🎯 Ready to get started?
HowToo makes it easy: same-day/2-day shipping on every part, plus all the tools and specialty tools you need! Check out the parts and tools sections below to add everything to your cart.