

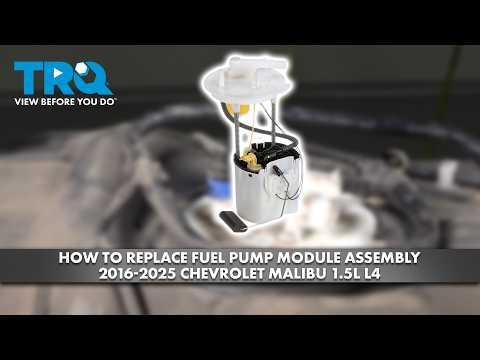






How to Replace the In-Tank Fuel Pump on a 2018-2020 Chevrolet Malibu (Engine: Inline 4 1.5L)
Step-by-step module replacement with required tools, parts, safety tips, and torque specs for 2018, 2019
How to Replace the In-Tank Fuel Pump on a 2018-2020 Chevrolet Malibu (Engine: Inline 4 1.5L)
Step-by-step module replacement with required tools, parts, safety tips, and torque specs for 2018, 2019


🔧 Malibu - In-Tank Fuel Pump Module Replacement
This procedure replaces the low-pressure electric fuel pump module inside the fuel tank. The module supplies fuel to the engine-mounted high-pressure pump.
Assumption: “Fuel pump” means the in-tank pump module, not the engine-mounted high-pressure pump.
Difficulty Level: Advanced | Estimated Time: 3-5 hours
⚠️ Safety & Precautions
- 🔥 Work outdoors or in a well-ventilated area, away from flames, heaters, sparks, and smoking materials.
- 🧯 Keep a Class B fire extinguisher within reach.
- 👓 Wear safety glasses and fuel-resistant gloves. Gasoline can cause serious eye and skin injury.
- ⚠️ Relieve fuel-system pressure before disconnecting a fuel line.
- 🔋 Disconnect the negative battery cable after relieving fuel pressure.
- ⛽ Perform this repair with the fuel level below one-quarter tank. A full tank is heavy and increases spill risk.
- 🚫 Never use an incandescent work light, drill, grinder, or shop vacuum near exposed gasoline.
- ⚠️ Do not probe electrical terminals with a powered test light near the open tank.
- 🧼 Clean the module area thoroughly before opening the tank. A small amount of dirt can damage the fuel system.
- 📞 If the access opening is not present beneath the rear seat, the tank must be lowered; do not cut an access hole.
🔧 Required Tools
You'll need the following tools for this repair:
- 10mm socket
- 13mm socket
- 3/8-inch-drive ratchet
- 3/8-inch-drive 6-inch extension
- 5-25 Nm torque wrench
- Plastic trim removal tool set
- Fuel-line disconnect tool set, 5/16-inch and 3/8-inch
- Fuel pump module lock-ring tool (specialty)
- Non-sparking brass drift, 10-inch
- 16-ounce rubber mallet
- Flat-blade screwdriver, 6-inch
- Needle-nose pliers, 6-inch
- Digital camera or smartphone
- Wet/dry vacuum with 1-1/4-inch hose
- Compressed-air blow gun with regulated air supply
- Fuel-safe drain pan, 2-gallon minimum
- Approved gasoline container, 5-gallon minimum
- Absorbent shop towels
- Nitrile gloves
- Safety glasses
- Class B fire extinguisher
🔩 Required Parts
HowToo sells all the parts you need for this repair:
- Complete in-tank fuel pump module - Qty: 1
- Fuel pump module sealing O-ring - Qty: 1
- Fuel pump module lock ring - Qty: 1
- Fuel-line retaining clip - Qty: 1
- Fuel-resistant access-cover sealer - Qty: 1
- Fuel-absorbent pads - Qty: 1 pack
📋 Before You Begin
- 🅿️ Park your Malibu outdoors on level ground. Select Park and apply the parking brake.
- ⛽ Reduce the tank to below one-quarter full before beginning.
- 🌡️ Allow the engine and exhaust system to cool completely.
- 📱 Photograph every connector and hose before removal. This makes correct reassembly easier.
- 🧯 Place the fire extinguisher nearby and remove all ignition sources from the work area.
- ⚠️ The fuel-pump module circuit is controlled electronically. Identify the fuel-pump or fuel-pump-control-module fuse using the legend inside the fuse-box cover; do not remove a fuse based only on cavity position.
🔨 Step-by-Step Instructions
Follow these steps in order:
Step 1: Relieve Fuel Pressure
- Open the hood and use the flat-blade screwdriver only if needed to release the engine-compartment fuse-box cover tabs.
- Use the fuse-box cover legend to identify and remove the fuel-pump or fuel-pump-control-module fuse with the needle-nose pliers.
- Start the engine normally. Let it run until it stalls, then crank it for five seconds.
- Switch the ignition off and reinstall the fuse with the needle-nose pliers.
- Wait at least two minutes before opening the fuel system.
- Pressure may remain; cover every connection with a towel.
Step 2: Disconnect the Battery
- Open the trunk and remove the battery-area trim with the plastic trim removal tool set.
- Use the 10mm socket and 3/8-inch-drive ratchet to loosen the negative battery-terminal clamp.
- Lift the negative cable from the battery and position it so it cannot spring back onto the terminal.
- During reassembly, tighten the terminal clamp with the 10mm socket and 5-25 Nm torque wrench to 6 Nm (53 in-lbs).
Step 3: Remove the Rear Seat Cushion
- Move both front seats forward.
- Reach beneath the front edge of the rear cushion and pull upward sharply at each retaining point.
- Use the plastic trim removal tool set if a retainer needs gentle assistance. Do not pry against painted metal.
- Guide the seat-belt buckles through the openings and remove the cushion from your Malibu.
Step 4: Locate the Fuel-Pump Access Cover
- Lift the carpet and insulation beneath the rear seat.
- Locate the round or oval metal access cover above the fuel-tank module.
- Use the plastic trim removal tool set to release the cover or its perimeter sealer.
- If no factory access cover is present, stop. The fuel tank must be professionally supported and lowered; never cut the body floor above a gasoline tank.
Step 5: Clean the Work Area
- Before opening the cover, use the wet/dry vacuum with 1-1/4-inch hose to remove loose dirt only while the fuel system remains sealed.
- After the cover is removed, use the compressed-air blow gun with regulated air supply to blow dirt away from the module at low pressure.
- Do not use the vacuum after any fuel connection has been opened.
- Place absorbent shop towels and the fuel-safe drain pan around the module.
Step 6: Disconnect the Electrical Connector
- Use the digital camera or smartphone to photograph the module, hose routing, and alignment marks.
- Release the connector’s secondary lock by hand. Use the flat-blade screwdriver gently only if the lock cannot be moved by hand.
- Press the connector tab and pull on the connector housing, not the wires.
- Inspect the terminals for melting, corrosion, or looseness. A damaged connector must be replaced before installing the pump.
Step 7: Disconnect the Fuel Line
- Wrap the connection with absorbent shop towels.
- Remove any external retaining clip with the needle-nose pliers.
- Use the correctly fitting 5/16-inch or 3/8-inch fuel-line disconnect tool to release the quick connector. A disconnect tool pushes the internal retaining fingers away from the line.
- Pull the connector straight off without twisting the plastic outlet.
- Drain captured fuel into the approved gasoline container.
Step 8: Mark the Module Position
- Use the digital camera or smartphone to record the pump-module arrow, tank marks, and hose direction.
- Confirm how the module is indexed before loosening the ring. Incorrect orientation can strain the fuel line or affect the fuel-level reading.
Step 9: Remove the Lock Ring
- Fit the fuel pump module lock-ring tool securely onto the ring.
- Turn the ring counterclockwise using the 3/8-inch-drive ratchet and 6-inch extension, if the tool accepts a square drive.
- If access prevents use of the specialty tool, tap the ring counterclockwise with the non-sparking brass drift and 16-ounce rubber mallet.
- Never use a steel punch or steel hammer because it can produce a spark.
- Remove the lock ring and discard it if it is bent, corroded, or damaged.
Step 10: Remove the Pump Module
- Lift the module slowly by hand. The module is spring-loaded, meaning it pushes upward as the ring is removed.
- Tilt the module carefully to guide the fuel-level float through the opening without bending its arm.
- Allow fuel in the reservoir to drain into the tank, then place the old module in the fuel-safe drain pan.
- Remove and discard the old sealing O-ring by hand.
Step 11: Install the New Seal
- Use absorbent shop towels to wipe the tank’s sealing surface clean.
- Do not use screwdrivers, abrasive pads, or sealant on the module O-ring.
- Install the new O-ring directly into the tank groove by hand. Confirm it is flat and not twisted.
- A pinched O-ring causes vapor leaks and warning lights.
Step 12: Install the New Pump Module
- Compare the new and old modules in the fuel-safe drain pan. Confirm the connector, outlet, float arm, and lower reservoir match.
- Lower the new module into the tank by hand without bending the float arm.
- Align the module arrow and locating features exactly as shown in your photograph.
- Push the spring-loaded module downward until its flange rests evenly on the O-ring.
Step 13: Install the Lock Ring
- Install the lock ring by hand and ensure it starts beneath every tank retainer.
- Use the fuel pump module lock-ring tool, 3/8-inch-drive ratchet, and 6-inch extension to rotate it clockwise until it reaches its mechanical stop and all locking tabs are fully seated.
- The lock ring has no conventional bolt torque. Do not continue striking or forcing it after all tabs reach their locked positions.
- If necessary, finish seating it with the non-sparking brass drift and 16-ounce rubber mallet.
Step 14: Reconnect the Fuel Line and Wiring
- Push the fuel-line connector straight onto the module outlet by hand until it clicks.
- Install the retaining clip with the needle-nose pliers, if equipped.
- Pull gently on the connector by hand to verify it is locked.
- Reconnect the electrical connector by hand and engage its secondary lock.
- Ensure the wiring and hose are routed exactly as shown in the photograph.
Step 15: Prime and Inspect the System
- Reconnect the negative battery cable with the 10mm socket and 5-25 Nm torque wrench. Torque to 6 Nm (53 in-lbs).
- Leave the access cover and rear seat removed.
- Switch the ignition on without pressing the brake pedal. Wait five seconds, then switch it off for ten seconds.
- Repeat the ignition cycle three times to fill and pressurize the new pump.
- Use a clean piece of absorbent shop towel to check around the module and fuel-line connector for wetness.
- If any fuel appears or a strong odor persists, switch the ignition off, disconnect the battery, and correct the leak before continuing.
Step 16: Reinstall the Access Cover and Seat
- Install the access cover using fresh fuel-resistant access-cover sealer if the original sealer no longer adheres.
- Press the cover evenly into place using the plastic trim removal tool set where needed.
- Reposition the carpet and insulation.
- Guide the seat-belt buckles through the cushion openings.
- Align the rear-seat retainers and press firmly downward until both sides latch.
- Pull upward gently on the cushion by hand to verify it is secured.
✅ After Repair
- 🚗 Start the engine and let it idle for five minutes. A slightly longer first crank can be normal.
- 🔍 Inspect beneath the rear seat and under your Malibu for leaks before driving.
- ⛽ Confirm the fuel gauge responds normally. It may take a short drive to stabilize.
- ⚠️ If the engine runs poorly, stalls, or displays a warning light, switch it off and recheck the connector and fuel line.
- 👃 Stop driving immediately if you smell raw gasoline inside or outside the vehicle.
- 🛣️ Take a short, low-speed test drive, then perform a second leak and odor inspection.
- ♻️ Transfer old gasoline only into an approved container and dispose of the old pump according to local Sonīpat hazardous-waste requirements.
💰 DIY vs Shop Cost
Shop Cost: ₹28,000-₹55,000 (parts + labor)
DIY Cost: ₹14,000-₹32,000 (parts only)
You Save: ₹14,000-₹23,000 by doing it yourself!
Labor rates and imported-part prices vary locally. This repair takes a shop approximately 2.5-4 hours.
🎯 Ready to get started?
HowToo makes it easy: same-day/2-day shipping on every part, plus all the tools and specialty tools you need! Check out the parts and tools sections below to add everything to your cart.