


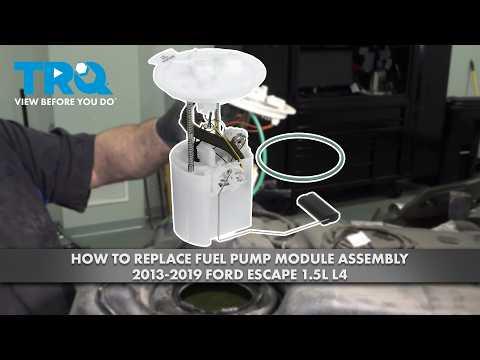





How to Replace the In-Tank Fuel Pump on a 2013-2019 Ford Escape (Engine: Inline 4 2.0L)
Step-by-step tank removal and pump installation guide with tools, parts, and safety tips for 2013, 2014, 2015, 2016
How to Replace the In-Tank Fuel Pump on a 2013-2019 Ford Escape (Engine: Inline 4 2.0L)
Step-by-step tank removal and pump installation guide with tools, parts, and safety tips for 2013, 2014, 2015, 2016


🔧 Escape - In-Tank Fuel Pump Replacement
This procedure replaces the low-pressure fuel pump module inside the tank. Your Escape also has a separate high-pressure pump on the engine, so confirm the failed component through fuel-pressure testing or diagnostic trouble codes before opening the tank.
The tank normally needs to be lowered for access. This is an advanced first-time repair because gasoline vapors, quick-connect fittings, exhaust clearance, and a heavy fuel tank are involved.
Difficulty Level: Advanced | Estimated Time: 4-6 hours
Assumption: These instructions cover the complete in-tank pump module shown in the parts sidebar. AWD models may require additional exhaust or driveshaft clearance.
⚠️ Safety & Precautions
- 🔥 Work outdoors or in a highly ventilated area, away from flames, heaters, sparks, and smoking.
- 🧯 Keep an ABC-rated fire extinguisher within immediate reach.
- ⚡ Relieve fuel pressure before disconnecting any line.
- 🔋 Disconnect the negative battery cable after relieving pressure.
- ⛽ Reduce the tank below one-quarter full before lowering it.
- 🚫 Never use an electric shop vacuum, incandescent work light, steel punch, or grinder near gasoline.
- 🛞 Support the Escape with jack stands. Never work beneath a vehicle held only by a jack.
- 🧤 Wear fuel-resistant gloves and safety glasses throughout the repair.
🔧 Required Tools
You'll need the following tools for this repair:
- 10mm socket
- 13mm socket
- 15mm socket
- 3/8-inch drive ratchet
- 3/8-inch drive 6-inch extension
- Metric combination wrench set, 8-18mm
- Fuel-line quick-disconnect tool set (specialty)
- Fuel-pump lock-ring tool (specialty)
- Manual fuel-transfer pump (specialty)
- Transmission jack or floor jack rated 2-ton minimum
- Floor jack rated 2-ton minimum
- Jack stands rated 2-ton minimum
- Torque wrench, 10-150 ft-lb range
- Plastic trim-removal tool
- Small flat-blade screwdriver
- Approved gasoline containers
- Large fuel-safe drain pan
- LED flashlight
- Wheel chocks
- Fuel-resistant gloves
- Safety glasses
- ABC-rated fire extinguisher
🔩 Required Parts
HowToo sells all the parts you need for this repair:
- Complete in-tank fuel pump module assembly - Qty: 1
- Fuel pump tank seal - Qty: 1
- Fuel pump flange gasket - Qty: 1 if required by the selected module
- Fuel-safe shop towels - Qty: 1 pack
Use a new tank seal even if the old one looks acceptable. Reusing a flattened seal is an excellent way to do the entire job twice.
📋 Before You Begin
- Park on solid, level ground, select Park, apply the parking brake, and chock both front wheels.
- Run the tank below one-quarter full. Transfer excess gasoline using the manual fuel-transfer pump and approved containers.
- Remove passenger-compartment fuse F56, 20A, identified by Ford as the fuel-pump supply fuse. The panel is below the glove box. fordservicecontent.com
- Start the engine and let it run until it stalls. Crank it for another three seconds, switch the ignition off, and reinstall F56.
- Use the 10mm socket to disconnect the negative battery terminal. Isolate the cable so it cannot touch the terminal.
- Photograph every hose and connector before removal.
- Obtain Ford workshop specifications for your exact drivetrain before beginning. Tank-strap, exhaust, driveshaft, and lock-ring specifications must not be guessed.
🔨 Step-by-Step Instructions
Follow these steps in order:
Step 1: Raise and secure the Escape
- Place the floor jack only beneath an approved rear lifting point.
- Raise the rear and install both jack stands beneath approved support points.
- Lower the Escape onto the stands and firmly shake the body to verify stability.
- Leave the floor jack nearby as backup support, but do not rely on it alone.
Step 2: Remove obstructing shields and exhaust sections
- Use the appropriate metric socket and plastic trim-removal tool to remove the underbody shields beneath the tank.
- Support any exhaust section that crosses below the tank with the transmission jack.
- Use the metric socket set to remove the required exhaust brackets or hangers. Do not let the exhaust hang from the flexible joint.
- On AWD models, stop if the propeller shaft blocks the tank and you do not have the correct shaft-indexing and fastener specifications.
Step 3: Disconnect the filler and vent connections
- Place the drain pan beneath the filler-neck connection.
- Use the appropriate metric socket or screwdriver to loosen the filler-hose clamp.
- Twist the hose gently by hand and slide it from the tank fitting.
- Release the smaller vapor hose by pressing its locking tabs with your fingers or plastic trim-removal tool.
- Cap exposed openings to prevent contamination.
Step 4: Support the fuel tank
- Center the transmission jack beneath the tank.
- Use a broad wooden pad between the jack and tank so the load is spread evenly.
- Raise the jack only until it contacts and supports the tank.
- Secure the tank to the jack with a suitable strap.
Step 5: Remove the tank straps
- Use the appropriate metric socket, extension, and ratchet to loosen the tank-strap fasteners.
- Remove the fasteners while keeping the tank fully supported.
- Swing the straps away without bending them.
- Do not reuse severely corroded fasteners or straps.
Step 6: Lower the tank partially
- Lower the transmission jack only a few inches.
- Use the LED flashlight to inspect above the tank.
- Stop immediately if a hose, wire, exhaust component, or shaft remains attached or becomes tight.
- Slow lowering prevents expensive broken fittings.
Step 7: Disconnect the pump wiring and fuel line
- Use the small flat-blade screwdriver only to release the electrical connector lock. Pull the connector body, not its wires.
- Place fuel-safe towels around the pressure-line fitting.
- Use the correctly sized fuel-line quick-disconnect tool to release the line.
- Pull the fitting straight off. Expect a small amount of gasoline even after pressure relief.
- Disconnect remaining vapor hoses by pressing their locking tabs.
Step 8: Remove the fuel tank
- Verify that every line, wire, clip, and hose is disconnected.
- Slowly lower the transmission jack until the tank clears the vehicle.
- Move the tank to a clean, ventilated work area away from every ignition source.
- Keep the tank level to prevent fuel from escaping through its openings.
Step 9: Clean the pump opening
- Use fuel-safe towels to clean all dirt from the top of the tank and pump flange.
- Do not use compressed air because it can spread fuel vapor and drive contamination into the tank.
- Mark the pump module's installed orientation with a marker before removal.
Step 10: Remove the retaining ring
- Fit the fuel-pump lock-ring tool squarely onto the retaining ring.
- Use the 3/8-inch ratchet to rotate the ring counterclockwise.
- Do not strike the ring with a steel hammer or steel chisel.
- Remove the ring and inspect it for cracks, distortion, or corrosion.
Step 11: Remove the old pump module
- Lift the module slowly while guiding the fuel-level float through the tank opening.
- Tilt the module only enough to clear the float arm.
- Drain the module into the fuel-safe drain pan.
- Remove and discard the old tank seal.
- Inspect the tank for water, sediment, rust-colored contamination, or damaged wiring.
Step 12: Install the new module
- Compare the new and old modules before installation. Confirm matching fittings, connector, height, and float-arm arrangement.
- Lightly wet the new tank seal with clean gasoline. Do not use petroleum grease or silicone sealant.
- Place the seal flat in its tank groove.
- Guide the new module and float into the tank without bending the float arm.
- Align the module with the orientation marks and locating tabs.
- Verify that the seal has not rolled, pinched, or slipped from its groove.
Step 13: Install the retaining ring
- Install the ring by hand, then use the fuel-pump lock-ring tool and ratchet to rotate it clockwise.
- Seat the ring completely in its locking position.
- Lock-ring setting: Use the exact Ford workshop specification supplied with the service procedure.
- Do not apply an invented torque to a plastic tank or retaining ring.
Step 14: Reinstall the tank
- Place the tank securely on the transmission jack and raise it slowly.
- Reconnect the electrical connector, pressure line, and vapor lines before the tank reaches the body.
- Pull gently on every quick-connect fitting to confirm it is locked.
- Raise the tank fully and position both support straps.
- Use the torque wrench to tighten the strap fasteners to the Ford workshop specification for your drivetrain.
Step 15: Reinstall filler, exhaust, and shields
- Push the filler hose completely onto its fitting and tighten its clamp with the appropriate screwdriver or metric socket.
- Reconnect the vent hose until its lock clicks.
- Use the metric socket set and torque wrench to reinstall removed exhaust or driveline components to their exact Ford specifications.
- Reinstall every heat shield and underbody panel with the original fasteners.
Step 16: Lower the vehicle and reconnect power
- Use the floor jack to lift the Escape slightly from the jack stands.
- Remove the stands and lower the vehicle completely.
- Use the 10mm socket to reconnect the negative battery terminal securely.
✅ After Repair
- Switch the ignition on for five seconds without starting the engine, then switch it off.
- Repeat the ignition cycle three or four times to fill and pressurize the new module.
- Inspect the tank, filler hose, and all accessible connections for wetness or gasoline odor.
- Start the engine and let it idle while checking again for leaks.
- Switch the engine off immediately if you see fuel, smell a strong odor, or hear a fitting spraying or hissing.
- Confirm the fuel gauge responds normally.
- Road-test the Escape only after every connection remains completely dry.
- Check for diagnostic trouble codes and verify low-side fuel pressure with a compatible scan tool.
- Dispose of old gasoline and the pump through an approved hazardous-waste facility.
💰 DIY vs Shop Cost
Shop Cost: $700-$1,300 USD equivalent, depending on drivetrain and local labor
DIY Cost: Approximately $215-$350 USD equivalent for the pump, seal, and consumables
You Save: Approximately $350-$900 by doing it yourself!
Labor pricing varies considerably by location. This repair commonly requires approximately 4-6 shop hours when tank removal is necessary.
🎯 Ready to get started?
The fuel-pump module and new sealing parts are showing in the parts sidebar. HowToo makes it easy with matched parts, tools, and specialty tools, but don't begin until the tank is nearly empty and you have a stable tank jack plus the correct Ford torque data.
