

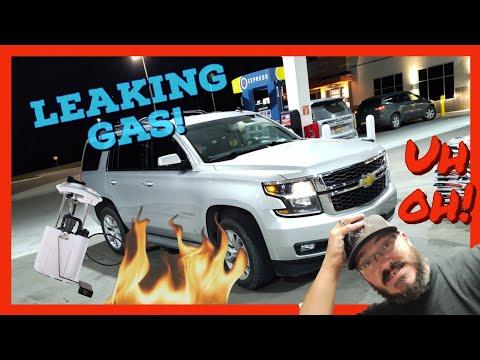






How to Replace the In-Tank Fuel Pump on a 2004-2019 Chevrolet Tahoe (Trim: LT)
Step-by-step fuel tank removal and pump module installation with tools, torque specs, and safety tips for 2004, 2005, 2006, 2007, 2008, 2009, 2010, 2011, 2012, 2013, 2018, 2019
How to Replace the In-Tank Fuel Pump on a 2004-2019 Chevrolet Tahoe (Trim: LT)
Step-by-step fuel tank removal and pump module installation with tools, torque specs, and safety tips for 2004, 2005, 2006, 2007, 2008, 2009, 2010, 2011, 2012, 2013, 2018, 2019


🔧 Tahoe - In-Tank Fuel Pump Module Replacement
This procedure replaces the low-pressure fuel pump module located inside the fuel tank. The tank must be drained, supported, and lowered to reach the module.
Assumption: “Fuel pump” means the in-tank module, not the engine-mounted high-pressure pump.
Difficulty Level: Advanced | Estimated Time: 4-6 hours
⚠️ Safety & Precautions
- 🔥 Gasoline vapor ignites easily. Work outdoors or in a well-ventilated area away from flames, heaters, sparks, and smoking materials.
- 🧯 Keep a Class B fire extinguisher within reach.
- ⚠️ Relieve fuel pressure before opening any fuel connection.
- ⚠️ Disconnect the negative battery cable after relieving pressure.
- ⚠️ Never use an incandescent work light, household pump, shop vacuum, or unapproved electrical device near gasoline.
- ⚠️ A full Tahoe fuel tank is extremely heavy. Drain it and support it with a transmission jack and fuel-tank adapter.
- ⚠️ Support your Tahoe only at the factory lift points. Never work beneath a vehicle supported only by a jack.
- ⚠️ Do not deform, pry against, or puncture the plastic fuel tank.
- ⚠️ Wear fuel-resistant gloves and safety glasses throughout the repair.
🔧 Required Tools
You'll need the following tools for this repair:
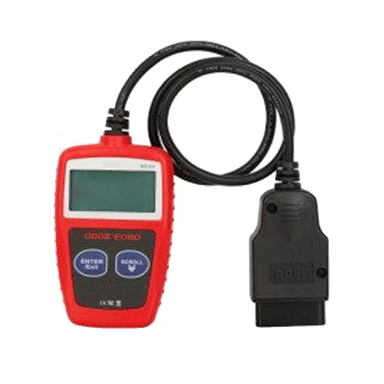
- GM-compatible bidirectional scan tool (specialty)
- Fuel pressure gauge with GM direct-injection adapter (specialty)
- Automotive fuel transfer pump rated for gasoline (specialty)
- Approved gasoline storage containers
- Transmission jack rated 1,000-pound minimum
- Fuel tank support adapter (specialty)
- Floor jack rated 3-ton minimum
- Jack stands rated 3-ton minimum
- Wheel chocks
- 1/2-inch drive torque wrench rated 20-150 ft-lbs
- 3/8-inch drive torque wrench rated 3-30 ft-lbs
- 1/2-inch drive ratchet
- 3/8-inch drive ratchet
- 7mm socket
- 10mm socket
- 13mm socket
- 15mm socket
- 18mm socket
- 10-inch socket extension
- Fuel-line quick-disconnect tool set (specialty)
- Fuel pump module lock-ring tool (specialty)
- 1/2-inch drive breaker bar
- Hose-clamp pliers
- Trim-clip removal tool
- Plastic scraper
- Brass cleaning brush
- Compressed-air blow gun regulated to 30 psi maximum
- Drain pan rated 5-gallon minimum
- Class B fire extinguisher
- Fuel-resistant nitrile gloves
- ANSI Z87.1 safety glasses
🔩 Required Parts
HowToo sells all the parts you need for this repair:
- Complete in-tank fuel pump module - Qty: 1
- Fuel pump module sealing O-ring - Qty: 1
- Fuel pump module retaining ring - Qty: 1
- Fuel-resistant shop towels - Qty: 1 pack
📋 Before You Begin
- 🅿️ Park your Tahoe on level pavement, select Park, apply the parking brake, and chock both front wheels.
- ⛽ Run the fuel level as low as practical. Drain the remaining gasoline into approved containers before lowering the tank.
- 📱 Connect the GM-compatible scan tool before disconnecting the battery. A bidirectional scan tool can command vehicle components during service.
- 🔍 Inspect the replacement module before starting. Transfer the fuel-tank pressure sensor only if the new module does not include it.
- ⚠️ If the scan tool cannot perform GM’s fuel-pressure relief command, do not loosen the direct-injection fuel system. Have a qualified shop depressurize it.
🔨 Step-by-Step Instructions
Follow these steps in order:
Step 1: Relieve Fuel-System Pressure
- Connect the GM-compatible bidirectional scan tool to the diagnostic connector below the driver-side dashboard.
- With the engine off, follow the scan-tool function for Engine Control Module > Control Functions > Fuel Pressure Relief. Menu wording can vary by scan-tool brand.
- Follow every on-screen instruction until commanded fuel pressure falls to the tool’s specified safe level.
- Use the fuel pressure gauge with GM direct-injection adapter to confirm pressure has been relieved before opening a fuel connection.
- Place the 5-gallon drain pan under the connection and cover it with fuel-resistant shop towels when disconnecting it later.
Step 2: Disconnect the Battery
- Switch the ignition off and keep the key or transmitter away from your Tahoe.
- Open the hood. Use a 10mm socket and 3/8-inch drive ratchet to loosen the negative battery-terminal clamp.
- Remove and isolate the negative cable so it cannot touch the terminal.
- Wait two minutes before touching fuel connectors.
Step 3: Raise and Secure the Vehicle
- Use the 3-ton floor jack at an approved frame lifting point.
- Place the 3-ton jack stands under the frame rails at the approved support points.
- Lower your Tahoe onto the stands and gently verify that it is stable.
- Leave enough space beneath the tank for the transmission jack and fuel-tank adapter.
Step 4: Drain the Fuel Tank
- Remove the fuel cap by hand.
- Use only the gasoline-rated automotive fuel transfer pump to move fuel into approved gasoline containers.
- Seal and move the containers away from the work area.
- Reinstall the fuel cap by hand after draining.
Step 5: Remove Tank Shields and Obstructions
- Use a 13mm or 15mm socket, as fitted, with the 3/8-inch drive ratchet to remove the fuel-tank shield fasteners.
- Use the trim-clip removal tool for any harness retainers attached to the shield.
- Support each shield while removing its final fastener, then lower it carefully.
- If the exhaust or driveshaft prevents the tank from lowering straight down, stop and support that component before removing its fasteners. Do not force the tank around it.
Step 6: Support the Fuel Tank
- Center the transmission jack and fuel-tank support adapter beneath the tank.
- Raise the adapter until it lightly supports the tank without deforming it.
- Secure the tank to the adapter with its nonmetallic retaining straps.
- Use a 15mm or 18mm socket, as fitted, with the breaker bar to loosen the fuel-tank strap bolts.
- Remove the strap bolts with the matching socket and 1/2-inch drive ratchet, then swing the straps down.
Step 7: Lower the Tank Partway
- Lower the transmission jack only a few inches. Watch every hose and wire above the tank.
- Use hose-clamp pliers to release the filler and vent-hose clamps.
- Twist the hoses gently by hand to free them. Do not pry into the plastic filler neck.
- Use the trim-clip removal tool to release wiring-harness retainers from the tank.
- Press the locking tab by hand and unplug the fuel-pump module electrical connector.
- Use the correctly sized fuel-line quick-disconnect tool to release each quick connector. A quick connector is a spring-locked fitting that releases without unscrewing.
- Cap or cover the disconnected lines with clean fuel-resistant shop towels.
Step 8: Remove the Fuel Tank
- Check all sides of the tank for attached hoses, wires, and clips.
- Lower the transmission jack slowly while guiding the tank around the frame and exhaust.
- Move the tank to a clean, well-ventilated work area.
- Keep the tank level on the fuel-tank support adapter.
Step 9: Clean the Pump Area
- Use the compressed-air blow gun regulated to 30 psi maximum to remove loose dirt from around the pump module.
- Use the brass cleaning brush for stubborn dirt around the retaining ring.
- Wipe the area with fuel-resistant shop towels.
- Do not allow dirt to fall into the tank.
Step 10: Remove the Old Fuel Pump Module
- Mark the module’s installed orientation with the plastic scraper.
- Fit the fuel pump module lock-ring tool onto the retaining ring. This tool turns the ring without producing the sparks a steel punch can create.
- Use the 1/2-inch drive breaker bar with the lock-ring tool to rotate the ring counterclockwise until released.
- Remove the retaining ring by hand.
- Lift the module slowly while tilting it enough to clear the fuel-level float arm.
- Drain fuel from the module into the 5-gallon drain pan.
- Remove and discard the old sealing O-ring.
Step 11: Install the New Fuel Pump Module
- Use fuel-resistant shop towels to clean the tank’s O-ring groove.
- Place the new sealing O-ring into the groove. Do not use grease, silicone, or petroleum jelly.
- Lower the new module into the tank while guiding the float arm past the opening.
- Align the module with the orientation mark and molded tank locating feature.
- Install the new retaining ring by hand.
- Use the fuel pump module lock-ring tool and 1/2-inch drive breaker bar to rotate the ring clockwise until its tabs are fully seated at the tank stops.
- Do not strike the retaining ring with a steel hammer or chisel.
Step 12: Reinstall the Fuel Tank
- Position the tank beneath your Tahoe with the transmission jack and fuel-tank support adapter.
- Raise it partway, leaving room to reach the connections.
- Push each fuel-line quick connector onto its matching fitting until it clicks. Pull back gently by hand to verify it is locked.
- Plug in the module electrical connector until its lock clicks.
- Use hose-clamp pliers to reinstall the filler and vent hoses and position their clamps over the original marks.
- Use the trim-clip removal tool by hand to reinstall all harness retainers.
- Raise the tank fully while checking that no line or wire is trapped.
Step 13: Secure the Tank and Shields
- Install the tank straps and start every bolt by hand to prevent cross-threading.
- Use the matching 15mm or 18mm socket and 1/2-inch drive torque wrench to tighten the tank-strap bolts to 40 Nm (30 ft-lbs).
- Reinstall the tank shields with the matching 13mm or 15mm socket and 3/8-inch drive ratchet.
- Tighten shield fasteners only to their original seated position unless a specification is supplied with the replacement hardware.
- Remove the transmission jack and fuel-tank support adapter.
Step 14: Lower the Vehicle and Reconnect Power
- Use the 3-ton floor jack to raise your Tahoe slightly and remove the 3-ton jack stands.
- Lower the vehicle completely and remove the wheel chocks.
- Reconnect the negative battery cable.
- Use the 10mm socket and 3/8-inch drive torque wrench to tighten the negative battery-terminal clamp to 5 Nm (44 in-lbs).
Step 15: Prime and Inspect the Fuel System
- Add at least 3 gallons of clean gasoline from an approved container.
- Switch the ignition on without starting the engine for five seconds, then switch it off for ten seconds.
- Repeat the ignition cycle three times to fill and pressurize the new module.
- Use the safety glasses and a bright visual inspection to check beneath your Tahoe for leaks. Do not use an incandescent work light.
- Start the engine and let it idle while checking again for fuel odor, dripping, or wet fittings.
- Switch the engine off immediately if any leak is found.
✅ After Repair
- ✅ Use the GM-compatible bidirectional scan tool to clear fuel-pressure or fuel-pump control codes caused during service.
- ✅ Confirm that the engine starts normally after sitting for at least 15 minutes.
- ✅ Verify that the fuel gauge responds correctly after adding fuel.
- ✅ Road-test your Tahoe for 10-15 minutes, then inspect the tank area again for leaks or fuel odor.
- ✅ Recheck the scan tool for pending diagnostic trouble codes.
- ⚠️ If the engine cranks without starting, stop after 10 seconds. Recheck the module connector, fuel-line connections, and scan-tool data rather than repeatedly cranking.
💰 DIY vs Shop Cost
Shop Cost: $1,100-$1,750 (parts + labor)
DIY Cost: $350-$700 (parts only)
You Save: $750-$1,050 by doing it yourself!
Shop labor rates vary but typically run $100-$150/hour. This repair takes a shop approximately 3-5 hours.
🎯 Ready to get started?
HowToo makes it easy: same-day/2-day shipping on every part, plus all the tools and specialty tools you need! Check out the parts and tools sections below to add everything to your cart.