

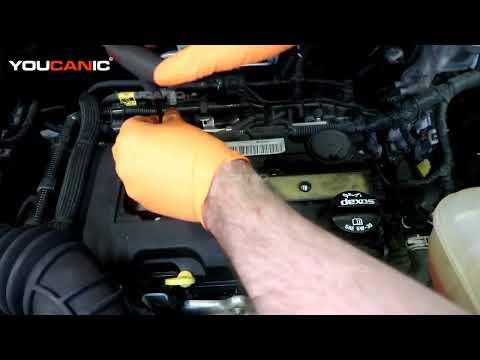







How to Replace the Ignition Coil Assembly on a 2015-2021 Chevrolet Trax (Engine: Inline 4 1.4L)
Step-by-step DIY instructions with required tools, parts, torque specs, and safety tips for 2015, 2016, 2017, 2018, 2019, 2020, 2021
How to Replace the Ignition Coil Assembly on a 2015-2021 Chevrolet Trax (Engine: Inline 4 1.4L)
Step-by-step DIY instructions with required tools, parts, torque specs, and safety tips for 2015, 2016, 2017, 2018, 2019, 2020, 2021


🔧 Trax - Ignition Coil Assembly Replacement
Your Trax uses one ignition-coil assembly that operates all four spark plugs. Replacement involves removing the engine cover, disconnecting the electrical connector, and lifting the assembly from the spark-plug wells.
Difficulty Level: Beginner | Estimated Time: 0.5-1 hour
⚠️ Safety & Precautions
- ⚠️ Let the engine cool completely before touching the ignition components.
- ⚡ Keep the ignition switched off whenever the coil connector is disconnected.
- 🧤 Pull the coil assembly straight upward so the rubber boots are not torn.
- 🔋 Disconnecting the negative battery cable is recommended. This may reset the clock and some saved settings.
🔧 Required Tools
You'll need the following tools for this repair:
- 10mm socket
- 1/4-inch drive ratchet
- Torx T30 socket
- 1/4-inch drive inch-pound torque wrench
- Plastic trim-removal tool
- Compressed-air blow gun with regulated air supply
- Mechanic's gloves
- Safety glasses
🔩 Required Parts
HowToo sells all the parts you need for this repair:
- Ignition coil assembly with four coil boots - Qty: 1
- Dielectric grease - Qty: 1 small tube
📋 Before You Begin
- 🚗 Park your Trax on level ground, select Park, apply the parking brake, and switch off the ignition.
- 🌡️ Open the hood and allow the engine to become completely cool.
- 🔋 Use a 10mm socket and ratchet to loosen the negative battery-terminal nut. Remove the cable and position it where it cannot touch the terminal.
- 📱 No scan-tool command, programming, or infotainment service mode is required for this repair.
🔨 Step-by-Step Instructions
Follow these steps in order:
Step 1: Remove the Engine Cover
- 🛠️ Use your hands to grasp the engine cover near its mounting points.
- Pull straight upward to release the cover from its rubber mounting grommets.
- If a grommet holds the cover, use a plastic trim-removal tool gently. Do not pry against wiring or plastic engine fittings.
- Set the cover aside in a clean location.
Step 2: Clean Around the Coil Assembly
- 🧹 Put on safety glasses and use a compressed-air blow gun to remove loose dirt around the coil assembly.
- Keep the air pressure regulated and direct debris away from your face.
- This prevents dirt from entering the spark-plug wells after the assembly is lifted.
Step 3: Disconnect the Coil Electrical Connector
- 🔌 Locate the electrical connector at the end of the ignition-coil assembly.
- Use your fingers to release the connector lock. If needed, use the plastic trim-removal tool gently on the locking tab.
- Pull on the connector body, not the wires.
- Never force a connector that is still locked.
Step 4: Remove the Coil Fasteners
- 🔩 Use a Torx T30 socket and 1/4-inch drive ratchet to remove the coil-assembly retaining bolts.
- Place the bolts in a clean container so they cannot fall into the engine compartment.
Step 5: Remove the Ignition Coil Assembly
- ⬆️ Grasp both ends of the coil assembly with your hands.
- Rock it very slightly while pulling straight upward. The rubber boots may resist because they seal around the spark plugs.
- Do not use a screwdriver as a lever. The plastic assembly and nearby valve cover can crack.
- Inspect the spark-plug wells for engine oil, water, or corrosion. Oil in a well can indicate a leaking valve-cover seal that should be repaired before installing the new coil.
Step 6: Prepare the New Coil Assembly
- 🧴 Confirm that all four rubber boots and their internal springs are installed on the new assembly.
- Apply a very small amount of dielectric grease inside the opening at the end of each rubber boot. Dielectric grease is an insulating silicone grease that helps keep moisture out.
- Do not pack the boots with grease or apply grease to the electrical connector terminals.
Step 7: Install the New Coil Assembly
- 📍 Align all four boots directly over the spark plugs.
- Press down evenly with both hands until every boot is fully seated.
- Make sure the assembly lies flat against its mounting surface. Do not use the bolts to pull an unseated coil into place.
Step 8: Tighten the Coil Fasteners
- 🔧 Start each retaining bolt by hand to prevent crossed threads.
- Use a Torx T30 socket and inch-pound torque wrench to tighten the retaining bolts evenly.
- Torque to 8 Nm (71 in-lbs).
- Stop tightening as soon as the wrench clicks.
Step 9: Reconnect the Electrical Connector
- 🔌 Push the coil electrical connector into place by hand until its lock clicks.
- Pull lightly on the connector body to verify that it is locked.
Step 10: Reinstall the Engine Cover
- 🛠️ Align the engine-cover mounting points with their rubber grommets.
- Press downward by hand directly over each mounting point until the cover is secure.
- Check that no wire or hose is trapped beneath the cover.
Step 11: Reconnect the Battery
- 🔋 Place the negative battery cable fully onto its terminal.
- Use a 10mm socket and 1/4-inch drive ratchet to tighten the terminal nut snugly.
- Do not overtighten or twist the battery terminal.
✅ After Repair
- ✅ Start the engine and let it idle for several minutes. It should run smoothly without shaking or misfiring.
- 👂 Listen for snapping or ticking near the coil assembly, which can indicate an improperly seated boot.
- 🚨 Verify that the check-engine light does not flash. A flashing light indicates an active misfire; shut the engine off immediately.
- 🛣️ Take a short, gentle test drive and confirm smooth acceleration.
- 🕒 Restore the clock and saved settings if they were reset by the battery disconnect.
- 🔍 If a misfire code remains, further diagnosis of the spark plugs, wiring, fuel injector, or engine compression may be necessary.
💰 DIY vs Shop Cost
Shop Cost: $280-$450 (parts + labor)
DIY Cost: $120-$220 (parts only)
You Save: $60-$330 by doing it yourself!
Shop labor rates vary but typically run $100-$150/hour. This repair takes a shop approximately 0.5-1 hour.
🎯 Ready to get started?
HowToo makes it easy: same-day/2-day shipping on every part, plus all the tools and specialty tools you need! Check out the parts and tools sections below to add everything to your cart.