


How to Replace the Fuel Pump on a 2020 Chevrolet Equinox
Step-by-step DIY in-tank fuel pump module replacement with tools, parts list, torque specs, and safety tips for 2018, 2019, 2020, 2021
How to Replace the Fuel Pump on a 2020 Chevrolet Equinox
Step-by-step DIY in-tank fuel pump module replacement with tools, parts list, torque specs, and safety tips for 2018, 2019, 2020, 2021
🔧 Equinox - Fuel Pump Replacement
Your Equinox has two fuel pumps: a low-pressure in-tank pump inside the fuel tank and a high-pressure pump mounted on the engine. The replacement steps are very different for each.
Difficulty Level: Advanced | Estimated Time: 3-6 hours (depending on pump)
⚠️ Safety & Precautions
- 🔥 Gasoline is very flammable—work in a well-ventilated area away from sparks, flames, and smoking.
- ⚡ Disconnect the negative battery cable before starting to avoid sparks and accidental cranking.
- 🧯 Keep a class B fire extinguisher nearby in case of fuel ignition.
- 🫧 Fuel system is pressurized—relieve pressure before opening any fuel line to avoid spray into eyes/skin.
- 📏 Support the vehicle safely on jack stands if you raise it; never rely only on a jack.
- 🧤 Wear safety glasses and fuel-resistant gloves; gasoline can irritate skin and eyes.
🔧 Required Tools
You'll need the following tools for this repair:
- Socket set (8mm-19mm)
- Ratchet wrench 3/8"
- Extension bar 3/8"
- Torque wrench 3/8" drive
- Flathead screwdriver medium
- Phillips screwdriver medium
- Fuel line quick-disconnect tool set (specialty)
- Plastic fuel tank lock ring tool (specialty)
- Trim removal tool plastic
- Floor jack rated 3-ton minimum
- Jack stands rated 3-ton minimum
- Wheel chocks rubber
- Shop rags
- Drain pan fuel-safe
- Safety glasses
- Nitrile gloves
🔩 Required Parts
HowToo sells all the parts you need for this repair:
- Fuel pump module (in-tank, with fuel level sensor) - Qty: 1
- Fuel pump module sealing ring - Qty: 1
- Fuel pump module lock ring - Qty: 1
- Fuel line O-rings - Qty: 2-4
- Dielectric grease - Qty: 1 small tube
- Brake cleaner or parts cleaner (for cleaning spilled fuel) - Qty: 1 can
📋 Before You Begin
- Park your Equinox on a level surface, set the parking brake, and place wheel chocks behind the rear wheels.
- Run the fuel level down as low as possible; a nearly empty tank is much lighter and safer to work with.
- Disconnect the negative battery terminal using a 10mm socket.
- Relieve fuel system pressure: remove the fuel pump fuse and start the engine; let it stall, then crank for 5 seconds more.
- Work with doors and windows open or outdoors to avoid breathing fuel vapors.
🔨 Step-by-Step Instructions
Follow these steps in order:
This procedure covers the in-tank fuel pump module, which is the usual failure on this model.
Step 1: Prepare and lift the vehicle
- Use a floor jack rated 3-ton minimum to lift the rear of your Equinox at the designated rear jacking points.
- Place jack stands rated 3-ton minimum under the rear pinch welds or frame points and lower the vehicle onto them.
- Keep the floor jack lightly supporting the rear subframe as extra safety if possible.
Step 2: Remove fuel pump fuse and relieve pressure
- Open the interior fuse panel (left side of dash) with a trim removal tool plastic if needed.
- Locate the fuel pump fuse (refer to fuse box cover diagram) and pull it out with your fingers or needle-nose pliers if available.
- Reconnect the battery temporarily with a 10mm socket, start the engine, and let it run until it stalls.
- Crank for another 5 seconds, then disconnect the battery negative again with the 10mm socket.
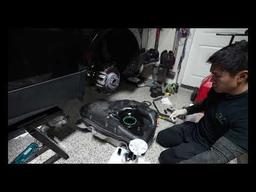
Step 3: Access the fuel tank from below
- Slide under the rear of the vehicle on a creeper or cardboard.
- Identify the fuel tank in the middle rear under the vehicle; it is a large plastic container.
- Support the tank using the floor jack and a piece of wood to spread the load.
Step 4: Disconnect fuel lines and electrical connectors
- Locate the fuel lines and electrical connectors at the front-top area of the tank.
- Use a flathead screwdriver medium to gently release any plastic tabs on the line holders.
- Use the fuel line quick-disconnect tool set (specialty) to disconnect the fuel lines from the body-side pipes.
- Unplug the electrical connectors by pressing tabs with your fingers or a flathead screwdriver medium.
- Catch any fuel drips in the drain pan.
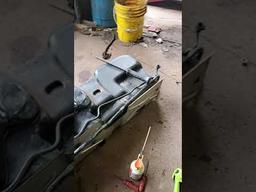
Step 5: Remove fuel tank straps
- Locate the two metal straps holding the tank up.
- Use a 15mm socket and ratchet wrench 3/8" to remove the strap bolts at the rear.
- Slowly lower the floor jack to drop the tank just enough to reach the top, keeping it supported.
- Do not let any lines or wires stretch.
Step 6: Lower and remove the fuel tank
- Double-check all lines and connectors are disconnected.
- Lower the floor jack further until you can slide the tank out from under the vehicle.
- Carefully move the tank to a clean, flat work area.
Step 7: Remove the fuel pump module lock ring
- Clean the top of the tank around the pump module with a rag to keep dirt out.
- Use the plastic fuel tank lock ring tool (specialty) and a ratchet wrench 3/8" or appropriate driver to turn the lock ring counterclockwise.
- Remove the lock ring and lift it away.
Step 8: Remove the old fuel pump module
- Carefully lift the pump module straight up; tip it slightly to get the float arm out of the opening.
- Drain fuel from the old module into the drain pan fuel-safe.
- Remove and discard the old sealing ring from the tank opening.
Step 9: Install new sealing ring and fuel pump module
- Place the new fuel pump module sealing ring into the groove on the tank opening.
- Lower the new fuel pump module into the tank, guiding the float arm carefully.
- Align the marks on the pump module flange with the marks on the tank (if present).
Step 10: Reinstall lock ring
- Place the new or cleaned fuel pump module lock ring over the module.
- Use the plastic fuel tank lock ring tool (specialty) to turn the ring clockwise until it seats fully.
- Torque to 60 Nm (44 ft-lbs) using a torque wrench 3/8" drive if your tool allows.
Step 11: Reinstall fuel tank
- Position the tank back on the floor jack and roll it under the vehicle.
- Raise it slowly into place, guiding the front first.
- Reinstall the tank straps with the 15mm socket and ratchet wrench 3/8".
- Torque strap bolts to 25 Nm (18 ft-lbs) with the torque wrench 3/8" drive.
Step 12: Reconnect fuel lines and electrical connectors
- Reconnect all electrical connectors until they click; apply a tiny amount of dielectric grease to seals if desired.
- Reconnect fuel lines using the fuel line quick-disconnect tool set (specialty) and ensure they click firmly.
- Secure any plastic retainers or clips using a flathead screwdriver medium if needed.
Step 13: Lower the vehicle
- Raise the rear slightly with the floor jack, remove the jack stands, then lower the vehicle to the ground.
- Remove the wheel chocks rubber.
Step 14: Reconnect battery and prime the fuel system
- Reinstall the fuel pump fuse in the interior fuse box.
- Reconnect the negative battery terminal using a 10mm socket.
- Turn the ignition to ON (engine off) for 5 seconds, then OFF. Repeat 3-4 times to prime the fuel system.
Step 15: Start the engine and check for leaks
- Start the engine and let it idle.
- Inspect under the vehicle for any fuel leaks around the tank area and fuel lines.
- Wipe any spilled fuel with shop rags and clean with brake cleaner or parts cleaner if needed.
✅ After Repair
- Verify the fuel gauge reads correctly; if it seems off, the pump module float may be misaligned.
- Take a short test drive, watching for normal power and no hesitation.
- Re-check under the vehicle for leaks after your test drive.
💰 DIY vs Shop Cost
Shop Cost: $700-$1,000 (parts + labor)
DIY Cost: $200-$350 (parts only)
You Save: $350-$800 by doing it yourself!
Shop labor rates vary but typically run $100-$150/hour. This repair takes a shop approximately 3-4 hours.
🎯 Ready to get started?
HowToo makes it easy: same-day/2-day shipping on every part, plus all the tools and specialty tools you need! Check out the parts and tools sections below to add everything to your cart.
