

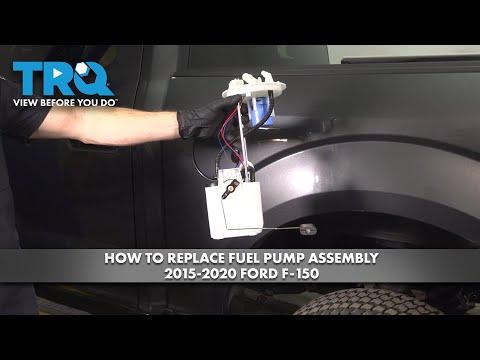




How to Replace the Fuel Pump on a 2018 Ford F-150 (Engine: V6 3.5L)
Step-by-step in-tank fuel pump module guide with tools, parts, torque specs, and safety tips for 2018
How to Replace the Fuel Pump on a 2018 Ford F-150 (Engine: V6 3.5L)
Step-by-step in-tank fuel pump module guide with tools, parts, torque specs, and safety tips for 2018


🔧 F-150 - Fuel Pump Module Replacement
On your F-150, the fuel pump is part of the in-tank fuel pump module. The safest DIY method is to support and lower the fuel tank enough to access the pump module from the top of the tank.
This repair is doable at home, but fuel is flammable and the tank can be heavy. Work slowly, keep sparks away, and use a helper if the tank has more than a small amount of fuel in it.
Difficulty Level: Advanced | Estimated Time: 3-5 hours
⚠️ Safety & Precautions
- ⚠️ Work outside or in a very well-ventilated area because fuel vapors can ignite.
- ⚠️ Do not smoke, use a heat gun, use incandescent work lights, or create sparks near the truck.
- ⚠️ Disconnect the negative battery cable before opening the fuel system.
- ⚠️ Relieve fuel pressure before disconnecting any fuel line.
- ⚠️ Support the fuel tank with a transmission jack or floor jack and a wide wood block. A partially full tank is very heavy.
- ⚠️ Keep a Class B fire extinguisher nearby. Class B means it is rated for flammable liquids like gasoline.
- ⚠️ Replace the fuel pump seal. Reusing the old seal can cause fuel vapor leaks or fuel smell.
🔧 Required Tools
You'll need the following tools for this repair:
- 8mm socket
- 10mm socket
- 13mm socket
- 15mm socket
- 1/4-inch ratchet
- 3/8-inch ratchet
- 6-inch socket extension
- Torque wrench rated 10-100 Nm
- Flat-blade screwdriver
- Plastic trim tool
- Fuel line disconnect tool set 3/8-inch and 5/16-inch
- Fuel pump lock ring tool (specialty)
- Brass punch
- Dead-blow hammer
- Fuel-safe drain pan
- Floor jack rated 3-ton minimum
- Transmission jack (specialty)
- Jack stands rated 3-ton minimum
- Wheel chocks
- Shop towels
- Safety glasses
- Nitrile gloves
- Class B fire extinguisher
🔩 Required Parts
HowToo sells all the parts you need for this repair:
- Fuel pump module assembly - Qty: 1
- Fuel pump module seal - Qty: 1
- Fuel pump module lock ring - Qty: 1
- Fuel line retaining clips - Qty: As needed
- Fuel-safe absorbent pads - Qty: 1 pack
📋 Before You Begin
- ✅ Park your F-150 on level ground and set the parking brake.
- ✅ Run the fuel level as low as safely possible before starting. Less fuel makes the tank much easier to lower.
- ✅ Chock the front wheels with wheel chocks.
- ✅ Raise the rear of the truck with a floor jack and support it with jack stands under the frame.
- ✅ Disconnect the negative battery cable using a 10mm socket.
- ✅ A fuel line disconnect tool releases the spring lock inside the fuel connector without breaking it.
- ✅ A fuel pump lock ring tool turns the metal locking ring that holds the pump module in the tank.
🔨 Step-by-Step Instructions
Follow these steps in order:
Step 1: Relieve Fuel Pressure
- Use a 10mm socket to disconnect the negative battery cable.
- Open the fuel filler door and remove the fuel cap to release tank vapor pressure.
- Place shop towels around the fuel line connection at the tank because a small amount of fuel may spill.
- Keep your face away from fuel lines.
Step 2: Raise and Secure the Rear of the Truck
- Use wheel chocks on the front wheels.
- Use a floor jack rated 3-ton minimum to lift the rear of the truck by the rear axle center section.
- Place jack stands rated 3-ton minimum under the rear frame rails.
- Lower the truck gently onto the jack stands and shake the truck lightly to confirm it is stable.
Step 3: Remove the Fuel Filler Neck Fasteners
- Use an 8mm socket to remove the fuel filler neck screws at the fuel door area if equipped.
- Use a flat-blade screwdriver to loosen the fuel filler hose clamp at the tank.
- Use a plastic trim tool to release any filler neck retainers from the body.
- Move the filler neck enough so the tank can lower without pulling on it.
Step 4: Support the Fuel Tank
- Position a transmission jack under the fuel tank.
- If using a floor jack, place a wide wood block between the jack and tank to spread the load.
- Raise the jack until it just touches and supports the tank.
- A helper makes this much safer.
Step 5: Remove Tank Shields or Skid Brackets if Equipped
- Use a 13mm socket or 15mm socket to remove any fuel tank shield bolts that block the tank straps.
- Use a 3/8-inch ratchet and 6-inch socket extension where access is tight.
- Set the shield and bolts aside in order so they go back in the same locations.
- During installation, tighten shield fasteners to Torque to 25 Nm (18 ft-lbs) unless the shield fastener size differs.
Step 6: Remove the Fuel Tank Strap Bolts
- Use a 15mm socket to loosen the fuel tank strap bolts slowly.
- Keep the transmission jack snug against the tank while removing the bolts.
- Swing the tank straps down and away from the tank.
- During installation, tighten the fuel tank strap bolts to Torque to 40 Nm (30 ft-lbs).
Step 7: Lower the Tank Slightly
- Use the transmission jack to lower the tank only a few inches at first.
- Look above the tank with a flashlight and check for wiring, vapor hoses, and fuel lines.
- Do not let the tank hang from hoses or wiring.
- Lower slowly and inspect often.
Step 8: Disconnect Electrical and Fuel Line Connections
- Use your fingers or a plastic trim tool to unlock the fuel pump electrical connector tab, then unplug it.
- Use a 3/8-inch or 5/16-inch fuel line disconnect tool to release the fuel feed line from the pump module.
- Use shop towels around the connector to catch any fuel drips.
- Use a flat-blade screwdriver carefully to release vapor line clips if needed.
- Do not pry hard on plastic fittings because they can crack.
Step 9: Lower and Remove the Fuel Tank
- Use the transmission jack to lower the tank fully.
- Slide the tank out from under the truck if needed for better access.
- Keep the tank level to avoid fuel spilling from the filler opening.
Step 10: Clean Around the Pump Module
- Use shop towels to wipe dirt from the top of the tank around the fuel pump module.
- Use a soft brush if needed, but do not blow dirt into the tank opening.
- This prevents dirt from falling into the tank when the pump is removed.
Step 11: Remove the Fuel Pump Lock Ring
- Use the fuel pump lock ring tool and a 3/8-inch ratchet to rotate the lock ring counterclockwise.
- If a lock ring tool is not available, use a brass punch and dead-blow hammer to tap the ring counterclockwise.
- Use only brass, not steel, because brass is less likely to create sparks.
- Lift the lock ring off the tank.
Step 12: Remove the Fuel Pump Module
- Lift the fuel pump module straight up by hand.
- Tilt it slightly to clear the float arm. The float arm is the small lever that measures fuel level.
- Let fuel drain from the old module into the tank before removing it completely.
- Remove the old fuel pump module seal from the tank opening.
Step 13: Install the New Fuel Pump Module
- Place the new fuel pump module seal into the tank groove by hand.
- Lower the new fuel pump module into the tank carefully without bending the float arm.
- Align the module marks with the tank marks so the fittings point the same direction as the original.
- Install the new lock ring by hand first to avoid cross-threading or misalignment.
Step 14: Lock the Fuel Pump Module in Place
- Use the fuel pump lock ring tool and 3/8-inch ratchet to rotate the lock ring clockwise until fully seated against the stops.
- If using a brass punch and dead-blow hammer, tap evenly around the ring until it locks fully.
- Make sure the seal does not pinch or bulge out from under the module.
Step 15: Reinstall the Fuel Tank
- Use the transmission jack to raise the tank partway.
- Reconnect the fuel pump electrical connector by hand until it clicks.
- Reconnect the fuel line by pushing it on until it clicks, then gently tug it to confirm it is locked.
- Reconnect vapor hoses and any retaining clips by hand.
- Raise the tank fully into position with the transmission jack.
Step 16: Reinstall Tank Straps and Filler Neck
- Use a 15mm socket to install the fuel tank strap bolts.
- Use a torque wrench to tighten the fuel tank strap bolts to Torque to 40 Nm (30 ft-lbs).
- Use a flat-blade screwdriver to tighten the filler hose clamp securely.
- Use an 8mm socket to reinstall the fuel filler neck screws, if removed.
Step 17: Reinstall Shields and Lower the Truck
- Use a 13mm socket or 15mm socket to reinstall any fuel tank shield bolts.
- Use a torque wrench to tighten shield fasteners to Torque to 25 Nm (18 ft-lbs).
- Use a floor jack to lift the rear slightly, remove the jack stands, and lower the truck to the ground.
Step 18: Reconnect Battery and Prime the Fuel System
- Use a 10mm socket to reconnect the negative battery cable.
- Turn the ignition to ON without starting the engine for 5 seconds, then turn it OFF.
- Repeat this ON/OFF cycle 3-4 times to fill the fuel lines.
- Start the engine and let it idle.
✅ After Repair
- ✅ With the engine idling, inspect the top of the tank area and under the truck for fuel leaks.
- ✅ If you smell raw fuel, shut the engine off immediately and recheck the pump seal and fuel line connections.
- ✅ Confirm the fuel gauge reads normally after a few minutes.
- ✅ Take a short test drive, then recheck for leaks again.
- ✅ If a check engine light appears, scan for codes before driving further.
💰 DIY vs Shop Cost
Shop Cost: $850-$1,500 (parts + labor)
DIY Cost: $250-$650 (parts only)
You Save: $600-$850 by doing it yourself!
Shop labor rates vary but typically run $100-$150/hour. This repair takes a shop approximately 2.5-4.0 hours.
🎯 Ready to get started?
HowToo makes it easy: same-day/2-day shipping on every part, plus all the tools and specialty tools you need! Check out the parts and tools sections below to add everything to your cart.