

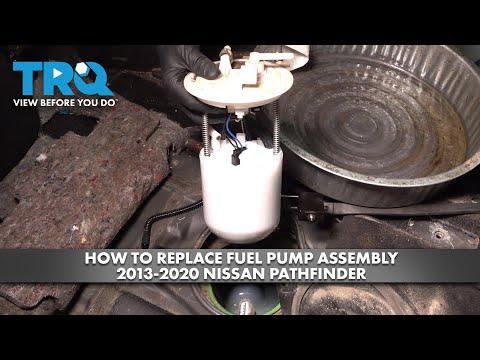





How to Replace the Fuel Pump on a 2017-2020 Nissan Pathfinder (Engine: V6 3.5L)
Step-by-step in-tank fuel pump module guide with tools, torque specs, and safety tips for 2017, 2018, 2019, 2020
How to Replace the Fuel Pump on a 2017-2020 Nissan Pathfinder (Engine: V6 3.5L)
Step-by-step in-tank fuel pump module guide with tools, torque specs, and safety tips for 2017, 2018, 2019, 2020


🔧 Pathfinder - Fuel Pump Module Replacement
The fuel pump is part of an in-tank module beneath the second-row seating area. Replacement requires relieving fuel pressure, opening the service access panel, and removing the module through the top of the fuel tank.
Difficulty Level: Intermediate | Estimated Time: 2-3 hours
Assumption: This procedure covers the original U.S.-market fuel system; access-panel details can vary slightly between two-wheel-drive and four-wheel-drive versions.
⚠️ Safety & Precautions
- 🔥 Work outdoors or in a well-ventilated area, away from flames, heaters, cigarettes, sparks, and hot work lights.
- 🧯 Keep a Class B fire extinguisher within reach.
- ⚡ Disconnect the negative battery cable after relieving fuel pressure.
- 🛢️ Run the fuel level below one-quarter tank before starting. A full tank greatly increases spill and fire risks.
- 🧤 Wear fuel-resistant gloves and safety glasses. Gasoline can injure skin and eyes.
- 🚫 Do not use a shop vacuum around gasoline vapors.
- 📱 Keep electronic devices and battery chargers away from the open fuel tank.
- ⚠️ Ground yourself against an unpainted metal body surface before opening the tank to reduce static electricity.
- 🔩 Do not reuse the fuel-pump sealing O-ring.
🔧 Required Tools
You'll need the following tools for this repair:
- 8mm socket
- 10mm socket
- 14mm socket
- 3/8-inch-drive ratchet
- 3/8-inch-drive extension set
- 3/8-inch-drive torque wrench rated 10-100 Nm
- Fuel pump lock-ring wrench (specialty)
- Plastic trim-removal tool set
- Small flat-tip screwdriver
- Needle-nose pliers
- Brass drift punch
- 16-ounce dead-blow hammer
- Fuel-line disconnect tool set (specialty)
- Permanent marker
- Parts-cleaning brush
- Drain pan rated for gasoline
- Lint-free shop towels
- Fuel-resistant gloves
- Safety glasses
- Class B fire extinguisher
🔩 Required Parts
HowToo sells all the parts you need for this repair:
- In-tank fuel pump module assembly - Qty: 1
- Fuel pump module sealing O-ring - Qty: 1
- Fuel pump module lock ring - Qty: 1 if damaged or corroded
- Fuel-resistant absorbent towels - Qty: 1 pack
📋 Before You Begin
- 🅿️ Park your Pathfinder outdoors on level ground, select Park, and apply the parking brake.
- ⛽ Reduce the fuel level below one-quarter tank.
- 🔑 Switch the ignition off and keep the intelligent key at least 10 feet from the vehicle.
- 📦 Remove loose items from the second-row floor and cargo area.
- 🪟 Open the doors for ventilation before exposing the fuel tank opening.
- ⚠️ Do not disconnect the battery until fuel pressure has been relieved.
🔨 Step-by-Step Instructions
Follow these steps in order:
Step 1: Relieve Fuel-System Pressure
- Open the under-hood fuse and relay box. Use the small flat-tip screwdriver only on the plastic cover latch.
- Use needle-nose pliers to remove the fuel-pump fuse identified by the diagram inside the fuse-box cover. Do not substitute a fuse position from another model year.
- Start the engine and let it run until it stalls.
- Crank the engine for approximately five seconds to remove remaining pressure, then switch the ignition off.
- Reinstall the fuse with needle-nose pliers and refit the fuse-box cover.
- Some fuel will remain inside the line.
Step 2: Disconnect the Battery
- Open the hood and use a 10mm socket with the 3/8-inch-drive ratchet to loosen the negative battery-terminal nut.
- Remove the negative cable and position it where it cannot touch the terminal.
- Wait at least three minutes before disconnecting electrical connectors.
Step 3: Expose the Fuel-Pump Access Area
- Move the second-row seats fully forward and remove the floor trim with the plastic trim-removal tools.
- Fold or lift the carpet and insulation to locate the circular fuel-tank service cover on the right side of the vehicle.
- If seat removal is necessary for working clearance, use a 14mm socket, extension, and ratchet to remove the seat mounting bolts. Have another person help lift the seat without damaging its wiring.
- Disconnect any seat connector only after the battery has been disconnected for at least three minutes.
- Keep removed bolts organized by location. Reinstall original seat bolts with the 14mm socket and torque wrench to the specification marked in Nissan service information for the applicable seat position; mounting-bolt specifications vary by seating configuration.
Step 4: Remove the Service Cover
- Use an 8mm or 10mm socket, as fitted, with the ratchet to remove the service-cover fasteners. If the cover is retained with sealant instead, lift it carefully with a plastic trim-removal tool.
- Use the parts-cleaning brush and lint-free shop towels to remove all dirt from the top of the module.
- Do not allow dirt to fall into the fuel tank.
Step 5: Disconnect the Module
- Use the permanent marker to place matching alignment marks on the module flange and tank.
- Press the lock and unplug the electrical connector by hand. Pull on the connector body, not its wires.
- Place the gasoline-rated drain pan and lint-free shop towels around the connection.
- Push the fuel-line connector toward the module, release its locking tabs by hand or with the correctly sized fuel-line disconnect tool, and pull the connector straight off.
- Cover the disconnected line with a clean lint-free shop towel. Do not insert metal plugs into the connector.
Step 6: Remove the Lock Ring
- Fit the fuel pump lock-ring wrench squarely over the lock ring. A lock-ring wrench is a specialty tool that turns the large ring without producing sparks.
- Use the 3/8-inch-drive ratchet and extension to rotate the ring counterclockwise.
- If the specialty wrench cannot be fitted, use the brass drift punch and dead-blow hammer carefully. Never use a steel punch because it can create sparks.
- Remove the lock ring and place it on a clean lint-free shop towel.
Step 7: Remove the Old Fuel Pump Module
- Lift the module slowly by hand while allowing fuel inside it to drain back into the tank.
- Tilt the module only enough to clear the fuel-level float arm. The float arm is the thin rod that measures the amount of fuel in the tank.
- Move the module directly into the gasoline-rated drain pan.
- Remove and discard the old sealing O-ring.
- Use lint-free shop towels to clean the tank sealing surface. Do not scrape the plastic tank with metal tools.
Step 8: Install the New Module
- Compare the new and old modules in the drain pan. Confirm that the electrical connector, hose connection, flange, strainer, and float-arm shape match.
- Install the new sealing O-ring into the tank groove by hand. Do not twist or stretch it.
- Lower the new module into the tank by hand, guiding the strainer and float arm through the opening without bending them.
- Align the module with the permanent-marker reference marks and the molded tank alignment feature.
- Hold the module down evenly so its spring does not lift the flange or displace the O-ring.
- Never lubricate the seal with engine oil.
Step 9: Install and Tighten the Lock Ring
- Start the lock ring by hand and verify that it engages evenly.
- Use the fuel pump lock-ring wrench, torque wrench, and extension to tighten the lock ring to 70 Nm (52 ft-lbs).
- Stop and reposition the seal if the flange rises unevenly or the ring binds.
Step 10: Reconnect the Fuel Line and Wiring
- Push the fuel-line connector straight onto the module by hand until it clicks.
- Pull back gently by hand to confirm it is locked.
- Connect the electrical plug by hand until its latch clicks.
- Keep the service cover off temporarily so the connection can be inspected for leaks.
Step 11: Reconnect the Battery and Prime the System
- Use the 10mm socket and ratchet to reconnect the negative battery cable.
- Switch the ignition to ON for five seconds without starting the engine, then switch it off for ten seconds.
- Repeat the ON-and-OFF cycle three times to fill and pressurize the new pump.
- Use a flashlight to inspect the module flange and fuel-line connector. Do not use a flame-style inspection light.
- If gasoline appears or a strong leak odor develops, switch the ignition off immediately and disconnect the negative battery cable with the 10mm socket.
Step 12: Reassemble the Interior
- After confirming there are no leaks, switch the ignition off and reconnect the service cover.
- Use the 8mm or 10mm socket and ratchet to tighten removable service-cover fasteners snugly without crushing the cover.
- Reposition the insulation and carpet by hand.
- Use the plastic trim-removal tools to press the floor trim clips into place.
- If removed, reinstall the second-row seat with assistance and use the 14mm socket, extension, and torque wrench for its mounting bolts. Reconnect every seat electrical connector before reconnecting the battery if it was disconnected again.
✅ After Repair
- 🔍 Start the engine and inspect the service-cover area again for wetness or fuel odor.
- ⏱️ Let the engine idle for five minutes. It may crank slightly longer during the first start.
- 🚗 Confirm the fuel gauge responds normally, then take a short low-speed test drive.
- ⚠️ If the airbag warning lamp remains on after seat wiring was disconnected, verify every seat connector is fully locked. Professional diagnosis may be needed if the warning remains.
- 🛑 Stop driving immediately if gasoline leaks, the engine stalls, or a strong fuel smell enters the cabin.
- ♻️ Take the old pump and captured gasoline to an approved hazardous-waste or automotive recycling facility.
💰 DIY vs Shop Cost
Shop Cost: $650-$1,050 (parts + labor)
DIY Cost: $250-$500 (parts only)
You Save: $400-$550 by doing it yourself!
Shop labor rates vary but typically run $100-$150/hour. This repair takes a shop approximately 1.5-2.5 hours.
🎯 Ready to get started?
HowToo makes it easy: same-day/2-day shipping on every part, plus all the tools and specialty tools you need! Check out the parts and tools sections below to add everything to your cart.