


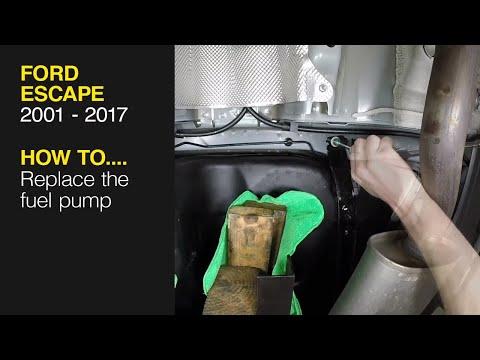





How to Replace the Fuel Pump on a 2013-2017 Ford Escape (Engine: Inline 4 2.5L)
Step-by-step fuel tank removal and pump module installation with tools, parts, and safety tips for 2013, 2014, 2015, 2016, 2017
How to Replace the Fuel Pump on a 2013-2017 Ford Escape (Engine: Inline 4 2.5L)
Step-by-step fuel tank removal and pump module installation with tools, parts, and safety tips for 2013, 2014, 2015, 2016, 2017


🔧 Escape - Fuel Pump Module Replacement
This is an advanced repair. The fuel pump sits inside the fuel tank, and your Escape doesn’t provide a normal service opening above it. Ford’s procedure requires lowering the tank before removing the pump and fuel-level sender assembly. static.nhtsa.gov)
I’d install a complete fuel pump module with a new tank seal rather than trying to rebuild the old module. The fuel tank should be nearly empty before you begin. A full tank is heavy enough to turn this job into a wrestling match nobody wins.
Difficulty Level: Advanced | Estimated Time: 4-6 hours
⚠️ Safety & Precautions
- ⚠️ Work outdoors or in a professional, well-ventilated workspace.
- Keep cigarettes, heaters, grinders, incandescent work lights, and other ignition sources away.
- Wear safety glasses and fuel-resistant gloves throughout the repair.
- Have an ABC-rated fire extinguisher within immediate reach.
- Relieve fuel pressure before disconnecting any fuel line.
- Disconnect the negative battery cable after relieving fuel pressure.
- Support the Escape with correctly rated jack stands on solid, level ground. Never work beneath a vehicle supported only by a jack.
- Use a transmission jack to support the tank. Don’t balance it on a small floor-jack saddle.
- Drain or consume the fuel until the tank is nearly empty. Never siphon gasoline by mouth.
- Do not use a steel punch and hammer on the pump lock ring. One spark around fuel vapor is one too many.
🔧 Required Tools
You'll need the following tools for this repair:
- 10mm socket
- 13mm socket
- 15mm socket
- 3/8-inch drive ratchet
- 3/8-inch drive extension set
- Fuel-line quick-disconnect tool set (specialty)
- Fuel pump lock-ring tool (specialty)
- Torque wrench rated 10-100 ft-lbs
- Transmission jack rated 1,000 pounds minimum
- Floor jack rated 2-ton minimum
- Jack stands rated 2-ton minimum
- Wheel chocks
- Exhaust hanger removal pliers
- Plastic trim tool
- Nylon cleaning brush
- Compressed-air blow gun
- Drain pan rated for gasoline
- ABC-rated fire extinguisher
- Fuel-resistant nitrile gloves
- Safety glasses
🔩 Required Parts
HowToo sells all the parts you need for this repair:
- Complete in-tank fuel pump module assembly - Qty: 1
- Fuel pump tank seal or O-ring - Qty: 1
- Fuel-safe absorbent towels - Qty: 1 pack
Parts recommendation: Choose a complete premium module from the fuel-pump aisle now displayed. Replace the seal even if the old one appears undamaged. Ford service information also calls for a new module O-ring whenever the pump is removed. charm.li
📋 Before You Begin
- Park outdoors on level, solid pavement and engage the parking brake.
- Run the fuel level as low as practical before starting.
- Record any radio presets you want to keep.
- Open the hood and locate the battery and engine-compartment fuse box.
- Confirm the replacement module includes the correct electrical connector, line fittings, float arm, and new seal before disabling the Escape.
- Do not open the fuel system until the engine and exhaust are completely cold.
🔨 Step-by-Step Instructions
Follow these steps in order:
Step 1: Relieve the fuel pressure
- Use the owner’s manual diagram on the fuse-box cover to identify the fuel-pump fuse or relay. Do not remove a fuse based only on its position number.
- Use plastic fuse pullers to remove the identified fuel-pump fuse or relay.
- Start the engine and let it run until it stalls.
- Use the ignition switch to crank the engine for approximately five seconds, then switch it fully off.
- If the engine won’t run, pressure must be released with an approved fuel-pressure procedure. Expect residual fuel when opening the line.
Step 2: Disconnect the battery
- Use a 10mm socket to loosen the negative battery-terminal clamp.
- Lift the clamp from the post and isolate it so it can’t spring back into contact.
- Leave the positive terminal connected and covered.
Step 3: Raise and support the Escape
- Place wheel chocks securely around the front wheels.
- Use a 2-ton floor jack at the approved rear lifting point.
- Position 2-ton jack stands beneath the approved body support points.
- Lower the Escape onto the stands, then gently shake the body to verify stability.
Step 4: Make room around the fuel tank
- Use exhaust hanger removal pliers to release the rear exhaust isolators if the exhaust blocks the tank.
- Support the exhaust before releasing its hangers. Don’t allow its weight to hang from the front flexible joint.
- Use the appropriate 13mm or 15mm socket if an exhaust brace or heat shield must be removed.
- Photograph every shield, bracket, and harness location before removal.
- Photos beat memory under a vehicle.
Step 5: Disconnect the filler-neck connections
- Use a 10mm socket or appropriate clamp tool to release the filler-neck retaining clamp, depending on the installed clamp style.
- Use a plastic trim tool to gently separate the filler hose from the tank neck.
- Disconnect the smaller vapor hose without twisting or cracking its plastic fitting.
- Cap exposed openings using clean, fuel-safe caps.
Step 6: Support the fuel tank
- Center a 1,000-pound transmission jack beneath the tank.
- Place a broad rubber or wood pad between the jack and tank so the load is spread evenly.
- Raise the jack only until it supports the tank. Do not deform the plastic tank.
Step 7: Remove the tank straps
- Use the appropriate 13mm or 15mm socket to loosen the fuel-tank strap bolts gradually.
- Keep the transmission jack firmly supporting the tank while removing the bolts.
- Remove the straps and note their positions and orientation.
- Ford uses application-specific torque values for these structural fasteners. During installation, tighten them to the current Ford service specification for the exact bolt location rather than using a generic torque.
Step 8: Lower the tank slightly
- Use the transmission jack to lower the tank only a few inches.
- Stop as soon as the upper electrical connector, fuel line, and vapor lines become reachable.
- Do not stretch the wiring or use it to support the tank.
Step 9: Disconnect the upper connections
- Use a plastic trim tool to release any harness retainers.
- Press the electrical-connector lock, then pull the connector straight off.
- Use the correct fuel-line quick-disconnect tool to release the fuel supply line.
- Release each EVAP vapor-line connector by its locking tabs. EVAP means the system that contains gasoline vapor.
- Wrap the connections in fuel-safe absorbent towels because some fuel will remain in the lines.
Step 10: Remove the fuel tank
- Check all four sides for attached hoses, wiring, shields, and brackets.
- Use the transmission jack to lower the tank slowly.
- Move the tank to a clean, ventilated work area away from every ignition source.
Step 11: Clean the pump area
- Use a nylon cleaning brush to loosen dirt around the module flange and lock ring.
- Use compressed air carefully to blow debris away from the opening while wearing safety glasses.
- Do not remove the lock ring until the area is clean. Dirt inside the tank can damage the replacement pump.
Step 12: Remove the old pump module
- Mark the pump’s installed orientation with a paint marker.
- Use the fuel pump lock-ring tool to rotate the retaining ring counterclockwise.
- Lift the lock ring away and place it on a clean surface.
- Raise the module slowly while guiding the fuel-level float arm through the opening.
- Tilt the module over a gasoline-rated drain pan and allow trapped fuel to drain.
- Remove and discard the old tank seal.
Step 13: Install the new pump module
- Use fuel-resistant gloves to clean the tank’s sealing groove with a lint-free towel.
- Inspect the flange for scratches, cracks, warping, or corrosion.
- Lightly lubricate the new seal with clean engine oil, then seat it evenly in the tank groove. Ford service information specifies a new lubricated O-ring. charm.li
- Lower the new module into the tank without bending the float arm.
- Align the module’s tabs and marks with the tank.
- Install the lock ring and use the fuel pump lock-ring tool to rotate it until it reaches the tank’s stop tabs. charm.li
Step 14: Reinstall the fuel tank
- Use the transmission jack to raise the tank close enough to reconnect the upper fittings.
- Push each fuel and vapor connector into place until it clicks.
- Pull lightly on every quick connector to verify it is locked.
- Connect the pump electrical plug and reinstall its secondary lock.
- Raise the tank fully, checking that no hose or harness becomes trapped.
Step 15: Install the straps and surrounding components
- Install the tank straps in their original positions.
- Use the correct socket and a torque wrench to tighten the strap bolts to Ford’s location-specific service specification.
- Reconnect the filler and vapor hoses using the original clamp positions.
- Use exhaust hanger removal pliers to reinstall the exhaust isolators.
- Reinstall heat shields and braces using the appropriate 10mm, 13mm, or 15mm socket.
Step 16: Lower the Escape
- Use the floor jack to raise the body slightly above the stands.
- Remove the jack stands.
- Lower the Escape steadily onto level ground.
Step 17: Restore power and prime the pump
- Reinstall the fuel-pump fuse or relay using plastic fuse pullers.
- Use a 10mm socket to reconnect the negative battery clamp securely.
- Switch the ignition on without starting the engine for five seconds, then switch it off.
- Repeat the on-and-off cycle three times to fill and pressurize the fuel lines.
✅ After Repair
- Inspect beneath the Escape and around the filler connection before starting the engine.
- Start the engine and let it idle. A longer first crank can be normal while pressure builds.
- Switch the engine off immediately if you smell strong gasoline or see any leakage.
- Inspect every accessible fuel connection again with the engine running.
- Verify the fuel gauge responds normally.
- Take a short local test drive, then perform another leak and odor inspection.
- Do not fill the tank completely until the Escape has passed the initial leak check.
- If the original problem remains, test the fuel-pump driver module, power supply, ground, fuel pressure, and control circuit before replacing more parts.
💰 DIY vs Shop Cost
Shop Cost: $750-$1,300 USD (parts + labor)
DIY Cost: $120-$410 USD (parts only)
You Save: Approximately $340-$1,180 USD by doing it yourself.
Local labor prices in Sonīpat can differ substantially. This repair takes a properly equipped shop approximately 3-5 hours.
🎯 Ready to get started?
HowToo has opened the correct fuel-pump, complete module, and tank-seal aisles for your Escape. Same-day and two-day shipping availability depends on your delivery area, and the list also includes the specialty tools needed to lower the tank safely.
