







How to Replace the Fuel Cap on a 2019 Mazda CX-5
Beginner-friendly steps, required tools, safety tips, and post-repair checks
How to Replace the Fuel Cap on a 2019 Mazda CX-5
Beginner-friendly steps, required tools, safety tips, and post-repair checks


🔧 CX-5 - Fuel Cap Replacement
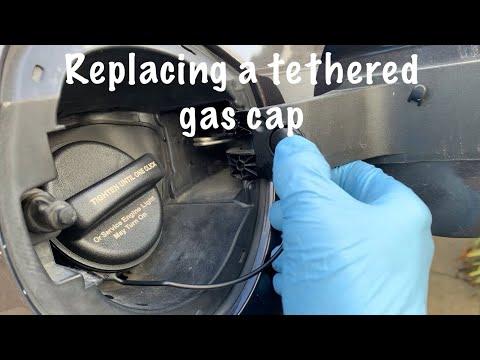
Easy job. I’d use the tethered, non-locking fuel cap shown first in the parts list at $6.53 because it most closely matches the original design. You’ll remove the old tether, fit the new one, and hand-tighten the cap until it clicks.
Difficulty Level: Beginner | Estimated Time: 5-10 minutes
⚠️ Safety & Precautions
- 🔥 Switch off the engine and keep cigarettes, flames, and sparks away.
- 🧤 Work carefully around the plastic tether clip because it can become brittle.
- ⛽ If fuel spills, wipe it up immediately and allow the area to air-dry.
- 🔋 Battery disconnection is not required.
🔧 Required Tools
You'll need the following tools for this repair:
- Nitrile gloves
- Safety glasses
- Plastic trim-removal tool
- Clean shop towel
🔩 Required Parts
HowToo sells all the parts you need for this repair:
- Non-locking tethered fuel tank cap - Qty: 1
📋 Before You Begin
- 🚗 Park your CX-5 on level ground, select Park, and switch off the engine.
- 🔑 Keep the ignition completely off while the filler opening is uncovered.
- 🧼 Clean loose dirt from around the cap so it can’t fall into the filler neck.
- 📱 No infotainment menu, scan tool, programming, or reset procedure is required.
🔨 Step-by-Step Instructions
Follow these steps in order:
Step 1: Open the fuel door
- Open the fuel door with the vehicle unlocked.
- Use a clean shop towel to wipe dirt from around the old cap.
Step 2: Remove the old cap
- Turn the cap counterclockwise by hand until it releases.
- Set it in the holder on the inside of the fuel door, if equipped.
- Do not insert tools into the metal filler neck.
Step 3: Release the tether
- Inspect where the plastic tether attaches to the fuel-door area.
- Use the plastic trim-removal tool to gently release its retaining clip.
- Support the clip while removing it. Don’t pull hard on the tether.
- Warm plastic bends more safely than cold plastic.
Step 4: Attach the new cap
- Press the new tether retainer into the same mounting point by hand.
- Use the plastic trim-removal tool only if gentle guidance is needed.
- Confirm that the retainer sits fully in place and the tether isn’t twisted.
Step 5: Install the new cap
- Place the new cap squarely onto the filler neck.
- Turn it clockwise by hand until it clicks.
- No torque wrench is needed. Hand-tighten until the cap clicks securely.
- Give the cap a light counterclockwise check without releasing it.
Step 6: Check operation
- Remove and reinstall the cap once to confirm smooth threading.
- Place the cap in the fuel-door holder and check that the tether reaches without pulling tight.
- Close the fuel door gently.
✅ After Repair
- ✅ Start the engine and confirm there’s no immediate warning message.
- 🔍 Check that the fuel door closes flush and doesn’t pinch the tether.
- ⚠️ If the check-engine light was caused by a loose cap, it may take several normal driving cycles to turn off.
- 🛠️ If the light remains on, the evaporative-emissions system should be scanned for fault codes.
💰 DIY vs Shop Cost
Shop Cost: $35-$80 (parts + labor)
DIY Cost: $7-$19 (parts only)
You Save: $16-$73 by doing it yourself!
Shop labor rates vary. This repair takes a shop approximately 0.1-0.2 hours.
🎯 Ready to get started?
HowToo makes it easy: same-day/2-day shipping on every part, plus all the tools and specialty tools you need! Check out the parts and tools sections below to add everything to your cart. This is a five-minute win, which is about as friendly as car repair gets.