

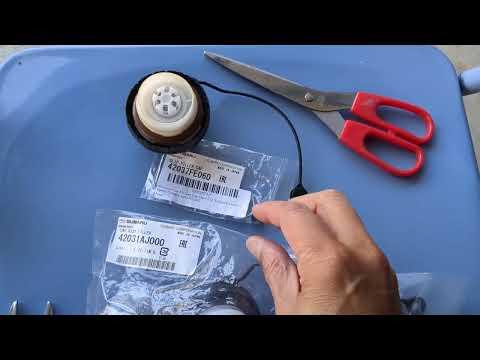





How to Replace the Fuel Cap on a 2000-2025 Subaru Outback (Engine: Flat 6 3.6L)
Step-by-step DIY guide with safety tips, required parts, tools, and EVAP light advice for 2000, 2001, 2002, 2003, 2004, 2010, 2011, 2012, 2013, 2014, 2015, 2016, 2017, 2018, 2019, 2020, 2021, 2022, 2023, 2024, 2025
How to Replace the Fuel Cap on a 2000-2025 Subaru Outback (Engine: Flat 6 3.6L)
Step-by-step DIY guide with safety tips, required parts, tools, and EVAP light advice for 2000, 2001, 2002, 2003, 2004, 2010, 2011, 2012, 2013, 2014, 2015, 2016, 2017, 2018, 2019, 2020, 2021, 2022, 2023, 2024, 2025


🔧 Fuel Cap - Replacement
Replacing the fuel cap on your Outback is a simple job. The fuel cap seals the fuel tank, and a loose or worn cap can cause fuel vapor leaks, fuel smell, or an EVAP/check engine light.
Difficulty Level: Beginner | Estimated Time: 5-10 minutes
⚠️ Safety & Precautions
- ⚠️ Work away from flames, cigarettes, sparks, or hot equipment.
- ⚠️ Do not leave the fuel filler opening uncovered longer than needed.
- ⚠️ Wipe fuel residue carefully if present, but do not use compressed air around fuel vapors.
- ⚠️ Battery disconnect is not required for this repair.
🔧 Required Tools
You'll need the following tools for this repair:
- Nitrile gloves
- Safety glasses
- Clean microfiber towel
🔩 Required Parts
HowToo sells all the parts you need for this repair:
- Fuel cap - Qty: 1
📋 Before You Begin
- Park your Outback on level ground.
- Turn the ignition fully off and remove the key.
- Make sure the fuel door area is clean so dirt does not fall into the filler neck. The filler neck is the metal opening where the fuel nozzle goes.
- If your check engine light is on because of a loose fuel cap, it may take several drive cycles to turn off after replacement.
🔨 Step-by-Step Instructions
Follow these steps in order:
Step 1: Open the Fuel Door
- Use your hand to pull the fuel door release lever inside the vehicle.
- The fuel door release lever is located on the driver-side floor area near the seat.
- Put on safety glasses and nitrile gloves.
Step 2: Remove the Old Fuel Cap
- Use your hand to turn the old fuel cap counterclockwise.
- Stop turning once the cap is loose, then pull it straight away from the filler neck.
- If the cap has a plastic tether, remove the tether from its retaining point by hand.
- Turn slowly to avoid fuel vapor puffing out.
Step 3: Inspect the Filler Neck
- Use a clean microfiber towel to gently wipe the sealing surface around the filler neck.
- Look for dirt, rust, cracks, or damaged threads where the cap tightens.
- Do not push the towel deep into the filler neck.
Step 4: Install the New Fuel Cap
- Use your hand to place the new fuel cap squarely onto the filler neck.
- Turn the cap clockwise until it clicks.
- Subaru-style caps should be tightened until you hear several clicks, which means the cap is locked and sealed.
- No torque wrench is used for this part. Tighten by hand until the cap clicks securely.
- Do not overtighten after it clicks.
Step 5: Secure the Tether and Close the Fuel Door
- Use your hand to attach the fuel cap tether to the original retaining point if equipped.
- Use your hand to close the fuel door until it latches.
- Check that the fuel door sits flush with the body.
✅ After Repair
- Start your Outback and confirm there is no strong fuel smell around the fuel door.
- If the check engine light was caused by the fuel cap, drive normally for a few trips so the EVAP system can retest itself. EVAP means evaporative emissions system, which checks fuel vapor sealing.
- If the check engine light stays on after several days of normal driving, a scan tool may be needed to clear or diagnose stored EVAP codes.
- After your next fuel fill-up, always tighten the cap until it clicks several times.
💰 DIY vs Shop Cost
Shop Cost: $50-$120 parts + labor/diagnostic time
DIY Cost: $15-$35 parts only
You Save: $35-$85 by doing it yourself!
Shop labor rates vary but typically run $100-$150/hour. This repair takes a shop approximately 0.2-0.5 hours.
🎯 Ready to get started?
HowToo makes it easy: same-day/2-day shipping on every part, plus all the tools and specialty tools you need! Check out the parts and tools sections below to add everything to your cart.