

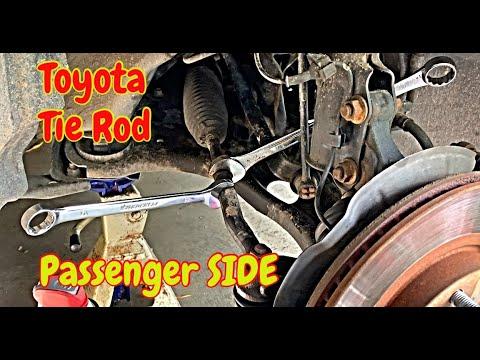




How to Replace the Front Outer Tie Rod End on a 2018-2025 Toyota Camry
Step-by-step DIY instructions with tools, parts, torque specs, safety tips, and alignment advice for 2018, 2019, 2020, 2021, 2022, 2023, 2024, 2025
How to Replace the Front Outer Tie Rod End on a 2018-2025 Toyota Camry
Step-by-step DIY instructions with tools, parts, torque specs, safety tips, and alignment advice for 2018, 2019, 2020, 2021, 2022, 2023, 2024, 2025


🔧 Camry - Front Outer Tie Rod End Replacement
Assumption: “Tie rod end” means the outer tie rod end that connects the steering rack to the steering knuckle.
The outer tie rod end is a ball-and-socket steering joint. Replace it if the joint has play, its boot is torn, or its stud is damaged. Carefully preserve its original position, but always arrange a professional wheel alignment afterward.
Difficulty Level: Intermediate | Estimated Time: 1-2 hours per side
⚠️ Safety & Precautions
- ⚠️ A loose or incorrectly installed tie rod end can cause loss of steering control.
- 🚗 Work on level, solid ground and support your Camry with a jack stand. Never rely only on a floor jack.
- 🛞 Do not rotate the inner tie rod while loosening the jam nut. Rotation can change alignment significantly or damage the steering-rack boot.
- 🔩 Install a new cotter pin through the castellated nut. A castellated nut has slots that lock against the cotter pin.
- 🔨 Do not strike the threaded stud or steering knuckle with a steel hammer.
- 📐 Professional wheel alignment is required immediately after this repair.
- 🔋 Battery disconnection is not required.
🔧 Required Tools
You'll need the following tools for this repair:
- 21mm impact-rated socket
- 17mm socket
- 19mm socket
- 22mm open-end wrench
- 24mm open-end wrench
- 1/2-inch-drive breaker bar
- 1/2-inch-drive ratchet
- 1/2-inch-drive torque wrench rated 20-150 Nm
- Front-end service puller (specialty)
- Needle-nose pliers
- Vernier caliper with 0.1mm resolution
- Paint marker
- Wire brush
- Floor jack rated 2-ton minimum
- Jack stand rated 2-ton minimum
- Wheel chocks
- Nitrile work gloves
- Safety glasses
🔩 Required Parts
HowToo sells all the parts you need for this repair:
- Front outer tie rod end - Qty: 1 per side
- Outer tie rod end castellated nut - Qty: 1 per side
- Outer tie rod end cotter pin - Qty: 1 per side
Replacing both sides is recommended when both joints have similar mileage or wear. Left and right tie rod ends may be side-specific, so install each part only in its listed position.
📋 Before You Begin
- 🚗 Park your Camry on level pavement with the front wheels pointing straight ahead.
- 🅿️ Select Park, apply the parking brake, and place wheel chocks behind both rear wheels.
- 📐 Arrange a four-wheel alignment before driving farther than necessary after the repair.
- 🔍 Check the inner tie rod, steering-rack boot, lower ball joint, and wheel bearing for looseness. Replacing the outer joint will not correct play elsewhere.
- 📱 No infotainment menu, scan-tool command, steering calibration, or battery procedure is required for this mechanical repair.
🔨 Step-by-Step Instructions
Follow these steps in order:
Step 1: Loosen the front wheel
- Keep the tire on the ground and remove the wheel cover if fitted.
- Use the 21mm socket and breaker bar to loosen each wheel nut approximately one-half turn.
- Do not remove the nuts while the vehicle is resting on the tire.
Step 2: Raise and support the front corner
- Use the floor jack at the approved front-center lifting point to raise your Camry.
- Position the jack stand beneath the approved front side support point.
- Lower your Camry securely onto the stand, then gently shake the body to verify stability.
Step 3: Remove the front wheel
- Use the 21mm socket and ratchet to remove all five wheel nuts.
- Remove the wheel by hand and place it flat away from the work area.
- Turn the steering wheel so the tie rod end faces outward and is easy to reach.
Step 4: Record the original tie rod position
- Use the wire brush to clean the exposed threads, jam nut, and tie rod end.
- Use the vernier caliper to measure from a fixed point on the inner tie rod to the center of the outer tie rod stud. Write down the measurement.
- Use the paint marker to draw one continuous reference line across the inner tie rod, jam nut, and outer tie rod end.
- Count and record the exact number of turns required during removal.
- Accurate counting helps preserve the temporary toe setting.
Step 5: Loosen the jam nut
- The jam nut locks the outer tie rod end onto the threaded inner tie rod.
- Use the correctly fitting 22mm or 24mm open-end wrench to loosen the jam nut approximately one-quarter turn.
- Hold the outer tie rod end steady with the other correctly fitting open-end wrench if necessary.
- Do not move the jam nut farther along the threads than needed.
Step 6: Remove the cotter pin and loosen the stud nut
- Use the needle-nose pliers to straighten and remove the cotter pin from the tie rod stud.
- Discard the old cotter pin. Never straighten and reuse it.
- Use the correctly fitting 17mm or 19mm socket and ratchet to loosen the castellated nut.
- Leave the nut threaded onto the end of the stud by several turns while separating the joint.
Step 7: Separate the tie rod end from the knuckle
- Position the front-end service puller over the steering-knuckle arm and tie rod stud.
- Use the correctly fitting socket and ratchet to tighten the puller screw slowly until the tapered stud releases.
- A tapered stud is cone-shaped and may release suddenly with a sharp pop.
- Remove the puller, then use the socket and ratchet to remove the loosened castellated nut.
- Lift the tie rod stud out of the steering knuckle by hand.
Step 8: Remove the old outer tie rod end
- Rotate the tie rod end counterclockwise by hand while counting every complete and partial turn.
- Do not allow the inner tie rod or steering-rack boot to twist.
- Leave the jam nut near its marked original position.
- Compare the old and new parts. Confirm that the thread, stud taper, bend, and overall length match.
Step 9: Install the new outer tie rod end
- Thread the new tie rod end clockwise onto the inner tie rod by hand.
- Install it using exactly the same number of turns recorded during removal.
- Use the vernier caliper to restore the recorded center-to-reference-point measurement.
- Align the new tie rod stud with the opening in the steering knuckle.
- Do not use a wrench if the new end will not thread on easily. Cross-threaded steering parts must be replaced.
Step 10: Secure the tie rod end to the knuckle
- Insert the tapered stud fully into the steering-knuckle arm by hand.
- Install the new castellated nut onto the stud by hand.
- Use the correctly fitting 17mm or 19mm socket and torque wrench to tighten the nut to 49 Nm (36 ft-lbs).
- If the cotter-pin holes do not align, tighten the nut only enough to reach the next slot. Never loosen the nut to align it.
- Use the needle-nose pliers to insert and bend the new cotter pin securely around the nut.
Step 11: Tighten the jam nut
- Confirm that the tie rod end is aligned naturally and its rubber boot is not twisted.
- Use the correctly fitting 22mm or 24mm open-end wrench to hold the tie rod end steady.
- Use the other correctly fitting open-end wrench to tighten the jam nut firmly against the tie rod end.
- Because a standard torque wrench cannot directly accept an open-end wrench, have the jam-nut torque verified during the alignment if a calibrated crowfoot attachment is unavailable.
- Recheck that the paint references and recorded measurement remain as close as possible to their original positions.
Step 12: Reinstall the wheel
- Place the wheel onto the hub by hand.
- Install all five wheel nuts by hand to prevent cross-threading.
- Use the 21mm socket and ratchet to snug the nuts in a star pattern.
- Use the floor jack to raise your Camry slightly, remove the jack stand, and lower the tire onto the ground.
- Use the 21mm socket and torque wrench to tighten the wheel nuts in a star pattern to 103 Nm (76 ft-lbs).
Step 13: Perform a stationary steering check
- Start the engine and turn the steering wheel slowly from side to side while stationary.
- Listen for knocking and verify that the steering moves smoothly without binding.
- Stop the engine and use the safety glasses and work gloves to inspect the tie rod boot and cotter pin one final time.
✅ After Repair
- 📐 Have a professional four-wheel alignment performed immediately. The technician must set front toe and center the steering wheel.
- 🚗 Drive only slowly and directly to the alignment shop if the steering feels normal and the wheel remains nearly centered.
- 🛑 Stop immediately if the steering binds, the vehicle pulls sharply, or the steering wheel is significantly off-center.
- 🔍 After alignment, check that the jam nut is tight, the cotter pin remains secure, and the rubber boot is not twisted or torn.
- 🔩 Recheck the wheel-nut torque at 103 Nm (76 ft-lbs) after approximately 80-160 km.
💰 DIY vs Shop Cost
Shop Cost: ₹6,000-₹14,000 per side (parts + labor + alignment)
DIY Cost: ₹2,500-₹7,500 per side (parts + required alignment)
You Save: ₹3,500-₹6,500 by doing it yourself!
Labor and imported U.S.-spec part prices around Panipat vary. This repair takes a shop approximately 1-1.5 hours per side, plus alignment time.
🎯 Ready to get started?
HowToo makes it easy: same-day/2-day shipping on every part, plus all the tools and specialty tools you need! Check out the parts and tools sections below to add everything to your cart.