

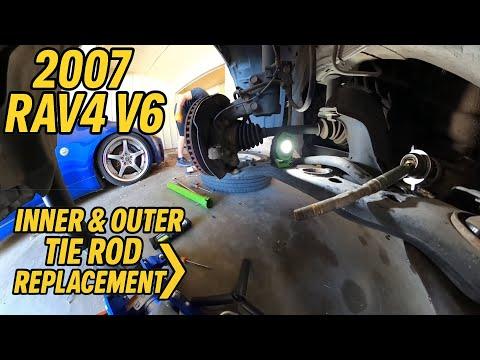





How to Replace the Front Outer Tie Rod End on a 2006-2019 Toyota RAV4
Step-by-step instructions with required tools, torque specs, safety tips, and alignment advice for 2006, 2007, 2008, 2009, 2010, 2011, 2012, 2013, 2014, 2015, 2016, 2017, 2018, 2019
How to Replace the Front Outer Tie Rod End on a 2006-2019 Toyota RAV4
Step-by-step instructions with required tools, torque specs, safety tips, and alignment advice for 2006, 2007, 2008, 2009, 2010, 2011, 2012, 2013, 2014, 2015, 2016, 2017, 2018, 2019


🔧 RAV4 - Outer Tie Rod End Replacement
This procedure covers replacing one outer tie rod end, the joint connecting the steering rack to the steering knuckle. A worn joint can cause steering looseness, vibration, uneven tire wear, or a clunk over bumps.
Assumption: The outer tie rod end is being replaced; an inner tie rod requires a different procedure and specialty tools.
Difficulty Level: Intermediate | Estimated Time: 1-2 hours, plus wheel alignment
⚠️ Safety & Precautions
- ⚠️ Make sure the instrument panel is completely off and the green READY light is not illuminated.
- 🔑 Keep the key at least 15 feet away so the hybrid system cannot be activated accidentally.
- 🛑 Support your RAV4 with jack stands. Never work beneath a vehicle supported only by a floor jack.
- 🧤 Wear safety glasses and gloves because rust and metal debris may fall during removal.
- 🔋 The 12-volt battery does not need to be disconnected for this repair.
- 🔨 Do not strike the threaded tie-rod stud. Use a tie-rod puller to separate the joint safely.
- 📐 A professional four-wheel alignment is required after replacement.
🔧 Required Tools
You'll need the following tools for this repair:
- 21mm impact socket
- 17mm socket
- 22mm open-end wrench
- 17mm combination wrench
- 1/2-inch drive breaker bar
- 3/8-inch drive ratchet
- 3/8-inch drive torque wrench rated 10-80 ft-lbs
- 1/2-inch drive torque wrench rated 30-150 ft-lbs
- Tie-rod end puller (specialty)
- Needle-nose pliers
- Wire brush
- Paint marker
- Penetrating oil aerosol
- Digital caliper or metric tape measure
- Floor jack rated 2-ton minimum
- Jack stands rated 2-ton minimum
- Wheel chocks
- Mechanic's gloves
- Safety glasses
🔩 Required Parts
HowToo sells all the parts you need for this repair:
- Front outer tie rod end - Qty: 1 per affected side
- Tie rod end castellated nut - Qty: 1
- Tie rod end cotter pin - Qty: 1
If both outer tie rod ends have measurable looseness or damaged boots, replace them as a pair.
📋 Before You Begin
- 📍 Park your RAV4 on firm, level ground with the steering wheel centered.
- 🅿️ Shift into Park, apply the parking brake, and chock both rear wheels.
- 🔌 Verify the hybrid READY light is off. No hybrid service mode or high-voltage isolation is required.
- 📏 Measure the installed position and count removal turns. This helps preserve approximate toe alignment, but it does not replace a professional alignment.
- 🧭 Confirm that the replacement tie rod end matches the side being repaired before removing the original part.
🔨 Step-by-Step Instructions
Follow these steps in order:
Step 1: Loosen the Wheel Nuts
- Use the 21mm impact socket and 1/2-inch drive breaker bar to loosen each wheel nut about one-quarter turn.
- Do not remove the wheel nuts while the tire is supporting the vehicle.
Step 2: Raise and Support the Front
- Use the floor jack rated 2-ton minimum at the front-center reinforced crossmember lifting point.
- Place the jack stands rated 2-ton minimum beneath the reinforced front side support points.
- Lower the vehicle slowly onto the stands. Gently push the body to verify it is stable.
- Keep the floor jack lightly touching the lifting point as a secondary precaution.
Step 3: Remove the Front Wheel
- Use the 21mm impact socket and 3/8-inch drive ratchet to remove the loosened wheel nuts.
- Remove the wheel and place it flat away from the work area.
Step 4: Record the Existing Tie Rod Position
- Use the wire brush to clean the exposed threads between the outer tie rod end and locking nut.
- Apply the penetrating oil aerosol to the locking nut and tie-rod stud nut. Allow it to soak for several minutes.
- Use the paint marker to mark the outer tie rod end, locking nut, and threaded inner tie rod.
- Use the digital caliper or metric tape measure to record the distance from the locking nut to a fixed point on the inner tie rod.
- The locking nut is also called a jam nut; it locks the outer tie rod end in its adjusted position.
Step 5: Loosen the Tie Rod Locking Nut
- Hold the outer tie rod end with the 17mm combination wrench if necessary.
- Use the 22mm open-end wrench to loosen the locking nut approximately one-quarter turn.
- Do not move the locking nut farther than necessary because its position is your installation reference.
- Marking the nut helps preserve approximate alignment.
Step 6: Remove the Cotter Pin and Stud Nut
- Use the needle-nose pliers to straighten and remove the cotter pin from the tie-rod stud.
- Discard the old cotter pin. Never reuse it.
- Use the 17mm socket and 3/8-inch drive ratchet to remove the castellated nut. A castellated nut has slots that lock against a cotter pin.
Step 7: Separate the Tie Rod End
- Position the tie-rod end puller (specialty) over the steering-knuckle arm and tie-rod stud.
- Tighten the puller with the appropriate 17mm socket and 3/8-inch drive ratchet until the tapered stud releases.
- Do not hammer the threaded stud or strike the aluminum steering knuckle.
Step 8: Remove the Old Tie Rod End
- Use the paint marker to make one final reference line across the threads.
- Unscrew the outer tie rod end by hand while counting every complete turn and partial turn.
- Use the 17mm combination wrench if the joint cannot initially be turned by hand.
- Write down the exact number of turns before proceeding.
Step 9: Install the New Tie Rod End
- Thread the new outer tie rod end onto the inner tie rod by hand using exactly the same number of turns recorded during removal.
- Use the digital caliper or metric tape measure to compare its position with the measurement taken earlier.
- Align the tie-rod stud with the steering-knuckle arm. Do not force or cross-thread the joint.
Step 10: Secure the Tie Rod End to the Knuckle
- Install the new castellated nut by hand.
- Use the 17mm socket and 3/8-inch drive torque wrench rated 10-80 ft-lbs to tighten it to 49 Nm (36 ft-lbs).
- If the cotter-pin holes do not align, tighten the nut slightly farther until the next slot aligns. Never loosen the nut to align it.
- Use the needle-nose pliers to install and bend the new cotter pin securely around the nut.
Step 11: Tighten the Locking Nut
- Use the 17mm combination wrench to hold the outer tie rod end so it cannot rotate.
- Use the 22mm open-end wrench and a compatible torque-wrench adapter to tighten the locking nut to 74 Nm (55 ft-lbs).
- If a torque-wrench adapter cannot be positioned correctly, have the locking nut final-tightened during the immediate alignment service.
- Verify the paint marks and recorded measurement remain closely aligned.
Step 12: Reinstall the Wheel
- Install the wheel and start all wheel nuts by hand.
- Use the 21mm impact socket and 3/8-inch drive ratchet to snug the nuts in a crisscross pattern.
- Use the floor jack rated 2-ton minimum to raise the vehicle slightly, then remove the jack stands.
- Lower your RAV4 until the tire touches the ground without carrying the vehicle's full weight.
- Use the 21mm impact socket and 1/2-inch drive torque wrench rated 30-150 ft-lbs to tighten the wheel nuts in a crisscross pattern to 103 Nm (76 ft-lbs).
✅ After Repair
- 🔍 With your RAV4 still parked, turn the steering wheel slowly from side to side and check for binding or unusual noise.
- 🛞 Confirm the steering wheel appears centered and the repaired tire is not visibly pointing inward or outward.
- 🚗 Drive slowly in a safe area. Stop immediately if the steering pulls strongly, binds, or feels loose.
- 📐 Arrange a professional four-wheel alignment before normal or highway driving. Matching the old position only creates an approximate setting.
- 🔧 Ask the alignment technician to inspect the opposite outer tie rod end, both inner tie rods, ball joints, and steering-rack boots.
- ✅ Recheck wheel-nut torque to 103 Nm (76 ft-lbs) after approximately 50-100 km.
💰 DIY vs Shop Cost
Shop Cost: ₹4,000-₹9,000 including one tie rod end, labor, and alignment
DIY Cost: ₹1,500-₹4,000 for the part, plus approximately ₹800-₹1,500 for alignment
You Save: Approximately ₹1,700-₹3,500 by doing the mechanical work yourself!
Local labor rates vary. This repair takes a shop approximately 0.8-1.2 hours, followed by wheel alignment.
🎯 Ready to get started?
HowToo makes it easy: same-day/2-day shipping on every part, plus all the tools and specialty tools you need! Check out the parts and tools sections below to add everything to your cart.