


How to Replace the Front Lower Ball Joint on a 2018 Ford Explorer
Step-by-step instructions with tools, parts, torque specs, and alignment tips for 2011, 2012, 2013, 2014, 2015, 2016, 2017, 2018, 2019
How to Replace the Front Lower Ball Joint on a 2018 Ford Explorer
Step-by-step instructions with tools, parts, torque specs, and alignment tips for 2011, 2012, 2013, 2014, 2015, 2016, 2017, 2018, 2019
🔧 Ball Joints - Replacement
On your Explorer, the front lower ball joint is typically serviced with the lower control arm assembly, not as a simple bolt-on joint. That means the repair usually involves removing the control arm, transferring it if needed, and then having the front end checked afterward.
Difficulty Level: Advanced | Estimated Time: 3-5 hours
⚠️ Safety & Precautions
- Support the vehicle securely on jack stands before removing any suspension parts.
- Do not work under a vehicle held up only by a jack.
- The front suspension is under load; keep hands clear when separating the knuckle and control arm.
- If your Explorer has electronic stability or steering angle calibration needs after the repair, a scan tool may be required.
- Front end alignment is required after ball joint or control arm replacement.
🔧 Required Tools
You'll need the following tools for this repair:
- Floor jack (rated 3-ton minimum)
- Jack stands (rated for vehicle weight)
- Wheel chocks
- Safety glasses
- Mechanic gloves
- 19mm socket
- 21mm socket
- 15mm socket
- 18mm socket
- Torque wrench
- Breaker bar
- Ratchet
- Ball joint separator (specialty)
- Penetrating oil
- Bungee cord or mechanic's hook
- Paint marker
🔩 Required Parts
HowToo sells all the parts you need for this repair:
- Front lower control arm assembly with ball joint - Qty: 2
- Front sway bar link hardware - Qty: 2
- Front lower control arm bolts and nuts - Qty: 4
- Front wheel alignment service - Qty: 1
📋 Before You Begin
- Park on level ground and set the parking brake.
- Loosen the front lug nuts before lifting the vehicle.
- Raise the front and support it securely with jack stands.
- Remove the front wheels.
- Mark the position of any cam bolts or eccentric washers if equipped.
🔨 Step-by-Step Instructions
Follow these steps in order:
Step 1: Remove the front wheel
- Use a 19mm socket to remove the wheel nuts and take off the wheel.
- Set the wheel aside safely.
Step 2: Disconnect the sway bar link if needed
- Use a 15mm socket or 18mm socket to remove the sway bar link from the lower control arm if it blocks access.
- Penetrating oil helps on rusty fasteners.
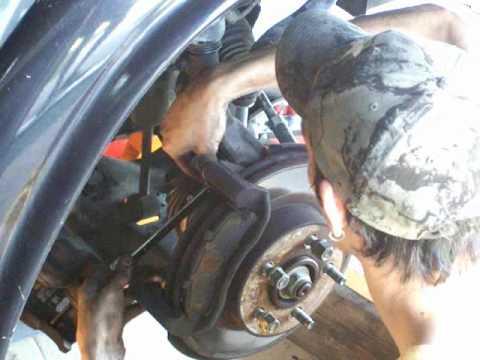
Step 3: Separate the lower ball joint from the steering knuckle
- Use a 21mm socket to remove the lower ball joint nut.
- Use a ball joint separator (specialty) to separate the stud from the steering knuckle.
- Support the knuckle with a bungee cord or mechanic's hook so the brake hose is not stretched.
Step 4: Remove the lower control arm
- Use a 21mm socket and 18mm socket to remove the lower control arm mounting bolts.
- Note the position of any cam bolts or washers before removal.
- Remove the control arm from the vehicle.
Step 5: Install the new lower control arm assembly
- Position the new control arm in place by hand first.
- Install the mounting bolts finger-tight only at first.
- Reconnect the ball joint stud into the steering knuckle.
- Install the new ball joint nut and tighten it with a 21mm socket.
- Torque to 95 Nm (70 ft-lbs) for the ball joint nut.
Step 6: Tighten the control arm bolts at ride height
- Raise the suspension slightly so the control arm sits at normal ride height.
- Use a torque wrench and the correct socket to tighten the control arm bolts.
- Torque to the factory specification for your Explorer's lower control arm fasteners.
- Final tightening at ride height helps the bushing last longer.
Step 7: Reinstall sway bar link and wheel
- Reinstall the sway bar link using a 15mm socket or 18mm socket.
- Reinstall the wheel and snug the lug nuts with a 19mm socket.
- Lower the vehicle and torque the lug nuts to 135 Nm (100 ft-lbs).
✅ After Repair
- Start the vehicle and turn the steering wheel lock to lock to check for binding or noise.
- Inspect the repaired side for loose hardware.
- Have a front wheel alignment performed immediately.
- Test drive slowly at first and listen for clunks or pulling.
💰 DIY vs Shop Cost
Shop Cost: $650-$1,200 (parts + labor)
DIY Cost: $180-$420 (parts only)
You Save: $470-$780 by doing it yourself!
Shop labor rates vary but typically run $100-$150/hour. This repair takes a shop approximately 3-5 hours.
🎯 Ready to get started?
HowToo makes it easy: same-day/2-day shipping on every part, plus all the tools and specialty tools you need! Check out the parts and tools sections below to add everything to your cart.
