

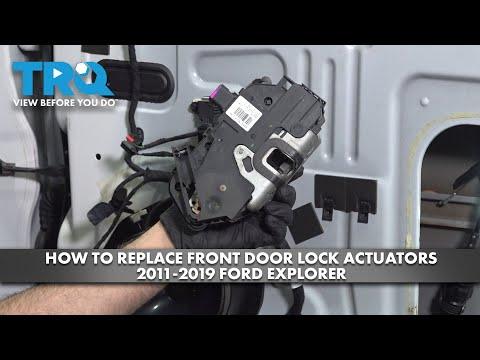





How to Replace the Front Door Lock Actuator on a 2018 Ford Explorer
Step-by-step instructions with tools, parts, torque specs, and safety tips for 2011, 2012, 2013, 2014, 2015, 2016, 2017, 2018, 2019, 2020
How to Replace the Front Door Lock Actuator on a 2018 Ford Explorer
Step-by-step instructions with tools, parts, torque specs, and safety tips for 2011, 2012, 2013, 2014, 2015, 2016, 2017, 2018, 2019, 2020


🔧 Front Door Lock Actuator - Replacement
The front door lock actuator is built into the door latch assembly on your Explorer. To fix a failed lock, you’ll remove the door trim panel, disconnect the latch cables and electrical connector, then swap the latch/actuator assembly.
Difficulty Level: Intermediate | Estimated Time: 2-4 hours
⚠️ Safety & Precautions
- Disconnect the negative battery cable before starting. The door latch and window/lock circuits are electrical.
- Support the window glass in the up position so it cannot drop while the panel is off.
- Use care around the side airbag in the door. Do not probe yellow connectors.
- Keep the ignition off while unplugging door harness connectors.
- Work with the door fully open for easier access.
🔧 Required Tools
You'll need the following tools for this repair:
- Trim panel removal tool
- 7mm socket
- 8mm socket
- 10mm socket
- Torx T20 screwdriver
- Torx T30 screwdriver
- Ratchet
- Short extension
- Small flat screwdriver
- Pick tool
- Torque wrench
- Needle-nose pliers
- Safety glasses
- Mechanic gloves
🔩 Required Parts
HowToo sells all the parts you need for this repair:
- Front door latch with lock actuator - Qty: 1
- Door panel push clips - Qty: 1 set
- Foam vapor barrier adhesive - Qty: 1
- Electrical tape - Qty: 1
📋 Before You Begin
- Park on level ground and set the parking brake.
- Lower the window slightly if needed, then disconnect the negative battery cable.
- Wait at least 2 minutes after battery disconnect before working near the door harness.
- Take photos of connector locations before unplugging anything.
🔨 Step-by-Step Instructions
Follow these steps in order:
Step 1: Remove the door trim panel
- Use a trim panel removal tool to gently pop off the door pull covers and switch bezel.
- Use a 7mm socket or Torx T20 screwdriver to remove the visible panel screws.
- Starting at a lower corner, use the trim panel removal tool to release the retaining clips around the edge.
- Lift the panel upward to unhook it from the window ledge.
- Disconnect the electrical connectors for the window switch and any courtesy light.
Step 2: Remove the water shield
- Use a small flat screwdriver or pick tool to carefully peel back the vapor barrier.
- Keep the adhesive clean so it can be reused. Replace it if it tears.
- Do not tear the foam barrier if you can avoid it.
Step 3: Disconnect the latch cables and connector
- Use a pick tool to rotate the cable retaining tabs and release the interior handle cable and lock cable from the latch.
- Unplug the latch electrical connector by pressing the lock tab first.
- Make sure the cables are free and note their routing.
Step 4: Remove the lock actuator/latch assembly
- Use a 10mm socket with a short extension to remove the door latch bolts on the door edge.
- Typical Ford service tightening spec on reassembly is 9 N·m (80 in-lbs).
- Pull the latch assembly out through the access opening while guiding the rods and cables free.
- If the latch is tight, use the needle-nose pliers to help guide the cables, not to force the latch.
Step 5: Install the new latch/actuator assembly
- Position the new latch in the door and route it the same way as the old one.
- Use the 10mm socket to install the latch bolts finger-tight first.
- Reconnect the electrical connector and both cables.
- Torque the latch bolts to 9 N·m (80 in-lbs).
- Make sure each cable snaps fully into place.
Step 6: Reassemble the door
- Press the vapor barrier back into place. Replace adhesive if needed.
- Reconnect the window switch and courtesy light connectors.
- Hang the door panel on the upper window ledge, then press the clips in by hand.
- Install all screws with the 7mm socket or Torx T20 screwdriver and tighten to 2-3 N·m (18-27 in-lbs).
- Reinstall covers and trim pieces.
✅ After Repair
- Reconnect the negative battery cable.
- Test the lock and unlock function with the key fob, door switch, and interior lock button.
- Test the inside and outside door handles to make sure the latch releases correctly.
- Check the window, mirror, and speaker functions before closing everything up fully.
- If the door still won’t lock or unlock, scan for body control module codes.
💰 DIY vs Shop Cost
Shop Cost: $350-$700 (parts + labor)
DIY Cost: $90-$220 (parts only)
You Save: $260-$480 by doing it yourself!
Shop labor rates vary but typically run $100-$150/hour. This repair takes a shop approximately 2-4 hours.
🎯 Ready to get started?
HowToo makes it easy: same-day/2-day shipping on every part, plus all the tools and specialty tools you need! Check out the parts and tools sections below to add everything to your cart.