

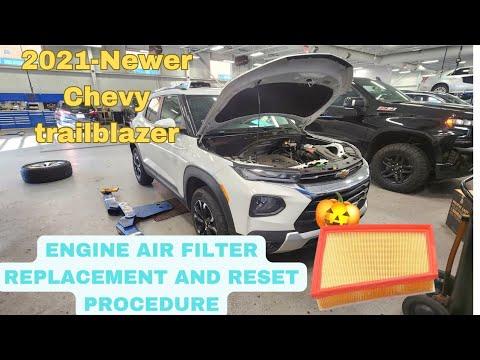







How to Replace the Engine Air Filter on a 2021 Chevrolet Trailblazer
Beginner-friendly step-by-step instructions with tools list, parts, safety tips, and post-install checks for 2021, 2022, 2023, 2024, 2025, 2026
How to Replace the Engine Air Filter on a 2021 Chevrolet Trailblazer
Beginner-friendly step-by-step instructions with tools list, parts, safety tips, and post-install checks for 2021, 2022, 2023, 2024, 2025, 2026


🔧 Trailblazer - Engine Air Filter Replacement
On your Trailblazer, the engine air filter sits inside the air cleaner box (airbox) in the engine bay. Replacing it restores proper airflow and helps fuel economy and turbo performance.
Difficulty Level: Beginner | Estimated Time: 0.2-0.4 hours
⚠️ Safety & Precautions
- 🧤 Work on a cool engine to avoid burns.
- 🧼 Keep dirt and tools out of the open airbox and intake tube.
- 🔌 Do not pull on wiring or sensors attached to the intake tube.
- 🔋 Battery disconnect is not required for this service.
🔧 Required Tools
You'll need the following tools for this repair:
- Safety glasses
- Nitrile gloves
- Flat-blade screwdriver
- 7mm socket
- 1/4" drive ratchet
- Trim clip tool
- Shop towel
- Flashlight
🔩 Required Parts
HowToo sells all the parts you need for this repair:
- Engine air filter - Qty: 1
📋 Before You Begin
- 🅿️ Park on level ground and shift to Park.
- 🧊 Let the engine cool for 15–30 minutes if it was running.
- 🔦 Open the hood and locate the airbox (the large plastic box connected to the intake tube).
🔨 Step-by-Step Instructions
Follow these steps in order:
Step 1: Locate and access the airbox
- Use a flashlight to find the airbox lid and the intake tube connected to it.
- Wipe loose dust around the airbox seam using a shop towel so dirt doesn’t fall inside when opened.
Step 2: Release the airbox lid (two common styles)
- If your lid uses metal/plastic clips: release each clip by hand; if tight, gently pry with a flat-blade screwdriver.
- If your lid uses screws/bolts: loosen them using a 7mm socket and 1/4" drive ratchet until the lid can lift.
- A hose clamp is a band that tightens a hose.
Step 3: Loosen the intake tube only if it blocks the lid
- If the intake tube prevents the lid from lifting, loosen the clamp at the airbox end using a 7mm socket and 1/4" drive ratchet.
- Gently wiggle the tube off just enough to lift the lid. Use a shop towel to cover the opening while you work.
Step 4: Remove the old air filter
- Lift the airbox lid and pull the filter straight out by hand while wearing nitrile gloves.
- Use a flashlight to check the airbox bottom for leaves or heavy dirt.
Step 5: Clean the airbox sealing surface
- Use a shop towel to wipe the airbox rim where the filter seals.
- If debris is inside, remove it carefully by hand (do not push it into the intake).
Step 6: Install the new air filter
- Place the new filter into the airbox in the same orientation as the old one.
- Make sure it sits fully down in its pocket and the seal is flat all the way around.
Step 7: Reinstall and secure the airbox lid
- Close the lid carefully, making sure no part of the filter is pinched.
- Re-latch clips by hand, or tighten lid screws using a 7mm socket and 1/4" drive ratchet until snug.
Step 8: Refit the intake tube (if you loosened it)
- Push the tube fully back onto the airbox outlet.
- Tighten the clamp using a 7mm socket and 1/4" drive ratchet until snug and the tube can’t rotate.
- Reinstall any clips you removed using a trim clip tool.
✅ After Repair
- 🔎 Double-check all clips/screws are secured and the lid seam is even.
- 🧪 Start the engine and listen for a hissing/whistling air leak near the airbox.
- 🚗 Take a short drive and confirm normal power and no warning lights.
💰 DIY vs Shop Cost
Shop Cost: $60-$130 (parts + labor)
DIY Cost: $15-$40 (parts only)
You Save: $45-$90 by doing it yourself!
Shop labor rates vary but typically run $100-$150/hour. This repair takes a shop approximately 0.3-0.5 hours.
🎯 Ready to get started?
HowToo makes it easy: same-day/2-day shipping on every part, plus all the tools and specialty tools you need! Check out the parts and tools sections below to add everything to your cart.