

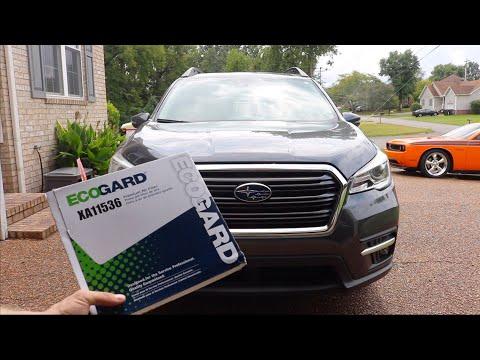






How to Replace the Engine Air Filter on a 2019-2026 Subaru Ascent (Engine: Flat 4 2.4L)
Beginner-friendly steps, required tools, safety tips, and filter installation checks for 2019, 2020, 2021, 2022, 2023, 2024, 2025, 2026
How to Replace the Engine Air Filter on a 2019-2026 Subaru Ascent (Engine: Flat 4 2.4L)
Beginner-friendly steps, required tools, safety tips, and filter installation checks for 2019, 2020, 2021, 2022, 2023, 2024, 2025, 2026


🔧 Ascent - Engine Air Filter Replacement
This is an easy maintenance job. You’ll open the air-filter housing, remove the old panel filter, clean out loose debris, and install the new filter with its rubber edge fully sealed.
Difficulty Level: Beginner | Estimated Time: 10-20 minutes
⚠️ Safety & Precautions
- ⚠️ Switch the engine off and let the engine compartment cool.
- 🗝️ Keep the key away from the vehicle so nobody starts it.
- 🛡️ Don’t allow dirt, leaves, tools, or cloth to enter the clean-air side of the intake.
- 🔋 Battery disconnection isn’t required.
🔧 Required Tools
You'll need the following tools for this repair:
- Nitrile work gloves
- Safety glasses
- Clean microfiber cloth
- Portable vacuum with crevice attachment
- Flashlight
🔩 Required Parts
HowToo sells all the parts you need for this repair:
- Vehicle-specific panel engine air filter - Qty: 1
📋 Before You Begin
- 🚙 Park your Ascent on level ground, select Park, and engage the parking brake.
- 🌡️ Open the hood after the engine has cooled.
- 📦 Remove the replacement filter from its packaging, but keep it clean and dry.
- 🏜️ Haryana’s dusty conditions can load a filter quickly, so inspect it more often than the normal schedule.
🔨 Step-by-Step Instructions
Follow these steps in order:
Step 1: Locate the air-filter housing
- Use the flashlight to locate the large black plastic air-filter box near the front corner of the engine compartment.
- Follow the wide intake duct from the front air inlet to the housing if you’re unsure which box it is.
Step 2: Release the housing clips
- Put on the safety glasses and nitrile work gloves.
- Release the metal retaining clips by hand. A retaining clip is a spring-loaded latch that holds the two housing halves together.
- Don’t force the plastic housing or pry it with a screwdriver.
Step 3: Open the housing
- Carefully pull the movable housing half away far enough to expose the filter.
- Watch the intake duct and attached wiring. Don’t stretch, twist, or disconnect anything unnecessarily.
- Small movement is enough here.
Step 4: Remove the old filter
- Lift the old panel filter straight out by hand.
- Notice which way it sits before removing it completely.
- Check for leaves, sand, insects, or damaged rubber around the filter edge.
Step 5: Clean the housing
- Use the portable vacuum with crevice attachment to remove loose debris from the dirty side of the housing.
- Use the clean microfiber cloth to wipe the filter’s sealing ledge.
- Don’t blow compressed air into the intake. Sending dirt toward the turbo is expensive shop confetti.
Step 6: Install the new filter
- Place the new filter into the lower housing in the same orientation as the old one.
- Run a gloved finger around the rubber perimeter and confirm it sits flat in its channel.
- Make sure no corner is folded, raised, or trapped between the housing halves.
Step 7: Close the housing
- Align any fixed tabs or locating edges before bringing the housing halves together.
- Press the housing closed evenly by hand.
- Reconnect every metal retaining clip by hand.
- No fastener torque is required because the standard housing is secured by clips.
Step 8: Perform a final inspection
- Use the flashlight to inspect the entire housing seam.
- Confirm the filter isn’t visible or pinched along the seam.
- Verify the intake duct and nearby electrical connectors remain secure.
✅ After Repair
- ✅ Remove every tool and cloth from the engine compartment.
- 🔊 Start the engine and listen for unusual whistling, hissing, or intake noise.
- 🔍 If you hear a new noise, shut the engine off and recheck the filter seal, housing tabs, and clips.
- 📅 Record the replacement date and mileage for future maintenance.
💰 DIY vs Shop Cost
Shop Cost: $50-$100 equivalent, depending on local parts and labor
DIY Cost: $13-$35 equivalent for a standard disposable filter
You Save: Approximately $35-$65 by doing it yourself!
Labor rates vary by location. This repair takes a shop approximately 0.2-0.3 hours.
🎯 Ready to get started?
HowToo makes it easy: same-day/2-day shipping on every part, plus all the tools and specialty tools you need! Check out the parts and tools sections below to add everything to your cart.