

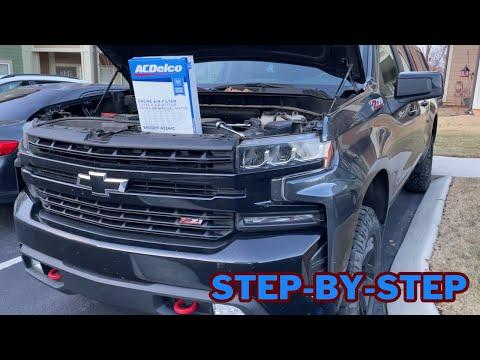






How to Replace the Engine Air Filter on a 2019-2026 Chevrolet Silverado 1500 (Engine: V8 5.3L)
Step-by-step DIY instructions with tools, fitment checks, and safety tips for 2019, 2020, 2021
How to Replace the Engine Air Filter on a 2019-2026 Chevrolet Silverado 1500 (Engine: V8 5.3L)
Step-by-step DIY instructions with tools, fitment checks, and safety tips for 2019, 2020, 2021


🔧 Silverado 1500 - Engine Air Filter Replacement
This is an easy first DIY job. You’ll open the air-filter housing, lift out the old panel filter, clean the housing, and install the replacement with its rubber seal fully seated.
Difficulty Level: Beginner | Estimated Time: 15-25 minutes
⚠️ Safety & Precautions
- ⚠️ Switch the engine off, remove the key, and let the engine cool.
- 🧤 Wear gloves and safety glasses because the housing may contain loose sand and debris.
- 🚫 Don’t start the engine while the filter or housing cover is removed.
- 🔋 Battery disconnection isn’t required.
🔧 Required Tools
You'll need the following tools for this repair:
- 1/4-inch drive ratchet
- 8mm socket
- Torx T25 bit
- 6-inch socket extension
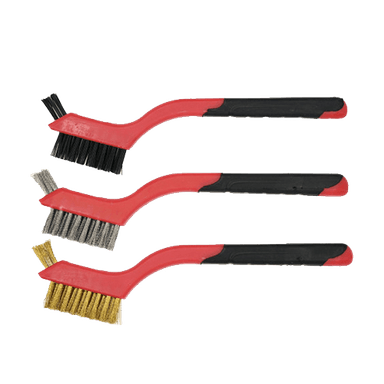
- Soft detailing brush
- Shop vacuum with crevice attachment
- Nitrile work gloves
- Safety glasses
🔩 Required Parts
HowToo sells all the parts you need for this repair:
- Engine air filter matched to the installed air cleaner - Qty: 1
Fitment note: Your Silverado may have a standard or high-capacity air cleaner. Compare the new filter’s thickness and seal shape with the removed filter before installation. The deeper option fits the high-capacity housing.
📋 Before You Begin
- 🅿️ Park on level ground, select Park, and apply the parking brake.
- 🌡️ Open the hood only after the engine and intake components have cooled.
- 📦 Remove the new filter from its packaging, but keep it clean and dry.
- 🔍 Locate the large black plastic air-filter housing near the front corner of the engine compartment.
🔨 Step-by-Step Instructions
Follow these steps in order:
Step 1: Open the hood
- Pull the interior hood-release handle.
- Release the secondary latch under the front edge of the hood.
- Raise the hood completely and confirm it’s securely supported.
Step 2: Identify the air-filter housing
- Find the large rectangular black plastic box connected to the engine by the intake tube.
- Check the housing cover for captive screws. Captive means the screws remain attached after loosening.
- Use the 8mm socket or Torx T25 bit, whichever fits the screw heads exactly.
Step 3: Loosen the housing cover
- Use the 1/4-inch drive ratchet and 6-inch socket extension to loosen each cover screw.
- Loosen the screws evenly until the cover releases. Don’t force a screw that’s still engaged.
- Leave captive screws in the cover so they can’t fall into the engine compartment.
Step 4: Lift the cover
- Lift the housing cover only far enough to access the filter.
- Don’t pull hard on the intake tube, wiring, or nearby sensor connector.
- Support the cover with one hand while removing the filter with the other.
Step 5: Remove the old filter
- Lift the old panel filter straight out by its rubber edge.
- Notice which side faces upward and how the seal sits in the housing groove.
- Immediately cover the clean-side opening with a clean, lint-free cloth.
- Take a photo before removal.
Step 6: Clean the lower housing
- Use the shop vacuum with crevice attachment to remove loose dust, leaves, and insects.
- Use the soft detailing brush to loosen debris in the corners while vacuuming.
- Remove the lint-free cloth afterward without dropping debris into the intake opening.
- Don’t blow compressed air toward the clean side. Dust always finds the expensive direction.
Step 7: Compare the filters
- Place the old and new filters beside each other.
- Confirm the length, width, thickness, corner shape, and rubber sealing edge match.
- Don’t install the new filter if it’s noticeably shallower or deeper than the removed filter.
Step 8: Install the new filter
- Lower the new filter into the housing in the same orientation as the old filter.
- Press gently around the rubber edge until it sits flat inside the housing groove.
- Check every corner. No part of the seal should be folded, raised, or trapped outside the groove.
Step 9: Refit the housing cover
- Lower the cover squarely without shifting the filter.
- Start every captive screw by hand using the 8mm socket or Torx T25 bit.
- Tighten the screws evenly with the 1/4-inch drive ratchet until the cover is fully seated.
- Torque: Hand-snug only. Stop when the screw seats because the plastic housing can crack.
Step 10: Perform a final inspection
- Run a finger around the housing seam and confirm the cover sits evenly.
- Check that no tools or packaging remain in the engine compartment.
- Close the hood firmly and confirm it latches.
✅ After Repair
- ✅ Start the engine and let it idle for about one minute.
- 👂 Listen for a loud whistle, hiss, or unusual intake noise.
- 🔍 If you hear air leaking, switch the engine off and recheck the filter seal and housing cover.
- 🧹 Inspect the filter more frequently in Sonīpat’s dusty conditions rather than relying only on mileage.
- 💻 No programming, relearn, warning-light reset, or battery registration is required.
💰 DIY vs Shop Cost
Shop Cost: $50-$100 (parts + labor)
DIY Cost: $12-$30 (standard replacement filter)
You Save: $20-$88 by doing it yourself!
Shop labor rates vary but typically run $100-$150/hour. This repair takes a shop approximately 0.2-0.4 hours.
🎯 Ready to get started?
HowToo makes it easy: same-day/2-day shipping on every part, plus all the tools and specialty tools you need! Check out the parts and tools sections below to add everything to your cart.