

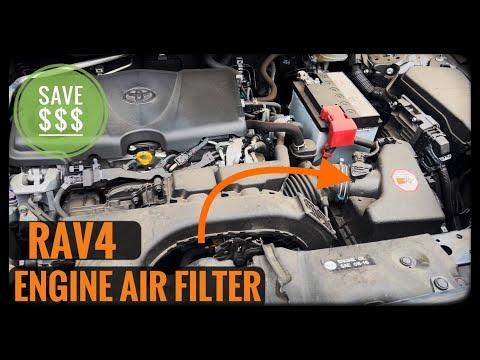






How to Replace the Engine Air Filter on a 2019-2025 Toyota RAV4 (Engine: Inline 4 2.5L)
Step-by-step DIY guide with tools, parts, safety tips, and air box clip instructions for 2019, 2020, 2021, 2022, 2023, 2024, 2025
How to Replace the Engine Air Filter on a 2019-2025 Toyota RAV4 (Engine: Inline 4 2.5L)
Step-by-step DIY guide with tools, parts, safety tips, and air box clip instructions for 2019, 2020, 2021, 2022, 2023, 2024, 2025


🔧 RAV4 - Engine Air Filter Replacement
Replacing the engine air filter helps your RAV4 breathe properly, improves throttle response, and protects the engine from dust and debris. This is one of the easiest maintenance jobs for a first-time DIYer.
Difficulty Level: Beginner | Estimated Time: 10-15 minutes
⚠️ Safety & Precautions
- ⚠️ Turn the engine off and let it cool before opening the air filter box.
- ⚠️ Keep loose clothing, tools, and fingers away from the engine cooling fans.
- ⚠️ Do not start the engine while the air filter box is open.
- ⚠️ Battery disconnect is not required for this repair.
🔧 Required Tools
You'll need the following tools for this repair:
- Safety glasses
- Nitrile gloves
- Shop towel
- Flashlight
🔩 Required Parts
HowToo sells all the parts you need for this repair:
- Engine air filter - Qty: 1
📋 Before You Begin
- Park your RAV4 on level ground and set the parking brake.
- Turn the ignition off and remove the key/fob from the vehicle area.
- Open the hood and support it securely.
- The engine air filter box is on the driver-side/front area of the engine bay. It is a black plastic box connected to the large air intake tube.
- An air filter box is the plastic housing that holds the filter before air enters the engine.
🔨 Step-by-Step Instructions
Follow these steps in order:
Step 1: Open the Hood
- Use your hand to pull the hood release lever inside the cabin near the lower driver-side dash.
- Go to the front of your RAV4, release the hood safety latch by hand, and lift the hood.
- Use the hood support if equipped, or confirm the hood struts are holding firmly.
Step 2: Locate the Engine Air Filter Box
- Use a flashlight to find the black plastic air filter box in the engine bay.
- Look for the wide black intake tube connected to the box.
- The filter box lid is held by metal spring clips.
- A spring clip is a small metal latch that snaps the air box lid closed.
Step 3: Release the Air Filter Box Clips
- Use your hand to unclip the metal spring clips on the air filter box lid.
- Do not force the plastic lid. It should lift slightly once the clips are released.
- Go slow; plastic tabs can crack.
Step 4: Lift the Air Filter Box Lid
- Use both hands to gently lift the air filter box lid upward enough to access the filter.
- Do not remove the intake tube unless necessary.
- Do not pull hard on any wiring or hoses attached near the air box.
Step 5: Remove the Old Engine Air Filter
- Use your hand to lift the old engine air filter straight out of the lower air box.
- Note the direction and shape of the old filter before removing it fully.
- Use a shop towel to wipe loose dust from the inside edge of the air box.
- Do not let dirt fall into the intake opening.
Step 6: Install the New Engine Air Filter
- Use your hands to place the new engine air filter into the lower air box.
- Make sure the rubber edge sits flat all the way around.
- The filter should fit neatly without bending, crushing, or forcing it.
- If it does not sit flat, reposition it.
Step 7: Close the Air Filter Box
- Use both hands to lower the air filter box lid back into place.
- Make sure the rear tabs are seated correctly before closing the clips.
- Use your hand to snap the metal spring clips back onto the lid.
- No torque spec applies because this air box uses clips, not bolts.
Step 8: Final Visual Check
- Use a flashlight to check that the air filter box lid is fully closed.
- Confirm all clips are latched.
- Confirm no tools or towels are left in the engine bay.
✅ After Repair
- Start your RAV4 and let it idle for 30-60 seconds.
- Listen for hissing or whistling sounds near the air box, which can mean the lid is not sealed.
- If the engine runs rough, shut it off and recheck that the filter is seated flat and the box is clipped shut.
- No scan tool reset is required after replacing the engine air filter.
- Check the filter every 12,000-15,000 miles, or sooner in dusty conditions.
💰 DIY vs Shop Cost
Shop Cost: $60-$110 (parts + labor)
DIY Cost: $20-$35 (parts only)
You Save: $40-$75 by doing it yourself!
Shop labor rates vary but typically run $100-$150/hour. This repair takes a shop approximately 0.2-0.4 hours.
🎯 Ready to get started?
HowToo makes it easy: same-day/2-day shipping on every part, plus all the tools and specialty tools you need! Check out the parts and tools sections below to add everything to your cart.