

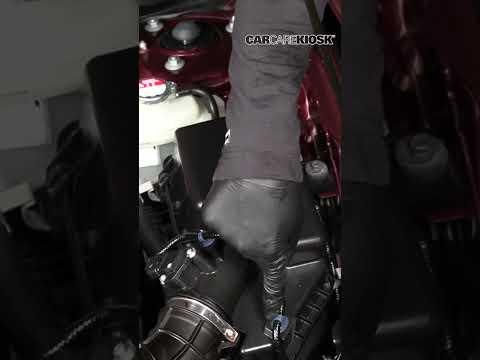





How to Replace the Engine Air Filter on a 2019-2022 Honda Insight (Engine: Inline 4 1.5L)
A quick, tool-free guide with step-by-step instructions, parts, and hybrid safety tips for 2019, 2020, 2021, 2022
How to Replace the Engine Air Filter on a 2019-2022 Honda Insight (Engine: Inline 4 1.5L)
A quick, tool-free guide with step-by-step instructions, parts, and hybrid safety tips for 2019, 2020, 2021, 2022


🔧 Insight - Engine Air Filter Replacement
This is an easy, tool-free job. You’ll release the airbox clips, swap the filter, clean the housing, and close everything securely.
Difficulty Level: Beginner | Estimated Time: 10-15 minutes
⚠️ Safety & Precautions
- ⚠️ Turn the Insight completely off and keep the key away from the car.
- ⚠️ Confirm the green READY indicator is off before opening the hood.
- ⚠️ Let the engine cool before reaching into the engine compartment.
- ⚠️ Don’t touch orange cables or hybrid-system components.
- ⚠️ Battery disconnection isn’t required for this repair.
🔧 Required Tools
You’ll need the following tools for this repair:
- Nitrile work gloves
- Safety glasses
- Clean damp microfiber cloth
- Shop vacuum with crevice attachment
🔩 Required Parts
HowToo sells all the parts you need for this repair:
- Vehicle-specific engine air filter - Qty: 1
📋 Before You Begin
- 📍 Park your Insight on level ground and select Park.
- 🔑 Apply the parking brake, switch the car off, and remove the key from the work area.
- 🌡️ Allow the engine compartment to cool.
- 📦 Remove the new filter from its packaging, but keep it clean and dry.
- 🧹 Haryana’s dusty conditions can load the filter quickly. Honda specifies replacement every 15,000 miles or 24,000 km when regularly driving in dusty conditions. owners.honda.com
🔨 Step-by-Step Instructions
Follow these steps in order:
Step 1: Open the Hood
- Pull the hood-release handle beneath the driver’s side of the dashboard.
- Release the secondary latch under the front edge of the hood.
- Raise the hood and secure it fully.
Step 2: Locate the Air Filter Housing
- Find the black plastic airbox connected to the large engine-intake tube.
- The airbox has a removable upper cover retained by metal clips.
- Don’t disconnect any electrical connectors or orange hybrid wiring.
Step 3: Release the Airbox Cover
- Use your gloved fingers to pull each metal retaining clip outward until it releases.
- Lift the cover only far enough to clear the filter.
- Don’t force the intake tube or pull on nearby wiring.
- The clips spring loose, so control them.
Step 4: Remove the Old Filter
- Lift the old engine air filter straight out with your gloved hands.
- Notice its orientation before removing it completely.
- Check the dirty side for heavy dust, leaves, insects, moisture, or oil.
Step 5: Clean the Airbox
- Use the shop vacuum with crevice attachment to remove loose debris from the lower housing.
- Wipe the inside with the clean damp microfiber cloth.
- Keep dirt from falling into the clean-air opening leading toward the engine.
- Don’t use compressed air inside the intake. It usually moves dirt somewhere worse.
Step 6: Install the New Filter
- Place the new filter into the lower airbox in the same orientation as the old filter.
- Confirm the filter’s rubber sealing edge sits flat inside its groove.
- Run one finger around the perimeter to check for folded or raised corners.
- No lubricant, sealant, or filter oil is needed on a standard disposable filter.
Step 7: Close the Airbox
- Lower the airbox cover squarely over the new filter.
- Make sure every cover tab and locating edge is properly seated.
- Use your gloved fingers to snap every metal retaining clip back into place.
- No torque specification applies because the cover uses retaining clips.
- If a clip won’t close easily, reopen the cover and correct the filter position. Don’t bully plastic parts. They remember.
Step 8: Final Inspection
- Check that the airbox cover is level with no visible gap around its edge.
- Verify the intake tube and nearby electrical connections weren’t disturbed.
- Remove the cloth, vacuum, packaging, and old filter from the engine compartment.
- Lower and latch the hood securely.
✅ After Repair
- ✅ Start the Insight and confirm the green READY indicator appears normally.
- ✅ Listen for unusually loud intake noise, whistling, or hissing.
- ✅ If you hear an air leak, switch the car off and reseat the filter and airbox cover.
- ✅ No scan tool, programming, battery registration, or Maintenance Minder reset is required solely for this filter replacement.
- ✅ Inspect the filter more frequently during dusty weather or construction-season driving around Sonipat.
💰 DIY vs Shop Cost
Shop Cost: $45-$90 (parts + labor)
DIY Cost: $14-$47 (parts only)
You Save: $31-$76 by doing it yourself!
Shop labor rates vary but typically run $100-$150/hour. This repair takes a shop approximately 0.2-0.3 hours.
🎯 Ready to get started?
HowToo makes it easy: same-day/2-day shipping on every part, plus all the tools and specialty tools you need! Check out the parts and tools sections below to add everything to your cart.