








How to Replace the Engine Air Filter on a 2017-2026 Honda Ridgeline (Engine: V6 3.5L)
Step-by-step DIY instructions with tools, safety tips, and housing bolt torque specs for 2017, 2018, 2019, 2020, 2021, 2022, 2023, 2024, 2025, 2026
How to Replace the Engine Air Filter on a 2017-2026 Honda Ridgeline (Engine: V6 3.5L)
Step-by-step DIY instructions with tools, safety tips, and housing bolt torque specs for 2017, 2018, 2019, 2020, 2021, 2022, 2023, 2024, 2025, 2026


🔧 Ridgeline - Engine Air Filter Replacement
The engine air filter sits inside the air-cleaner housing on the passenger side of the engine compartment. Replacing a dirty filter helps maintain proper airflow, fuel economy, and engine performance.
Difficulty Level: Beginner | Estimated Time: 10-20 minutes
⚠️ Safety & Precautions
- Let the engine cool before working under the hood.
- Keep tools and debris out of the open intake housing.
- Do not start the engine while the air-cleaner housing is open.
- Battery disconnection is not required for this repair.
🔧 Required Tools
You'll need the following tools for this repair:
- 8mm socket
- 1/4-inch drive ratchet
- 3-inch socket extension
- Inch-pound torque wrench (10-100 lb-in range)
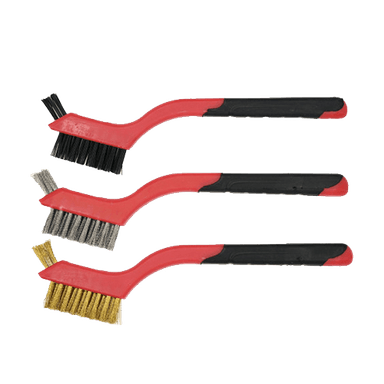
- Soft-bristle detailing brush
- Safety glasses
- Nitrile work gloves
🔩 Required Parts
HowToo sells all the parts you need for this repair:
- Engine air filter - Qty: 1
📋 Before You Begin
- Park your Ridgeline on level ground, shift into Park, apply the parking brake, and switch off the engine.
- Allow the engine to cool, then open and securely support the hood.
- No infotainment menu, scan tool, programming, or maintenance reset is required.
- Compare the new filter with the old one before installation. Their outside shape and sealing edges should match.
🔨 Step-by-Step Instructions
Follow these steps in order:
Step 1: Locate the Air-Cleaner Housing
- Stand at the front of your Ridgeline and locate the black plastic air-cleaner housing on the passenger side of the engine compartment.
- Follow the large black intake tube from the engine to the housing if you have trouble finding it.
- The housing cover is the upper section that encloses the filter.
Step 2: Loosen the Housing Fasteners
- Use an 8mm socket, 3-inch socket extension, and 1/4-inch drive ratchet to loosen the captive cover bolts.
- Captive bolts remain attached to the cover after they are fully loosened.
- Loosen each bolt evenly. Do not force a bolt if it becomes angled or difficult to turn.
Step 3: Lift the Housing Cover
- Wearing nitrile work gloves and safety glasses, carefully lift the cover enough to access the filter.
- Do not sharply bend or pull the intake tube, wiring, or attached hoses.
- Support the cover while removing the filter so dirt cannot fall into the clean-air opening.
Step 4: Remove the Old Filter
- Lift the old engine air filter straight out by its rubber sealing edge using your gloved hands.
- Observe how the filter sits in the lower housing before removing it completely.
- Do not shake or tap the dirty filter over the open housing.
Step 5: Clean and Inspect the Housing
- Use a soft-bristle detailing brush to move loose leaves and debris away from the housing opening.
- Do not push dirt into the intake outlet leading toward the engine.
- Inspect the housing for cracks, standing water, or signs that rodents have entered it.
- Never blow debris toward the engine opening.
Step 6: Install the New Filter
- Place the new engine air filter into the lower housing in the same orientation as the old filter.
- Make sure the rubber sealing edge sits flat inside its entire channel.
- Run a gloved finger around the perimeter to confirm that no corner is folded or raised.
- Do not apply oil or grease to a standard dry replacement filter.
Step 7: Refit the Housing Cover
- Lower the cover carefully while checking that the filter remains seated.
- Verify that the cover is aligned with the lower housing and that no wiring or hoses are trapped between the halves.
- Start every captive bolt by hand with the 8mm socket and 3-inch socket extension before using the ratchet.
Step 8: Tighten the Housing Fasteners
- Use the 8mm socket and inch-pound torque wrench to tighten the cover bolts evenly in a crossing pattern.
- Torque to 3.9 Nm (35 lb-in).
- Stop once the specified torque is reached. The plastic housing can crack if overtightened.
- Snug plastic fasteners gently and evenly.
✅ After Repair
- Check that the housing cover is fully closed around its entire edge.
- Confirm that the intake tube and nearby electrical connectors were not disturbed.
- Remove all tools from the engine compartment and close the hood securely.
- Start the engine and let it idle for about one minute. Listen for an unusual rushing or whistling sound that could indicate a poorly seated cover.
- No electronic reset, scan-tool procedure, or filter programming is required.
💰 DIY vs Shop Cost
Shop Cost: $45-$90 (parts + labor)
DIY Cost: $18-$35 (parts only)
You Save: $27-$55 by doing it yourself!
Local pricing in Sonīpat may vary. This repair takes a shop approximately 0.2-0.4 hours.
🎯 Ready to get started?
HowToo makes it easy: same-day/2-day shipping on every part, plus all the tools and specialty tools you need! Check out the parts and tools sections below to add everything to your cart.