

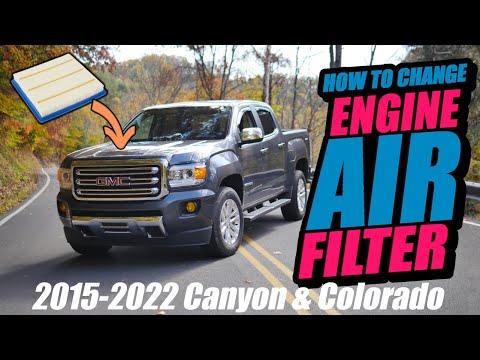






How to Replace the Engine Air Filter on a 2016-2022 GMC Canyon 2.8L Diesel (Engine: Inline 4 2.8L)
Beginner-friendly steps with required tools, filter fitment, and safety tips for 2016, 2017, 2018, 2019, 2020, 2021, 2022
How to Replace the Engine Air Filter on a 2016-2022 GMC Canyon 2.8L Diesel (Engine: Inline 4 2.8L)
Beginner-friendly steps with required tools, filter fitment, and safety tips for 2016, 2017, 2018, 2019, 2020, 2021, 2022


🔧 Canyon - Engine Air Filter Replacement
This is an easy first DIY job. You’ll open the air-filter housing, remove the old panel filter, clean the housing, and install the new filter with its sealing edge fully seated.
I’d use the Baldwin Panel Air Filter. It’s specifically listed for the Canyon’s 2.8L diesel and replaces the factory-style filter. In Sonīpat’s dusty conditions, a conventional high-quality filter is a smart choice. Dust is cheap, engines aren’t.
Difficulty Level: Beginner | Estimated Time: 15-25 minutes
⚠️ Safety & Precautions
- ⚠️ Park your Canyon on level ground, shift into Park, and set the parking brake.
- ⚠️ Turn the engine off and let the underhood components cool.
- ⚠️ Keep dirt, leaves, tools, and fasteners out of the open intake housing.
- ⚠️ Don’t start the engine while the filter or housing cover is removed.
- ⚠️ Battery disconnection isn’t required.
🔧 Required Tools
You'll need the following tools for this repair:
- 8mm socket
- 1/4-inch drive ratchet
- 1/4-inch drive 6-inch extension
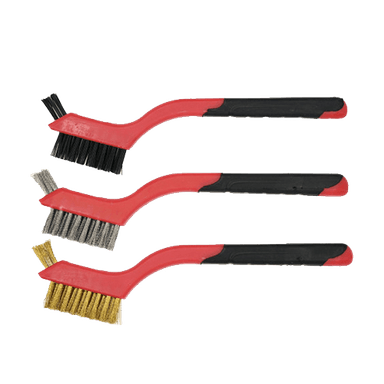
- Soft-bristle detailing brush
- Microfiber shop towel
- Nitrile work gloves
- Safety glasses
🔩 Required Parts
HowToo sells all the parts you need for this repair:
- Baldwin Panel Air Filter - Qty: 1
📋 Before You Begin
- Park on level ground, set the parking brake, and open the hood.
- Wait until the engine compartment is cool enough to touch comfortably.
- Locate the large black plastic air-filter housing near the front corner of the engine compartment.
- Set the replacement filter nearby, but leave it clean and dry.
- No infotainment settings, scan tools, relearns, or service modes are required.
🔨 Step-by-Step Instructions
Follow these steps in order:
Step 1: Inspect the Air-Filter Housing
- Use a soft-bristle detailing brush to remove loose dirt around the housing cover before opening it.
- Check that no wiring, hoses, or aftermarket accessories block the cover.
- Put on safety glasses and nitrile work gloves.
Step 2: Loosen the Housing Cover
- Use an 8mm socket, 1/4-inch drive ratchet, and 6-inch extension to loosen the captive cover screws.
- Captive screws remain attached to the cover when fully loosened, so don’t try to pull them out.
- Loosen each screw gradually rather than fully tightening or loosening one corner at a time.
- Don’t force a screw that feels crooked.
Step 3: Lift the Housing Cover
- Use both hands to lift the air-filter housing cover only far enough to clear the filter.
- Don’t sharply bend or pull the intake hose attached to the cover.
- Keep the cover supported so its weight isn’t hanging from the intake hose.
Step 4: Remove the Old Filter
- Lift the old panel filter straight out by its rubber sealing edge.
- Notice its installed direction before setting it aside.
- Don’t shake or tap the dirty filter over the open housing.
Step 5: Clean the Lower Housing
- Use a microfiber shop towel to wipe dirt from the lower housing and sealing ledge.
- Use the soft-bristle detailing brush only on areas away from the clean-air outlet.
- Don’t push debris into the outlet leading toward the engine.
- Check the housing for leaves, standing water, damaged plastic, or a loose intake duct.
Step 6: Install the New Filter
- Place the new filter into the lower housing in the same orientation as the old filter.
- Run a finger around the rubber perimeter seal to confirm it lies flat inside the housing channel.
- Make sure no corner is folded, raised, or trapped under the cover.
- A pinched seal defeats the whole filter.
Step 7: Refit the Housing Cover
- Lower the cover squarely over the new filter without sliding or crushing the sealing edge.
- Confirm the cover sits evenly on every side before tightening anything.
- If the cover rocks or leaves a gap, lift it and reseat the filter. Don’t use the screws to pull a misaligned cover into place.
Step 8: Tighten the Cover Screws
- Use the 8mm socket, 1/4-inch drive ratchet, and 6-inch extension to tighten the screws evenly by hand.
- Stop when each screw is snug and the cover is seated uniformly.
- These fasteners thread into plastic components. Don’t overtighten them.
- No high-torque tightening is required.
✅ After Repair
- Check that every screw is snug and the housing has no visible gaps.
- Inspect the intake hose and electrical connectors around the housing for anything disturbed during the job.
- Remove all tools and towels from the engine compartment.
- Start the engine and listen for unusual hissing or whistling.
- If you hear an air leak, switch the engine off and check the filter seal and housing cover again.
- No warning-light reset or computer relearn is normally needed.
💰 DIY vs Shop Cost
Shop Cost: $55-$110 equivalent, depending on local labor and parts markup
DIY Cost: $13-$33 equivalent for a disposable replacement filter
You Save: Approximately $25-$75 by doing it yourself!
Local labor rates vary. This repair takes a shop approximately 0.2-0.4 hours.
🎯 Ready to get started?
HowToo makes it easy: same-day/2-day shipping on every part, plus all the tools and specialty tools you need! Check out the parts and tools sections below to add everything to your cart.