


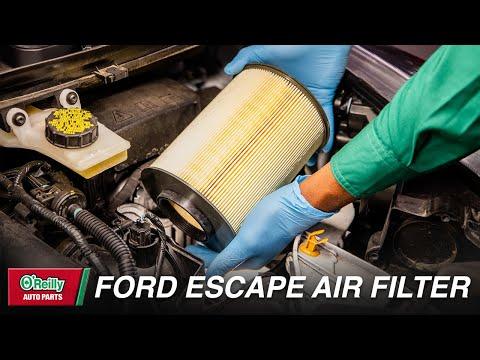





How to Replace the Engine Air Filter on a 2013-2019 Ford Escape 2.5L (Engine: Inline 4 2.5L)
Beginner-friendly steps, required tools, safety tips, and filter installation checks for 2013, 2014, 2015, 2016, 2017, 2018, 2019
How to Replace the Engine Air Filter on a 2013-2019 Ford Escape 2.5L (Engine: Inline 4 2.5L)
Beginner-friendly steps, required tools, safety tips, and filter installation checks for 2013, 2014, 2015, 2016, 2017, 2018, 2019


🔧 Escape - Engine Air Filter Replacement
This is an easy first DIY job. Open the air-filter housing, exchange the filter, clean out loose debris, and make sure the new filter seals evenly.
Difficulty Level: Beginner | Estimated Time: 10-20 minutes
⚠️ Safety & Precautions
- ⚠️ Switch the engine off and let it cool before beginning.
- Do not start the engine while the filter or housing cover is removed.
- Keep dirt, leaves, tools, and cleaning cloths out of the intake opening.
- Do not disconnect the battery. It isn't required for this repair.
🔧 Required Tools
You'll need the following tools for this repair:
- Safety glasses
- Nitrile work gloves
- Clean microfiber cloth
- Shop vacuum with narrow nozzle
🔩 Required Parts
HowToo sells all the parts you need for this repair:
- Engine air filter - Qty: 1
Use a vehicle-matched replacement for the 2.5L engine. The correct filter aisle is open in the parts sidebar.
📋 Before You Begin
- Park your Escape on level ground and shift into Park.
- Set the parking brake, switch off the ignition, and remove the key.
- Open the hood and secure it with the hood support rod.
- Locate the black air-filter housing near the front corner of the engine compartment.
- No infotainment setting, scan tool, programming, or battery reset is required.
🔨 Step-by-Step Instructions
Follow these steps in order:
Step 1: Release the housing cover
- Put on the safety glasses and nitrile work gloves.
- Release the two metal retaining clips securing the air-filter cover.
- The clips should release by hand. No screwdriver is normally needed.
Step 2: Lift the cover
- Carefully lift and move the housing cover only far enough to reach the filter.
- Do not disconnect the tubes or connections attached to the cover.
- Don't force the cover. The attached intake tube limits how far it moves.
Step 3: Remove the old filter
- Lift the old engine air filter straight out by hand.
- Notice which way it sits before removing it completely.
- Check the old filter for heavy dust, leaves, oil, or rodent damage.
Step 4: Clean the housing
- Use the shop vacuum with narrow nozzle to remove loose debris from the bottom of the housing.
- Use the clean microfiber cloth to wipe the housing and cover sealing surfaces.
- Keep the vacuum nozzle and cloth away from the open intake passage.
- Sonipat's dusty conditions can load this housing quickly, so this cleanup matters.
- Dirt belongs outside the engine.
Step 5: Install the new filter
- Place the new engine air filter into the housing in the same orientation as the old one.
- Press gently around the filter's rubber sealing edge.
- Confirm the filter sits flat and doesn't rock or lift at any corner.
- Do not use grease, oil, or sealant on a standard replacement filter.
Step 6: Refit the cover
- Lower the housing cover carefully without shifting the filter.
- Check the complete seam for a trapped or pinched filter edge.
- Secure both retaining clips by hand.
- No torque specification applies because the cover uses spring clips.
Step 7: Perform a final inspection
- Use the clean microfiber cloth to remove any loose dirt around the housing.
- Make sure both clips are fully locked and the attached intake tube hasn't moved loose.
- Remove every tool and cloth from the engine compartment before closing the hood.
✅ After Repair
- Start the engine and let it idle for about one minute.
- Listen for unusual hissing or whistling around the air-filter housing.
- If you hear a new air leak, switch off the engine and recheck the filter seal, cover, clips, and intake tube.
- No warning-light reset, scan-tool procedure, or break-in process is required.
- Inspect the filter more frequently when driving regularly in heavy dust.
💰 DIY vs Shop Cost
Shop Cost: $50-$100 equivalent, depending on local parts and labor pricing
DIY Cost: $10-$25 equivalent for a standard replacement filter
You Save: Approximately $25-$75 by doing it yourself!
Shop labor rates vary. This repair typically takes a technician about 0.2-0.3 hour.
🎯 Ready to get started?
HowToo makes it easy: same-day/2-day shipping on every part, plus all the tools and specialty tools you need! Check out the parts and tools sections below to add everything to your cart.
