

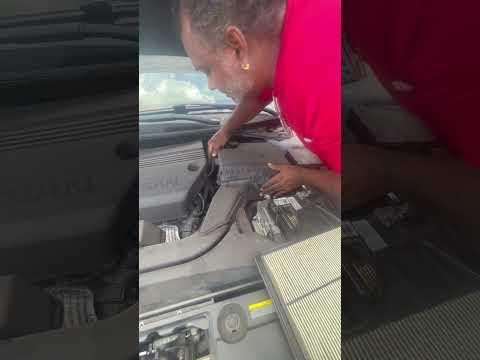






How to Replace the Engine Air Filter on a 2013-2018 Nissan Altima 2.5L (Engine: Inline 4 2.5L | Body: Sedan)
Beginner-friendly steps, required parts, safety tips, and final inspection checks for 2013, 2014, 2015, 2016, 2017, 2018
How to Replace the Engine Air Filter on a 2013-2018 Nissan Altima 2.5L (Engine: Inline 4 2.5L | Body: Sedan)
Beginner-friendly steps, required parts, safety tips, and final inspection checks for 2013, 2014, 2015, 2016, 2017, 2018


🔧 Altima - Engine Air Filter Replacement
The engine air filter keeps dust and debris from entering your Altima’s 2.5L engine. Replacement requires opening the air-cleaner housing, exchanging the filter, and checking that the housing seals completely.
Difficulty Level: Beginner | Estimated Time: 10-15 minutes
⚠️ Safety & Precautions
- Allow the engine to cool before working under the hood.
- Keep dirt, tools, and loose clothing away from the open intake.
- Do not start the engine while the air-cleaner housing is open.
- Battery disconnection is not required.
🔧 Required Tools
You'll need the following tools for this repair:
- Nitrile work gloves
- Safety glasses
- LED inspection flashlight
- Microfiber cleaning cloth
🔩 Required Parts
HowToo sells all the parts you need for this repair:
- Engine air filter for 2.5L engine - Qty: 1
📋 Before You Begin
- Park your Altima on level ground, select Park, apply the parking brake, and switch off the engine.
- Open the hood and support it securely.
- Wait until the engine compartment is cool enough to touch safely.
- Keep the new filter in its packaging until the housing is ready.
🔨 Step-by-Step Instructions
Follow these steps in order:
Step 1: Locate the air-cleaner housing
- Wear the nitrile work gloves and safety glasses.
- Use the LED inspection flashlight to locate the large black plastic air-cleaner housing connected to the engine by the intake duct.
- The housing contains the rectangular engine air filter.
Step 2: Release the housing clips
- Release the metal retaining clips around the edge of the housing lid by hand.
- A retaining clip is a spring-loaded latch that holds the lid closed.
- Do not use excessive force or bend the clips.
Step 3: Lift and disengage the housing lid
- Lift the clipped edge of the lid by hand, then carefully disengage the locating tabs on the opposite edge.
- Move the lid only far enough to access the filter.
- Do not pull on the intake duct, wiring, or mass-airflow sensor connector.
- Take a photo of the filter orientation.
Step 4: Remove the old filter
- Lift the old engine air filter straight out by hand.
- Note which way its sealing edge and pleats sit in the housing.
- Use the LED inspection flashlight to check that no leaves or debris fall into the clean-air opening.
Step 5: Clean and inspect the housing
- Use the microfiber cleaning cloth to wipe loose dirt from the lower housing.
- Do not push dirt into the outlet leading toward the engine.
- Inspect the housing for broken clips, cracks, or a distorted sealing surface.
- Do not use compressed air because it can drive debris into the intake.
Step 6: Install the new filter
- Remove the new filter from its packaging with clean, gloved hands.
- Place it into the housing in the same orientation as the old filter.
- Run a finger around the filter’s rubber sealing edge to confirm it sits flat and is not folded.
- No fastener torque specification applies because the housing uses hand-operated clips.
Step 7: Close the housing
- Engage the housing lid’s locating tabs by hand before lowering the clipped edge.
- Check with the LED inspection flashlight that no filter material is pinched between the housing halves.
- Secure every retaining clip by hand. Each clip should lock firmly without forcing the lid.
Step 8: Perform a final inspection
- Use the LED inspection flashlight to verify that the housing seam is even on every side.
- Confirm the intake duct and nearby electrical connector remain secure.
- Remove the microfiber cleaning cloth and all other items from the engine compartment.
- Close the hood securely.
✅ After Repair
- Start the engine and let it idle for about one minute.
- Listen for a loud rushing or whistling sound, which can indicate that the housing is not fully closed.
- Confirm that no warning light appears on the instrument panel.
- If the engine runs poorly, switch it off and recheck the filter seal, housing tabs, clips, intake duct, and airflow-sensor connector.
- No scan-tool reset or infotainment procedure is required.
💰 DIY vs Shop Cost
Shop Cost: ₹2,500-₹5,000 (parts + labor)
DIY Cost: ₹1,200-₹3,000 (parts only)
You Save: ₹1,300-₹2,000 by doing it yourself!
Local labor and imported-part prices vary. This repair takes a shop approximately 0.2-0.3 hours.
🎯 Ready to get started?
HowToo makes it easy: same-day/2-day shipping on every part, plus all the tools and specialty tools you need! Check out the parts and tools sections below to add everything to your cart.