





How to Replace the Engine Air Filter on a 2009-2026 Ford F-150 (Engine: V6 3.5L)
Beginner-friendly steps covering tools, parts, air-box cleaning, safety, and filter sealing for 2009, 2010
How to Replace the Engine Air Filter on a 2009-2026 Ford F-150 (Engine: V6 3.5L)
Beginner-friendly steps covering tools, parts, air-box cleaning, safety, and filter sealing for 2009, 2010


🔧 F-150 - Engine Air Filter Replacement
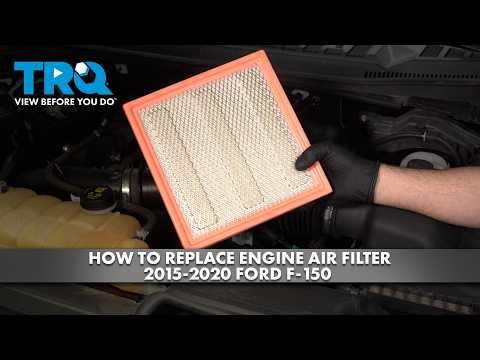
This is an easy first DIY job. Open the air-filter housing, remove the dirty panel filter, clean the housing, and seat the replacement filter securely. Haryana’s dusty conditions make that final sealing check especially important.
Difficulty Level: Beginner | Estimated Time: 10-20 minutes
⚠️ Safety & Precautions
- ⚠️ Switch the engine off and let it cool before reaching under the hood.
- 🗝️ Keep the key away from the truck so nobody accidentally starts it.
- 🌬️ Don’t allow dirt, leaves, tools, or cleaning cloths to enter the intake opening.
- 🔋 Battery disconnection isn’t required for this repair.
🔧 Required Tools
You'll need the following tools for this repair:
- Nitrile work gloves
- LED inspection flashlight
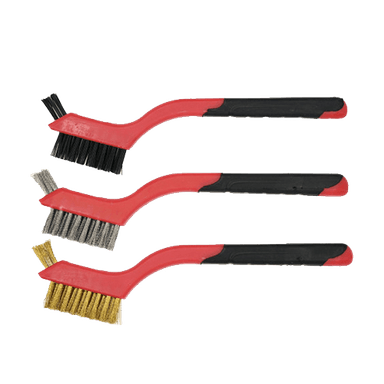
- Soft-bristle 25mm detailing brush
- Portable vacuum with crevice attachment
- Safety glasses
🔩 Required Parts
HowToo sells all the parts you need for this repair:
- Vehicle-matched disposable panel engine air filter - Qty: 1
📋 Before You Begin
- 🅿️ Park your F-150 on level ground, select Park, and apply the parking brake.
- ❄️ Wait until the engine and surrounding components are cool.
- 📦 Remove the new filter from its packaging, but keep it clean and dry.
- 🔍 Compare the new filter with the old one after removal. Their outside dimensions and sealing edges should match.
- 📱 No infotainment menu, scan tool, coding, or service mode is required.
🔨 Step-by-Step Instructions
Follow these steps in order:
Step 1: Open the hood
- Pull the hood-release handle inside the cab.
- Release the secondary hood latch at the front edge and raise the hood.
- Use the LED inspection flashlight to locate the black air-filter housing in the engine compartment.
Step 2: Clean around the housing
- Put on the safety glasses and nitrile work gloves.
- Use the soft-bristle 25mm detailing brush and portable vacuum with crevice attachment to remove loose dust from around the housing seam.
- This prevents debris from falling into the clean side of the intake.
Step 3: Release the air-box retainers
- Release the retaining clips around the air-filter housing by hand.
- Move each clip completely away from the lid.
- Don’t pry against the plastic housing with a screwdriver.
- Cold plastic clips dislike brute force.
Step 4: Lift the housing lid
- Carefully raise the housing lid enough to access the filter.
- Keep the connected intake duct and wiring relaxed. Don’t pull or twist them.
- If the lid resists, stop and use the LED inspection flashlight to check for a clip that’s still engaged.
Step 5: Remove the old filter
- Note how the old filter is positioned before lifting it out.
- Lift the filter straight upward with both hands.
- Avoid shaking loose dirt over the open housing.
- Check the old filter for heavy dust, torn pleats, moisture, oil, or rodent damage.
Step 6: Clean the lower housing
- Use the portable vacuum with crevice attachment to remove dirt and leaves from the bottom of the housing.
- Use the soft-bristle 25mm detailing brush only where needed.
- Don’t use compressed air. It can drive dirt farther into the intake system.
- Don’t drop the vacuum attachment into the intake opening.
Step 7: Install the new filter
- Place the new filter into the housing in the same orientation as the old filter.
- Run a gloved finger around the entire sealing edge.
- Confirm the seal lies flat with no folds, gaps, or trapped debris.
- The filter should sit naturally. Don’t force or trim it.
Step 8: Close the air box
- Lower the lid while watching the filter seal with the LED inspection flashlight.
- Make sure the lid’s locating tabs enter their matching slots before engaging the clips.
- Close every retaining clip by hand.
- No torque specification applies to hand-operated air-box clips.
Step 9: Perform a final inspection
- Use the LED inspection flashlight to inspect the full housing seam.
- Confirm there are no visible gaps and the filter isn’t pinched between the housing halves.
- Check that nearby hoses and electrical connectors weren’t disturbed.
- Remove every tool before closing the hood.
✅ After Repair
- ✅ Start the engine and let it idle for about one minute.
- 👂 Listen for a loud hiss, whistle, or unusual intake noise.
- 🔍 Recheck the air-box clips if the engine sounds different or the housing lid moves.
- 🧹 Inspect the filter more frequently during dusty weather or regular driving on unpaved roads.
- 💡 No dashboard reset, coding, or battery registration is needed.
💰 DIY vs Shop Cost
Shop Cost: $45-$90 USD equivalent, including parts and labor
DIY Cost: $10-$25 USD equivalent for a standard disposable filter
You Save: $25-$65 by doing it yourself!
Local labor and imported-part pricing vary. This repair takes a shop approximately 0.2-0.4 hours.
🎯 Ready to get started?
HowToo makes it easy: same-day/2-day shipping on every part, plus all the tools and specialty tools you need! Check out the parts and tools sections below to add everything to your cart.