






How to Replace the Engine Air Filter on a 2005-2019 Nissan Frontier (Engine: V6 4.0L)
Step-by-step DIY guide with required parts, basic tools, safety tips, and final checks for 2005, 2006, 2007, 2008, 2009, 2010, 2011, 2012, 2013, 2014, 2015, 2016, 2017, 2018, 2019
How to Replace the Engine Air Filter on a 2005-2019 Nissan Frontier (Engine: V6 4.0L)
Step-by-step DIY guide with required parts, basic tools, safety tips, and final checks for 2005, 2006, 2007, 2008, 2009, 2010, 2011, 2012, 2013, 2014, 2015, 2016, 2017, 2018, 2019


🔧 Frontier - Engine Air Filter Replacement
Replacing the engine air filter on your Frontier helps the 4.0L V6 breathe clean air, which supports proper power, fuel economy, and engine protection. This is one of the easiest DIY maintenance jobs and does not require lifting the truck.
Difficulty Level: Beginner | Estimated Time: 10-20 minutes
⚠️ Safety & Precautions
- ⚠️ Park on level ground and let the engine cool before working near the air intake box.
- ⚠️ Keep loose clothing, jewelry, and fingers away from the engine fan area.
- ⚠️ Do not start the engine while the air filter or air box cover is removed.
- ⚠️ Battery disconnect is not required for this repair.
🔧 Required Tools
You'll need the following tools for this repair:
- Safety glasses
- Nitrile gloves
- Shop towel
- Flashlight
🔩 Required Parts
HowToo sells all the parts you need for this repair:
- Engine air filter - Qty: 1
📋 Before You Begin
- 🅿️ Park your Frontier on level ground and set the parking brake.
- 🔥 Let the engine cool if it was recently driven.
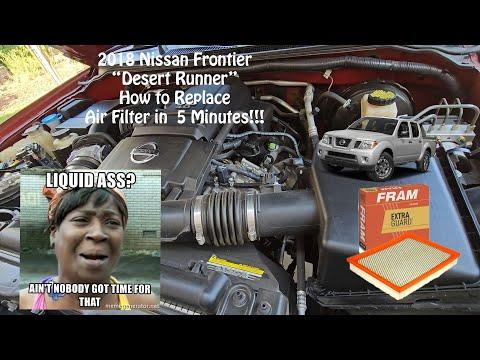
- 🔍 Open the hood and locate the engine air filter box on the passenger side of the engine bay.
- 📦 The air filter box is the black plastic housing connected to the large intake tube going toward the engine.
🔨 Step-by-Step Instructions
Follow these steps in order:
Step 1: Open the Hood
- Use your hand to pull the hood release inside the cabin, near the driver-side lower dash.
- Use your fingers to move the hood safety latch at the front center of the hood.
- Raise the hood and secure it with the hood prop rod.
- Make sure the hood is stable.
Step 2: Find the Air Filter Box
- Use a flashlight to look at the passenger side of the engine bay.
- Find the black plastic air filter box connected to the large ribbed intake tube.
- The air box cover is held by metal spring clips. Spring clips are small metal latches that snap the cover closed.
Step 3: Release the Air Box Clips
- Use your fingers while wearing nitrile gloves to unhook the metal spring clips from the air box cover.
- Pull each clip outward gently until it releases from the cover.
- Do not bend the clips too far; they only need to swing away from the cover.
Step 4: Open the Air Box Cover
- Use your hands to lift the air box cover slightly.
- Move the cover just enough to access the filter.
- Do not pull hard on the intake tube or wiring nearby.
- Gentle movement prevents cracked plastic.
Step 5: Remove the Old Air Filter
- Use your hands to slide the old engine air filter out of the air box.
- Notice which side faces up and how the filter sits in the housing.
- Inspect the old filter. Heavy dirt, leaves, dark dust, or torn filter material means replacement was needed.
Step 6: Clean the Air Box Area
- Use a shop towel to wipe loose dirt or leaves from the lower air box.
- Do not push debris into the intake tube opening.
- Do not use water inside the air box.
- Keep dirt out of the engine.
Step 7: Install the New Engine Air Filter
- Use your hands to place the new engine air filter into the lower air box.
- Make sure the rubber sealing edge sits flat all the way around.
- The filter should not be folded, crushed, or sitting crooked.
Step 8: Close the Air Box Cover
- Use your hands to lower the air box cover back into place.
- Check that the cover sits evenly against the filter seal.
- If the cover will not close easily, remove the filter and reseat it.
Step 9: Refasten the Spring Clips
- Use your fingers to snap the metal spring clips back over the air box cover.
- Make sure each clip is fully seated and holding the cover tight.
- No torque spec applies because these are hand-operated spring clips.
Step 10: Final Check
- Use a flashlight to check that no tools, towels, or packaging are left in the engine bay.
- Use your hands to gently confirm the intake tube and air box cover are secure.
- Lower the hood carefully and make sure it latches fully.
✅ After Repair
- ✅ Start your Frontier and let it idle for about 30 seconds.
- ✅ Listen for unusual hissing sounds near the air box, which could mean the cover is not seated correctly.
- ✅ If the engine runs normally and the air box is secure, the repair is complete.
- ✅ No scan tool reset, battery registration, or infotainment reset is required.
💰 DIY vs Shop Cost
Shop Cost: $45-$90 parts + labor
DIY Cost: $15-$35 parts only
You Save: $30-$55 by doing it yourself!
Shop labor rates vary but typically run $100-$150/hour. This repair takes a shop approximately 0.2-0.4 hours.
🎯 Ready to get started?
HowToo makes it easy: same-day/2-day shipping on every part, plus all the tools and specialty tools you need! Check out the parts and tools sections below to add everything to your cart.