

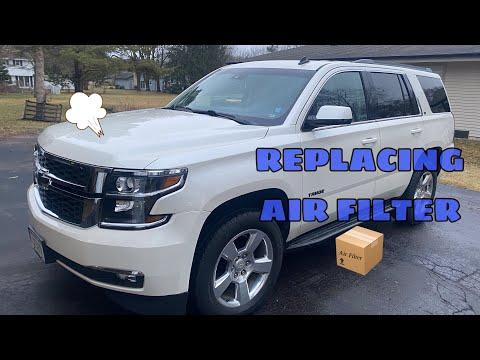







How to Replace the Engine Air Filter on a 2000-2020 Chevrolet Tahoe 5.3L V8 (Engine: V8 5.3L)
Step-by-step DIY instructions with required tools, parts, torque specs, and safety tips for 2000, 2001, 2002, 2003, 2004, 2005, 2006, 2007, 2008, 2009
How to Replace the Engine Air Filter on a 2000-2020 Chevrolet Tahoe 5.3L V8 (Engine: V8 5.3L)
Step-by-step DIY instructions with required tools, parts, torque specs, and safety tips for 2000, 2001, 2002, 2003, 2004, 2005, 2006, 2007, 2008, 2009


🔧 Tahoe - Engine Air Filter Replacement
The engine air filter sits inside the air-cleaner box at the front passenger side of the engine compartment. Replacing a dirty filter restores proper airflow and helps keep dust out of your Tahoe’s engine.
Difficulty Level: Beginner | Estimated Time: 15-25 minutes
⚠️ Safety & Precautions
- Turn the engine off and allow it to cool before working under the hood.
- Keep dirt, tools, and loose clothing away from the open intake tube.
- Handle the mass airflow sensor connector carefully; damaged wiring can cause warning lights or poor engine operation.
- Battery disconnection is not required.
🔧 Required Tools
You'll need the following tools for this repair:
- Torx T25 screwdriver
- 8mm socket
- 1/4-inch-drive ratchet
- Clean microfiber cloth
- Nitrile gloves
- Safety glasses
🔩 Required Parts
HowToo sells all the parts you need for this repair:
- Engine air filter for 5.3L V8 - Qty: 1
📋 Before You Begin
- Park your Tahoe on level ground, shift into Park, and apply the parking brake.
- Switch off the ignition and remove the key or keep the key fob away from the vehicle.
- Open the hood and locate the rectangular air-cleaner box at the front passenger side.
- Confirm that the replacement filter matches the old filter’s length, width, and seal shape before installation.
🔨 Step-by-Step Instructions
Follow these steps in order:
Step 1: Locate the Air-Cleaner Housing
- Put on safety glasses and nitrile gloves.
- Find the black plastic air-cleaner housing on the passenger side of the engine compartment.
- Follow the large intake tube from the housing toward the engine if you need help identifying it.
Step 2: Disconnect the Mass Airflow Sensor
- Locate the electrical connector on the intake outlet near the air-cleaner lid.
- The mass airflow sensor measures how much air enters the engine.
- Slide the connector lock back, if equipped, and press the release tab with your fingers.
- Pull on the connector body, not the wires, to unplug it.
- Never pry directly on the sensor.
Step 3: Release the Intake Tube
- Use an 8mm socket and 1/4-inch-drive ratchet to loosen the intake-tube clamp at the air-cleaner outlet.
- Gently twist and slide the intake tube off the air-cleaner lid.
- Do not allow dirt or tools to fall into the open tube.
Step 4: Open the Air-Cleaner Housing
- Use a Torx T25 screwdriver to loosen the four captive lid screws. Captive screws remain attached to the lid after loosening.
- Lift the lid carefully and move it only far enough to access the filter.
- Do not strain the nearby wiring or breather hoses.
Step 5: Remove the Old Filter
- Lift the old engine air filter straight out by hand.
- Notice which side of the filter faces upward before removing it completely.
- Check the lower housing for leaves, sand, or insects.
Step 6: Clean the Housing
- Use a clean microfiber cloth to wipe loose debris from the lower housing.
- Keep debris away from the clean-air outlet leading to the engine.
- Do not use compressed air because it can force dirt into the intake tract.
Step 7: Install the New Filter
- Place the new engine air filter into the lower housing in the same orientation as the old filter.
- Run a finger around the filter’s rubber edge and confirm it sits flat in the housing channel.
- Make sure no section of the seal is folded, raised, or trapped.
- A flat seal prevents unfiltered air leaks.
Step 8: Refit the Housing Lid
- Lower the lid squarely over the new filter without pinching its seal.
- Start all four captive screws by hand using the Torx T25 screwdriver.
- Tighten the screws evenly in a crossing pattern.
- Torque to 2 Nm (18 lb-in). Do not overtighten the plastic housing.
Step 9: Reconnect the Intake Tube
- Slide the intake tube completely over the air-cleaner outlet.
- Check that the tube is straight and fully seated past the outlet ridge.
- Use the 8mm socket and 1/4-inch-drive ratchet to tighten the clamp.
- Torque to 5 Nm (44 lb-in).
Step 10: Reconnect the Sensor
- Push the mass airflow sensor connector into place until its release tab clicks.
- Re-engage the connector lock, if equipped.
- Gently tug the connector body to confirm it is secure.
✅ After Repair
- Inspect the housing and intake tube for gaps, loose clamps, or trapped wiring.
- Remove all tools and the microfiber cloth from the engine compartment.
- Start the engine and let it idle for about one minute.
- Listen for a loud hissing sound that could indicate a loose intake tube.
- Confirm that no Check Engine warning appears.
- No infotainment reset, scan-tool procedure, or filter programming is required.
- Inspect the filter at each oil change and replace it sooner when driving in Haryana’s dusty conditions.
💰 DIY vs Shop Cost
Shop Cost: ₹2,500-₹5,500 (parts + labor)
DIY Cost: ₹1,500-₹3,500 (parts only)
You Save: ₹1,000-₹2,000 by doing it yourself!
Local labor rates and imported filter prices vary. This repair takes a shop approximately 0.2-0.4 hours.
🎯 Ready to get started?
HowToo makes it easy: same-day/2-day shipping on every part, plus all the tools and specialty tools you need! Check out the parts and tools sections below to add everything to your cart.