


How to Replace the Cabin Air Filter on a 2019-2025 Nissan Altima (Engine: Inline 4 2.5L)
Step-by-step DIY instructions with tools, parts, access tips, and safety checks for 2019, 2020, 2021, 2022, 2023, 2024
How to Replace the Cabin Air Filter on a 2019-2025 Nissan Altima (Engine: Inline 4 2.5L)
Step-by-step DIY instructions with tools, parts, access tips, and safety checks for 2019, 2020, 2021, 2022, 2023, 2024
🔧 Altima - Cabin Air Filter Replacement
Replacing the cabin air filter helps keep dust, pollen, and odors out of the air coming through your vents. On your Altima, the filter is accessed from the passenger-side footwell area behind the lower dash trim.
Difficulty Level: Beginner | Estimated Time: 15-30 minutes
⚠️ Safety & Precautions
- ⚠️ Turn the ignition OFF before starting.
- ⚠️ Do not force plastic trim pieces; they can crack if pulled at the wrong angle.
- ⚠️ Keep fingers clear of sharp plastic edges behind the glovebox area.
- ⚠️ Battery disconnect is not required for this repair.
🔧 Required Tools
You'll need the following tools for this repair:
- Trim removal tool
- Flashlight
- Nitrile gloves
- Safety glasses
🔩 Required Parts
HowToo sells all the parts you need for this repair:
- Cabin air filter - Qty: 1
📋 Before You Begin
- 🚗 Park your Altima on a flat surface and turn the ignition OFF.
- 🧤 Move the passenger seat fully rearward to give yourself more working room.
- 🔦 A cabin air filter cleans air entering the HVAC system, which is the heating, ventilation, and air conditioning system.
- 🧰 A trim removal tool is a plastic pry tool used to remove panels without scratching them.
🔨 Step-by-Step Instructions
Follow these steps in order:
Step 1: Get Access to the Passenger Footwell
- Use the seat adjustment switch or lever to slide the passenger seat all the way back.
- Use a flashlight to look under the passenger side of the dashboard, near the center console side.
- Put on safety glasses and nitrile gloves before reaching under the dash.
Step 2: Remove the Lower Passenger-Side Trim Panel
- Use a trim removal tool to gently release the lower passenger-side dash/footwell trim panel if it blocks access to the filter door.
- Pull the panel straight out only after the clips release.
- Tip: Gentle pressure prevents broken clips.
Step 3: Locate the Cabin Filter Access Door
- Use a flashlight to find the narrow rectangular cabin filter cover on the HVAC case behind the passenger-side lower dash area.
- The HVAC case is the plastic housing that holds the heater and air conditioning parts.
- The access door is usually vertical and clipped onto the side of the housing.
Step 4: Remove the Filter Access Door
- Use your fingers to press the locking tab on the cabin filter cover.
- If the tab is tight, use the trim removal tool carefully to help release it.
- Pull the cover off and set it somewhere safe.
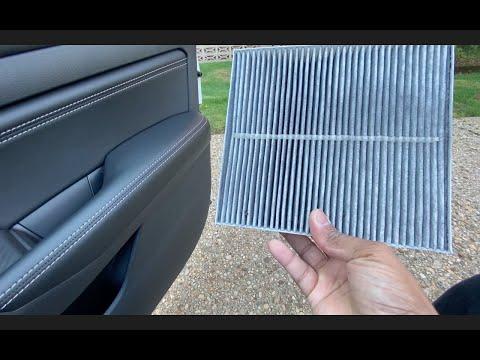
Step 5: Remove the Old Cabin Air Filter
- Use your fingers to pinch the exposed edge of the old cabin air filter.
- Pull the filter out slowly so dust and debris do not spill into the footwell.
- Notice the airflow arrow direction printed on the old filter before throwing it away.
- Tip: Take a quick phone photo first.
Step 6: Install the New Cabin Air Filter
- Use your hands to gently compress the new cabin air filter if needed to fit it through the opening.
- Slide the new filter into the housing with the airflow arrow facing the same direction as the old filter.
- Make sure the filter sits fully inside the housing and is not folded over.
- No torque spec applies because no bolts are removed or installed.
Step 7: Reinstall the Filter Access Door
- Use your hands to place the access door back onto the HVAC case.
- Press until the locking tab clicks into place.
- Use a flashlight to confirm the cover is seated evenly.
Step 8: Reinstall the Lower Trim Panel
- Use your hands to align the lower passenger-side trim panel with its clips.
- Press the panel straight into place until the clips snap in.
- Use the trim removal tool only if you need to guide an edge into position.
✅ After Repair
- ✅ Start your Altima and turn the blower fan on low, then medium, then high.
- ✅ Check that air comes from the vents normally.
- ✅ Listen for rattling or flapping noises, which may mean the filter door is loose or the filter is folded.
- ✅ If equipped, reset any maintenance reminder only if you personally use it to track cabin filter service.
💰 DIY vs Shop Cost
Shop Cost: $80-$150 parts + labor
DIY Cost: $15-$35 parts only
You Save: $65-$115 by doing it yourself!
Shop labor rates vary but typically run $100-$150/hour. This repair takes a shop approximately 0.3-0.5 hours.
🎯 Ready to get started?
HowToo makes it easy: same-day/2-day shipping on every part, plus all the tools and specialty tools you need! Check out the parts and tools sections below to add everything to your cart.
