





How to Replace the Cabin Air Filter on a 2015 Ford F-150
Step-by-step 2015 F-150 cabin filter change with tools, location, airflow direction, and reassembly tips for 2015, 2016, 2017, 2018, 2019, 2020, 2021, 2022, 2023, 2024
How to Replace the Cabin Air Filter on a 2015 Ford F-150
Step-by-step 2015 F-150 cabin filter change with tools, location, airflow direction, and reassembly tips for 2015, 2016, 2017, 2018, 2019, 2020, 2021, 2022, 2023, 2024


🔧 F-150 - Cabin Air Filter Replacement
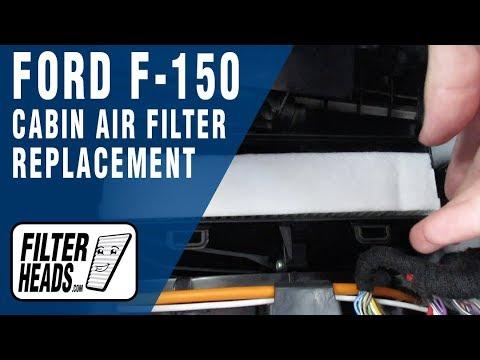
The cabin air filter is located behind the passenger-side glove box. Replacing it improves heater and air-conditioning airflow while reducing dust, pollen, and odors inside your F-150.
Difficulty Level: Beginner | Estimated Time: 0.2-0.4 hours
⚠️ Safety & Precautions
- 🛑 Switch the ignition off before working behind the glove box.
- ⚠️ Do not pull on the nearby wiring or yellow airbag connectors.
- 🔋 Battery disconnection is not required for this repair.
🔧 Required Tools
You'll need the following tools for this repair:
- LED flashlight
- Nitrile work gloves
- Safety glasses
- Vacuum with 25mm crevice attachment
🔩 Required Parts
HowToo sells all the parts you need for this repair:
- Cabin air filter - Qty: 1
📋 Before You Begin
- 🅿️ Park your F-150 on level ground, select Park, and apply the parking brake.
- 🔑 Turn the ignition and climate-control fan off.
- 📦 Empty the glove box before lowering it.
- 🧤 Wear nitrile work gloves and safety glasses because the old filter may contain dust and debris.
🔨 Step-by-Step Instructions
Follow these steps in order:
Step 1: Lower the Glove Box
- Use the LED flashlight to inspect both sides of the open glove box.
- Use your gloved fingers to release the small damper arm from the right side. The damper is the plastic arm that makes the glove box open slowly.
- Press both glove-box sides inward with your gloved hands so the stop tabs clear the dashboard opening.
- Carefully rotate the glove box downward. Do not force its hinges.
Step 2: Open the Filter Compartment
- Use the LED flashlight to locate the narrow rectangular filter cover on the climate-control housing behind the glove box.
- Use your gloved fingers to squeeze the cover’s retaining tabs.
- Pull the cover straight outward and place it somewhere clean.
- No screws or torque specifications apply to this snap-fit cover.
Step 3: Remove the Old Filter
- Use the LED flashlight to note the airflow-arrow direction printed on the old filter.
- Use your gloved fingers to slide the filter straight out. Keep it level so debris does not spill into the blower housing.
- Place a bag beneath the opening.
Step 4: Clean the Filter Housing
- Use the vacuum with 25mm crevice attachment to remove loose leaves and dust near the opening.
- Do not push the vacuum attachment deeply into the housing because it could contact the blower wheel.
- Do not use compressed air; it can drive debris farther into the climate-control system.
Step 5: Install the New Filter
- Use the LED flashlight to check that the compartment is clear.
- Hold the new cabin air filter with gloved hands and position its AIR FLOW arrow downward.
- Slide the filter completely into the housing without crushing or folding its pleats.
- Airflow arrows indicate direction, not filter orientation.
Step 6: Reinstall the Filter Cover
- Use your gloved hands to align the filter cover with the housing.
- Press the cover into place until both retaining tabs click securely.
- Use the LED flashlight to verify there is no gap around the cover.
Step 7: Reinstall the Glove Box
- Lift the glove box with your gloved hands.
- Press its sides inward until both stop tabs pass into the dashboard opening.
- Reconnect the damper arm to the right side using your gloved fingers.
- Open and close the glove box slowly to confirm smooth movement.
✅ After Repair
- 🌬️ Start your F-150 and operate the climate-control fan through every speed.
- 👂 Listen for clicking, rubbing, or unusual airflow noise.
- 🔍 If noise is present, switch the fan off and confirm that the filter and cover are fully seated.
- 📅 Replace the filter approximately every 15,000-20,000 miles, or sooner in dusty conditions.
💰 DIY vs Shop Cost
Shop Cost: ₹2,000-₹4,500 (parts + labor)
DIY Cost: ₹800-₹2,500 (parts only)
You Save: ₹1,200-₹2,000 by doing it yourself!
Local labor rates vary. This repair takes a shop approximately 0.2-0.4 hours.
🎯 Ready to get started?
HowToo makes it easy: same-day/2-day shipping on every part, plus all the tools and specialty tools you need! Check out the parts and tools sections below to add everything to your cart.