
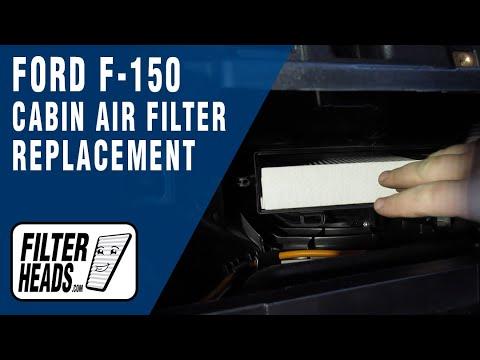






How to Replace the Cabin Air Filter on a 2009-2026 Ford F-150 (Engine: V6 3.5L)
Step-by-step glove box removal, filter installation, tools, and safety tips for 2009, 2010
How to Replace the Cabin Air Filter on a 2009-2026 Ford F-150 (Engine: V6 3.5L)
Step-by-step glove box removal, filter installation, tools, and safety tips for 2009, 2010


🔧 F-150 - Cabin Air Filter Replacement
Easy job. The cabin air filter sits behind your F-150’s glove box, and replacement takes about 15 minutes. Ford notes that keeping a filter installed protects the climate-control system from dirt and debris. fordservicecontent.com
Difficulty Level: Beginner | Estimated Time: 10-20 minutes
⚠️ Safety & Precautions
- ⚠️ Switch the ignition off before working behind the dashboard.
- 🧤 Empty the glove box so its contents don’t fall onto the floor.
- 🛑 Don’t force the plastic tabs. Warm interior trim flexes more safely than cold trim.
- 🔋 Battery disconnection is not required.
🔧 Required Tools
You’ll need the following tools for this repair:
- Small plastic trim tool
- LED flashlight
- Nitrile work gloves
- Safety glasses
- Shop vacuum with crevice attachment
A plastic trim tool is a non-metal pry tool that releases clips without scratching the dashboard.
🔩 Required Parts
HowToo sells all the parts you need for this repair:
- Cabin air filter - Qty: 1
An activated-carbon filter is worth considering around Sonīpat’s dust and traffic because it can also help reduce odors. Plain particulate filters still handle dust and pollen well. Your nose gets a vote here.
📋 Before You Begin
- 🚙 Park your F-150 on level ground and switch the ignition completely off.
- 📦 Remove everything from the glove box.
- 💡 Place the LED flashlight where it illuminates the area behind the glove box.
- 🧭 Check the airflow arrow printed on the new filter before removing the old one.
🔨 Step-by-Step Instructions
Follow these steps in order:
Step 1: Open and release the glove box
- Open the glove box fully.
- Use your hands to press the left and right sides of the glove box inward.
- Move the built-in stop tabs past the dashboard opening, then carefully lower the glove box.
- If a small damper arm is attached at the side, gently release its tab by hand or with the small plastic trim tool.
- Support the box while releasing it.
Step 2: Locate the filter access door
- Use the LED flashlight to find the long rectangular filter cover behind the lowered glove box.
- Keep wiring and electrical connectors undisturbed.
- The 2019 Ford owner’s manual confirms the cabin filter is located behind the glove box. fordservicecontent.com
Step 3: Remove the filter cover
- Press the retaining tabs at the sides of the filter cover with your fingers.
- If a tab is stubborn, apply light pressure with the small plastic trim tool.
- Pull the cover away and set it somewhere clean.
- No fastener torque is required because the cover uses retaining clips.
Step 4: Remove the old filter
- Note the direction of the airflow arrow on the old filter.
- Grip the filter edges with your nitrile work gloves and pull it straight out.
- Keep the dirty side facing upward so loose debris doesn’t fall into the blower housing.
- Use the shop vacuum with crevice attachment to remove loose leaves and dust near the opening.
- Don’t push the vacuum attachment deeply into the HVAC housing.
Step 5: Install the new filter
- Match the new filter’s airflow arrow to the direction shown by the old filter or the marking on the housing.
- Slide the filter into the housing evenly with both hands.
- Keep the pleats straight and make sure the filter isn’t folded or crushed.
- Never force a bunched filter.
Step 6: Reinstall the filter cover
- Position the filter cover over the opening by hand.
- Engage its locating edge first, then press the cover until both side clips click into place.
- Run your fingers around the cover to confirm it sits flush.
Step 7: Reinstall the glove box
- Raise the glove box by hand.
- Reconnect the damper arm if you released it earlier.
- Press both glove-box sides inward and guide the stop tabs back through the dashboard opening.
- Open and close the glove box once to verify smooth movement.
✅ After Repair
- ✅ Start your F-150 and run the blower at low, medium and high speeds.
- 👂 Listen for rubbing, fluttering or clicking that could indicate a folded filter.
- 💨 Check that airflow comes evenly from the dashboard vents.
- 🔍 If airflow dropped after replacement, reopen the housing and check the filter orientation and pleats.
- 🗓️ Inspect the filter more frequently in dusty conditions rather than waiting for noticeable airflow loss.
💰 DIY vs Shop Cost
Shop Cost: $65-$130 parts and labor
DIY Cost: $10-$40 for the filter
You Save: Approximately $40-$100 by doing it yourself!
Shop labor rates vary but typically run $100-$150/hour. This repair takes a shop approximately 0.2-0.5 hour.
🎯 Ready to get started?
HowToo makes it easy: same-day/2-day shipping on every part, plus all the tools and specialty tools you need! Check out the parts and tools sections below to add everything to your cart.