






How to Replace the Cabin Air Filter on a 2009-2020 Honda Fit (Engine: Inline 4 1.5L)
Step-by-step DIY guide with glove box access, airflow direction, tools, and cost savings for 2009, 2010, 2011, 2012, 2013, 2015, 2016, 2017, 2018, 2019, 2020
How to Replace the Cabin Air Filter on a 2009-2020 Honda Fit (Engine: Inline 4 1.5L)
Step-by-step DIY guide with glove box access, airflow direction, tools, and cost savings for 2009, 2010, 2011, 2012, 2013, 2015, 2016, 2017, 2018, 2019, 2020


🔧 Fit - Cabin Air Filter Replacement
The cabin air filter cleans the air that comes through your vents. Replacing it helps improve airflow, reduce odors, and keep dust and pollen out of the cabin.
Difficulty Level: Beginner | Estimated Time: 5-10 minutes
🔧 Required Tools
You'll need the following tools for this repair:
- Safety glasses
- Nitrile gloves
- Flashlight
🔩 Required Parts
HowToo sells all the parts you need for this repair:
- Cabin air filter - Qty: 1
📋 Before You Begin
- Park your Fit on level ground.
- Turn the ignition off and remove the key.
- Empty the glove box so nothing falls out when it swings down.
- No battery disconnect is required for this repair.
🔨 Step-by-Step Instructions
Follow these steps in order:
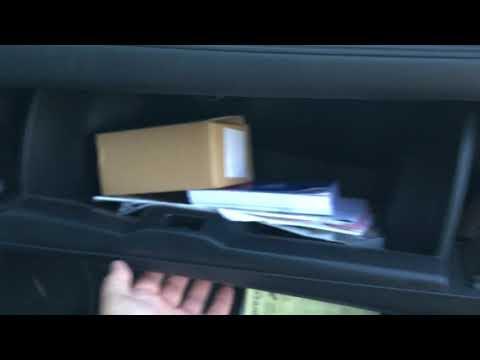
Step 1: Open and Empty the Glove Box
- Use your hands to open the glove box fully.
- Remove all items from the glove box.
- Use a flashlight if the area is dark.
- Keep small items in a cup.
Step 2: Release the Glove Box Stops
- Use both hands to gently squeeze the left and right sides of the glove box inward.
- The glove box stops are small molded tabs that keep the glove box from dropping too far.
- While squeezing the sides inward, lower the glove box down toward the floor.
- Do not force it. The plastic can crack if bent too sharply.
Step 3: Find the Cabin Filter Cover
- Look straight behind the lowered glove box using a flashlight.
- You will see a rectangular plastic cover on the HVAC housing.
- HVAC means the heating, ventilation, and air conditioning box behind the dash.
Step 4: Remove the Cabin Filter Cover
- Use your fingers to press the release tabs on both sides of the cabin filter cover.
- Pull the cover straight outward by hand.
- Set the cover aside where it will not get stepped on.
Step 5: Remove the Old Cabin Air Filter
- Use your fingers to slide the old cabin air filter straight out.
- Pay attention to the airflow arrow printed on the old filter before removing it completely.
- On your Fit, the airflow direction should point downward.
- Wear nitrile gloves if the old filter is dusty or dirty.
- Pull slowly to avoid spilling dust.
Step 6: Install the New Cabin Air Filter
- Check the airflow arrow on the new cabin air filter.
- Slide the new filter into the slot with the airflow arrow pointing downward.
- Use your hands only. Do not use tools to force the filter in.
- Make sure the filter sits flat and fully inside the housing.
Step 7: Reinstall the Cabin Filter Cover
- Use your hands to place the plastic cover back over the filter opening.
- Push the cover in until both side tabs click into place.
- Gently tug the cover by hand to make sure it is secure.
Step 8: Raise the Glove Box
- Use both hands to lift the glove box back upward.
- Squeeze the sides inward slightly so the glove box stops pass back into place.
- Close and open the glove box once to make sure it moves normally.
✅ After Repair
- Start your Fit and turn the blower fan on.
- Check airflow from the dash vents at low, medium, and high fan speeds.
- Listen for rattles behind the glove box. If you hear one, recheck the filter cover.
- Replace the cabin air filter about every 15,000-30,000 miles, or sooner in dusty areas.
💰 DIY vs Shop Cost
Shop Cost: $60-$120 parts + labor
DIY Cost: $15-$35 parts only
You Save: $45-$85 by doing it yourself!
Shop labor rates vary but typically run $100-$150/hour. This repair takes a shop approximately 0.2-0.4 hours.
🎯 Ready to get started?
HowToo makes it easy: same-day/2-day shipping on every part, plus all the tools and specialty tools you need! Check out the parts and tools sections below to add everything to your cart.