









How to Replace the Cabin Air Filter in a 2019-2025 Cadillac XT4 (Engine: Inline 4 2.0L)
Beginner-friendly instructions with required tools, safety tips, and glove-box access steps for 2019, 2020, 2021, 2022, 2023, 2024, 2025
How to Replace the Cabin Air Filter in a 2019-2025 Cadillac XT4 (Engine: Inline 4 2.0L)
Beginner-friendly instructions with required tools, safety tips, and glove-box access steps for 2019, 2020, 2021, 2022, 2023, 2024, 2025


🔧 XT4 - Cabin Air Filter Replacement
This is an easy first DIY job. The cabin air filter sits behind the passenger-side glove box and cleans air entering the heating and air-conditioning system.
Difficulty Level: Beginner | Estimated Time: 15-30 minutes
Assumption: These instructions cover the original glove-box filter housing and factory interior panels.
⚠️ Safety & Precautions
- ⚠️ Park your XT4, select Park, and switch the ignition completely off.
- 🧤 Wear gloves because the old filter may contain dust, pollen, and leaves.
- 🔌 Battery disconnection is not required.
- 🛑 Don’t force the glove-box stops or filter-cover tabs. The plastic can become brittle with heat.
🔧 Required Tools
You'll need the following tools for this repair:
- Small plastic trim removal tool
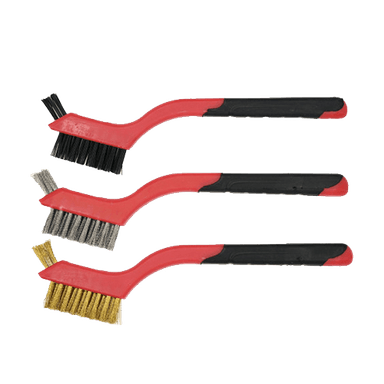
- Soft-bristle detailing brush
- Safety glasses
- Nitrile work gloves
- Portable vacuum with crevice attachment
- Flashlight
🔩 Required Parts
HowToo sells all the parts you need for this repair:
- Vehicle-matched cabin air filter - Qty: 1
An activated-carbon filter is a smart choice around Sonīpat because it can help with traffic odors and airborne dust. Plain paper works, but carbon earns its keep here.
📋 Before You Begin
- 🚙 Park on level ground and empty the glove box completely.
- 🌬️ Switch off the climate-control fan so it cannot pull loose debris into the housing.
- 📱 No infotainment menu, scan tool, reset, or filter registration is required.
- 🔎 Inspect the new filter for an airflow arrow before removing the old one.
🔨 Step-by-Step Instructions
Follow these steps in order:
Step 1: Open and empty the glove box
- Open the passenger door and glove box fully.
- Use the flashlight to inspect both sides of the glove-box bin.
- Remove every item so nothing falls behind the dashboard.
Step 2: Release the glove-box stops
- Support the glove box with one hand.
- Gently press both sides of the glove-box bin inward until its stop tabs clear the dashboard opening.
- Use the small plastic trim removal tool only if a side stop needs gentle assistance.
- Allow the glove box to swing downward slowly.
- Warm plastic bends more safely than cold plastic.
Step 3: Release the glove-box damper
- Look along the side of the glove box for the small damper arm, which controls how slowly the box opens.
- Use your fingers or the small plastic trim removal tool to carefully unclip the damper arm if it prevents the glove box from lowering.
- Don’t pull directly on the thin arm.
Step 4: Open the filter housing
- Use the flashlight to locate the rectangular cabin-filter access cover behind the lowered glove box.
- Press the retaining tabs inward with your fingers.
- Use the small plastic trim removal tool gently if a tab is difficult to reach.
- Pull the access cover straight away from the housing and set it aside.
Step 5: Remove the old filter
- Note the direction of the airflow arrow printed on the old filter before moving it.
- Pull the old filter straight out, squeezing its sides slightly only if clearance is tight.
- Keep the dirty side facing upward to avoid spilling debris.
- Wear safety glasses and nitrile work gloves while handling it.
Step 6: Clean the filter compartment
- Use the portable vacuum with crevice attachment to remove loose leaves and dust near the opening.
- Use the soft-bristle detailing brush to loosen debris around the housing lip.
- Don’t push the vacuum attachment deeply into the HVAC housing because the blower components are nearby.
Step 7: Install the new filter
- Match the new filter's airflow arrow to the direction shown by the old filter or the marking on the housing.
- Slide the filter evenly into its guides without crushing the pleats.
- Confirm the filter sits flat and its sealing edges aren’t folded.
- The arrow matters. Airflow isn't a suggestion.
Step 8: Reinstall the access cover
- Place the filter cover into its locating slots.
- Press across the cover until every retaining tab clicks securely.
- Use the flashlight to confirm the cover is seated evenly with no visible gap.
Step 9: Raise the glove box
- Reconnect the damper arm by pressing it onto its mounting point until it clicks.
- Raise the glove-box bin while gently pressing both sides inward.
- Guide the stop tabs past the dashboard opening and release the sides.
- Open and close the glove box once to confirm smooth movement.
✅ After Repair
- ✅ Start your XT4 and run the fan at low speed.
- 🌬️ Increase the fan through several speeds and listen for fluttering, whistling, or rubbing.
- 🔍 If airflow sounds abnormal, reopen the housing and check that the filter is flat and the cover is latched.
- 🗑️ Seal the old filter in a bag before disposal.
- 📅 Inspect the filter about every 12 months, sooner with frequent dusty-road or heavy-traffic driving.
💰 DIY vs Shop Cost
Shop Cost: $70-$140 equivalent, depending on local labor and filter type
DIY Cost: $10-$35 equivalent for a disposable filter
You Save: Approximately $40-$105 by doing it yourself!
Shop labor rates vary by region. This repair takes a shop approximately 0.2-0.5 hours.
🎯 Ready to get started?
HowToo makes it easy: same-day/2-day shipping on every part, plus all the tools and specialty tools you need! Check out the parts and tools sections below to add everything to your cart.
