

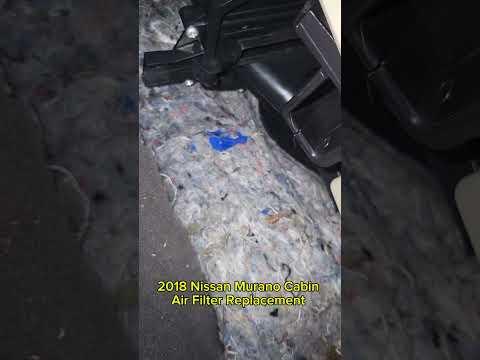






How to Replace the Cabin Air Filter in a 2015-2024 Nissan Murano
Step-by-step passenger footwell access instructions with tools and safety tips for 2015, 2016, 2017, 2018, 2019, 2020, 2021, 2022, 2023, 2024
How to Replace the Cabin Air Filter in a 2015-2024 Nissan Murano
Step-by-step passenger footwell access instructions with tools and safety tips for 2015, 2016, 2017, 2018, 2019, 2020, 2021, 2022, 2023, 2024


🔧 Murano - Cabin Air Filter Replacement
The cabin air filter cleans dust, pollen, and road debris from air entering your Murano’s heating and air-conditioning system. It is accessed through the front-passenger footwell near the center console; the glove box does not need to be removed.
Difficulty Level: Beginner | Estimated Time: 15-25 minutes
Assumption: These instructions apply to the stock U.S.-market climate-control housing.
⚠️ Safety & Precautions
- ⚠️ Switch the ignition and climate-control system off before opening the filter housing.
- 🧤 Wear gloves because the old filter can contain dust, pollen, and insect debris.
- 🔌 Battery disconnection is not required for this repair.
- 🚫 Do not switch on the blower motor while the filter is removed.
🔧 Required Tools
You'll need the following tools for this repair:
- Plastic interior trim-removal tool
- LED inspection flashlight
- Disposable nitrile gloves
- Safety glasses
🔩 Required Parts
HowToo sells all the parts you need for this repair:
- Cabin air filter - Qty: 1
📋 Before You Begin
- 🚙 Park your Murano on level ground, engage the parking brake, and switch the ignition off.
- 💺 Move the front-passenger seat fully rearward to create working space.
- 📦 Remove loose items from the passenger footwell.
- 🔦 Place the LED inspection flashlight where it illuminates the left side of the passenger footwell.
🔨 Step-by-Step Instructions
Follow these steps in order:
Step 1: Locate the Filter Housing
- Use the LED inspection flashlight and look beneath the dashboard from the front-passenger footwell.
- Find the narrow cabin-filter access cover on the side of the HVAC housing, close to the center console. HVAC means the heating, ventilation, and air-conditioning unit.
Step 2: Remove the Passenger-Side Lower Trim
- Use the plastic interior trim-removal tool to release the edge of the lower side trim beside the center console.
- Pull the trim gently outward to release its pressure clips, then place it somewhere safe.
- Do not twist the trim sharply; the retaining clips and panel can crack.
- Pull near each clip, not between clips.
Step 3: Remove the Filter Access Cover
- Use your gloved fingers to press the retaining tab on the filter access cover.
- Pull the cover away from the HVAC housing and note how its opposite end engages the housing.
- No fastener torque applies because the cover uses molded retaining tabs.
Step 4: Remove the Old Filter
- Use your gloved fingers to grasp the exposed edge of the old cabin air filter.
- Compress the filter slightly and pull it sideways through the narrow opening.
- Remove it slowly so trapped debris does not spill into the blower housing or carpet.
- Use the LED inspection flashlight to check the empty housing for leaves or large debris.
- Do not push tools or a vacuum nozzle deeply into the housing because the evaporator fins can be damaged.
Step 5: Check the New Filter Direction
- Compare the new filter’s dimensions and shape with the removed filter.
- If the new filter has an UP arrow, install it with that arrow pointing upward.
- If it has only an AIR FLOW arrow, match the arrow direction recorded from the original filter.
- Do not use the printed text alone to determine orientation; different filter manufacturers print their labels differently.
Step 6: Install the New Filter
- Use both gloved hands to compress the sides of the new filter gently.
- Guide it through the housing opening without crushing or sharply folding the filter media.
- Allow the filter to expand fully inside the housing.
- Use the LED inspection flashlight to verify that no filter edge is caught outside the opening.
- A gentle curve is normal during installation.
Step 7: Reinstall the Access Cover
- Use your fingers to engage the fixed end of the access cover first.
- Press the tabbed end toward the housing until it clicks securely into place.
- Tug the cover lightly by hand to confirm it is latched.
- No fastener torque applies because the cover snaps into place.
Step 8: Reinstall the Lower Trim
- Use the LED inspection flashlight to align every trim clip with its matching opening.
- Press the trim panel inward with your hands directly over each clip until it seats evenly.
- Check that the panel edges are flush and that no wiring or carpet is trapped behind it.
- No fastener torque applies because the panel is retained by pressure clips.
✅ After Repair
- ✅ Start your Murano and run the climate-control blower through all fan speeds.
- 👂 Listen for fluttering, ticking, or rubbing noises that could indicate an incorrectly seated filter.
- 💨 Confirm that airflow comes normally from the selected vents.
- 🔍 Recheck the access cover if airflow is weak or an unusual noise begins immediately after replacement.
- 📅 Inspect the filter about every 12 months or 15,000 miles, and more often in dusty conditions.
💰 DIY vs Shop Cost
Shop Cost: ₹1,800-₹4,000 (parts + labor)
DIY Cost: ₹700-₹2,000 (parts only)
You Save: ₹1,100-₹2,000 by doing it yourself!
Local labor and imported filter prices vary. This repair takes a shop approximately 0.2-0.4 hour.
🎯 Ready to get started?
HowToo makes it easy: same-day/2-day shipping on every part, plus all the tools and specialty tools you need! Check out the parts and tools sections below to add everything to your cart.