






How to Replace the Cabin Air Filter in a 2015-2022 Chevrolet Trax (Trim: LT | Engine: Inline 4 1.4L | Body: Sport Utility)
Step-by-step glove box removal, filter installation, tools, and safety tips for 2015, 2016, 2017, 2018, 2019, 2020, 2021, 2022
How to Replace the Cabin Air Filter in a 2015-2022 Chevrolet Trax (Trim: LT | Engine: Inline 4 1.4L | Body: Sport Utility)
Step-by-step glove box removal, filter installation, tools, and safety tips for 2015, 2016, 2017, 2018, 2019, 2020, 2021, 2022


🔧 Trax - Cabin Air Filter Replacement
The cabin air filter is behind the glove box. Replacing it improves heater and air-conditioning airflow while reducing dust, pollen, and odors inside your Trax.
Difficulty Level: Beginner | Estimated Time: 10-20 minutes
⚠️ Safety & Precautions
- ⚠️ Park your Trax, shift into Park, and switch the ignition off.
- 🧤 Wear gloves because the old filter may contain dust and allergens.
- 🔋 Battery disconnection is not required.
- 🚫 Do not run the blower while the filter is removed.
🔧 Required Tools
You'll need the following tools for this repair:
- LED flashlight
- Portable vacuum with crevice attachment
- Nitrile work gloves
- Safety glasses
🔩 Required Parts
HowToo sells all the parts you need for this repair:
- Cabin air filter - Qty: 1
📋 Before You Begin
- 🚙 Park on level ground, shift into Park, and apply the parking brake.
- 💡 Switch off the ignition, climate-control system, and blower motor.
- 📦 Empty the glove box so its contents do not fall onto the floor.
- 🔎 Compare the new filter with the old one before installation.
🔨 Step-by-Step Instructions
Follow these steps in order:
Step 1: Lower the Glove Box
- Use the LED flashlight to inspect both sides of the open glove box.
- With both hands, gently press the glove-box side walls inward so the stop tabs clear the dashboard opening.
- Slowly lower the glove box toward the passenger floor. Do not force its hinges.
- Emptying the box makes the sides easier to flex.
Step 2: Open the Filter Compartment
- Use the LED flashlight to locate the narrow rectangular filter cover behind the glove box.
- Release the locking tabs on the cover by hand, then pull the cover straight outward.
- Set the cover aside with its orientation unchanged.
Step 3: Remove the Old Filter
- Wear nitrile work gloves and safety glasses.
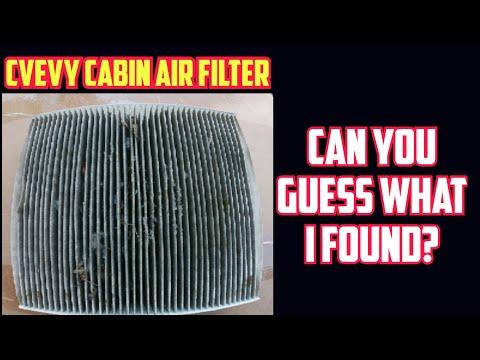
- Note the direction of the airflow arrow printed on the old filter.
- Pull the filter straight out by hand. Keep it level so loose debris does not spill into the blower housing.
- Photograph the old arrow direction before removal.
Step 4: Clean the Filter Housing
- Use the LED flashlight to check the empty housing for leaves and dirt.
- Use the portable vacuum with crevice attachment to remove loose debris near the opening.
- Do not push the vacuum attachment deeply into the housing or contact the blower fan.
Step 5: Install the New Filter
- Hold the new cabin air filter by its reinforced edges with your gloved hands.
- Install it with the airflow arrow matching the old filter’s direction; on the original Trax housing, the arrow normally points downward.
- Slide the filter fully into the housing without crushing or folding the pleats.
- Airflow arrows show airflow, not which side faces you.
Step 6: Reinstall the Filter Cover
- Use the LED flashlight to align the filter cover with the housing.
- Install the cover by hand and press evenly until both locking tabs click into place.
- Gently pull on the cover to verify it is secured.
Step 7: Raise the Glove Box
- Raise the glove box by hand while gently pressing its side walls inward.
- Move the stop tabs past the dashboard opening, then release the sides.
- Open and close the glove box once to confirm smooth movement.
✅ After Repair
- ✅ Start your Trax and operate the blower at each speed.
- 🌬️ Confirm that air flows normally without rattling, rubbing, or whistling sounds.
- 🔎 If airflow is restricted, switch the blower off and check that the filter is not folded or installed backward.
- 📅 Inspect the filter about every 12 months or 12,000-15,000 miles, and sooner in dusty conditions.
💰 DIY vs Shop Cost
Shop Cost: ₹2,000-₹4,500 (parts + labor)
DIY Cost: ₹900-₹2,500 (part only)
You Save: ₹1,100-₹2,000 by doing it yourself!
Local labor and imported-part prices vary. This repair takes a shop approximately 0.2-0.4 hours.
🎯 Ready to get started?
HowToo makes it easy: same-day/2-day shipping on every part, plus all the tools and specialty tools you need! Check out the parts and tools sections below to add everything to your cart.