


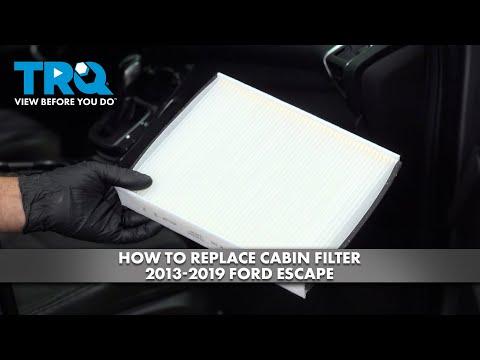







How to Replace the Cabin Air Filter in a 2013-2019 Ford Escape
Step-by-step DIY instructions with required tools, filter type, safety tips, and installation guidance for 2013, 2014, 2015, 2016, 2017, 2018, 2019
How to Replace the Cabin Air Filter in a 2013-2019 Ford Escape
Step-by-step DIY instructions with required tools, filter type, safety tips, and installation guidance for 2013, 2014, 2015, 2016, 2017, 2018, 2019


🔧 Escape - Cabin Air Filter Replacement
Easy first DIY job. The filter sits under the instrument panel on the passenger side, near the center console, and replacement requires removing one trim panel and a narrow filter cover. Ford lists the correct cabin-filter type as FP-70, and matching replacements are now shown in the parts section. fordservicecontent.com)
Difficulty Level: Beginner | Estimated Time: 20-35 minutes
⚠️ Safety & Precautions
- ⚠️ Switch the ignition and climate-control fan completely off.
- 🧤 Wear gloves because the old filter can contain heavy dust and debris.
- 💡 Don’t disconnect the battery. This repair doesn’t involve electrical connectors unless a footwell lamp obstructs access.
- 🧹 Don’t push debris into the open HVAC housing. It can reach the blower fan and cause noise.
🔧 Required Tools
You'll need the following tools for this repair:
- Torx T20 screwdriver
- Plastic trim-removal tool
- Small LED flashlight
- Work gloves
- Safety glasses
🔩 Required Parts
HowToo sells all the parts you need for this repair:
- Cabin air filter - Qty: 1
📋 Before You Begin
- 🚙 Park your Escape on level ground and move the passenger seat fully rearward.
- 🔑 Switch the ignition off and remove everything from the passenger footwell.
- 📦 Keep the new filter sealed until the old filter is removed.
- ➡️ Find the airflow arrow printed on the new filter before installing it.
🔨 Step-by-Step Instructions
Follow these steps in order:
Step 1: Access the Passenger Footwell
- Open the passenger door and kneel beside the vehicle rather than twisting under the dashboard.
- Use the small LED flashlight to look beneath the glove box and toward the center console.
- The cabin filter is behind the narrow vertical cover on the HVAC housing. HVAC means the heating and air-conditioning unit.
Step 2: Remove the Lower Trim Panel
- Use the plastic trim-removal tool to release the retainers holding the soft lower panel beneath the glove box.
- Lower the panel carefully. If a footwell lamp is fitted, don’t pull on its wiring.
- Move the panel aside without sharply bending it.
- Plastic clips prefer patience over horsepower.
Step 3: Remove the Filter Cover
- Locate the narrow cabin-filter cover near the center-console side of the passenger footwell.
- If your cover has a screw, use the Torx T20 screwdriver to remove the screw at the lower end. Some covers may be retained primarily by tabs. fordpartsonsale.com)
- Release the cover tabs gently and remove the cover.
- Keep the screw somewhere safe. It’s small enough to disappear into another dimension.
Step 4: Remove the Old Filter
- Note the direction of the airflow arrow on the old filter before moving it.
- Grip the exposed edge and pull the filter out slowly.
- The opening is tight, so gently compress or flex the old filter as it comes out.
- Keep the dirty side facing upward to avoid spilling debris into the housing.
Step 5: Inspect the Filter Housing
- Use the small LED flashlight to inspect the opening.
- Remove loose leaves near the entrance by hand while wearing work gloves.
- Don’t insert tools deeply into the housing because the blower fan is nearby.
Step 6: Install the New Filter
- Match the new filter's airflow arrow to the direction observed on the old filter.
- Gently compress the new filter and slide it fully into the housing.
- Make sure the pleats aren’t folded over and the filter sits squarely in its channel.
- Never force it. If it stops abruptly, withdraw it and check the orientation.
Step 7: Reinstall the Filter Cover
- Engage the cover tabs with the HVAC housing.
- Confirm the cover sits flush along its entire edge.
- If equipped, reinstall the screw using the Torx T20 screwdriver.
- No published service torque is needed here. Tighten the small screw gently until snug without crushing the plastic.
Step 8: Reinstall the Lower Panel
- Reconnect the footwell lamp if it was disconnected.
- Position the lower trim panel under the glove box.
- Align each retainer, then press upward by hand until every clip is fully seated.
- Check that the panel doesn’t hang down or contact the passenger's feet.
✅ After Repair
- 🌬️ Start your Escape and run the blower at every speed.
- 👂 Listen for clicking, scraping or fluttering that could indicate a folded filter.
- 🔍 Check that airflow comes evenly from the vents.
- ✅ No warning-light reset, programming or infotainment procedure is required.
- 🗓️ Inspect the filter more frequently in Sonīpat's dusty conditions, especially after heavy construction dust or crop-residue season.
💰 DIY vs Shop Cost
Shop Cost: $60-$120 (parts + labor)
DIY Cost: $10-$28 (parts only)
You Save: $32-$110 by doing it yourself!
Shop labor rates vary but typically run $100-$150/hour. This repair takes a shop approximately 0.3-0.5 hours.
🎯 Ready to get started?
HowToo makes it easy: same-day/2-day shipping on every part, plus all the tools and specialty tools you need! Check out the parts and tools sections below to add everything to your cart.
