

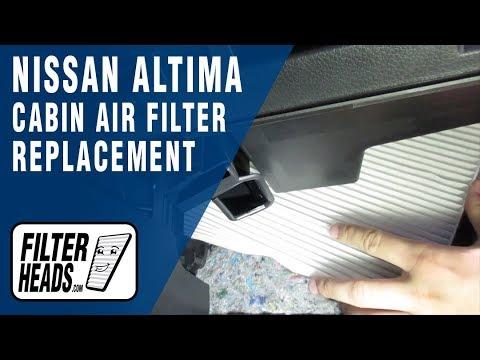







How to Replace the Cabin Air Filter in a 2013-2018 Nissan Altima (Engine: Inline 4 2.5L)
Step-by-step DIY instructions with required tools, filter orientation, and safety tips for 2013, 2014, 2015, 2016, 2017, 2018
How to Replace the Cabin Air Filter in a 2013-2018 Nissan Altima (Engine: Inline 4 2.5L)
Step-by-step DIY instructions with required tools, filter orientation, and safety tips for 2013, 2014, 2015, 2016, 2017, 2018


🔧 Altima - Cabin Air Filter Replacement
The cabin air filter cleans dust, pollen, and debris from air entering your Altima’s climate-control system. It is located behind the glove box and should generally be replaced every 15,000–30,000 miles, or sooner in dusty conditions.
Difficulty Level: Beginner | Estimated Time: 20–35 minutes
⚠️ Safety & Precautions
- ⚠️ Switch the ignition off and remove the key from the vehicle.
- ⚠️ Do not disconnect or disturb any yellow airbag wiring near the passenger-side dashboard.
- ⚠️ Support the glove box while removing it so its wiring and hinges are not strained.
- ⚠️ Battery disconnection is not required for this repair.
🔧 Required Tools
You'll need the following tools for this repair:
- Phillips #2 screwdriver
- Plastic interior trim-removal tool
- LED flashlight
- Household vacuum with crevice attachment
- Nitrile work gloves
- Safety glasses
🔩 Required Parts
HowToo sells all the parts you need for this repair:
- Cabin air filter - Qty: 1
📋 Before You Begin
- 📍 Park your Altima on level ground, apply the parking brake, and switch off the ignition and climate-control system.
- 📦 Empty the glove box completely.
- 🔎 Compare the new filter with the old one before installation. The shape and dimensions must match.
- 🧰 A trim-removal tool is a flat plastic lever that releases interior panels without scratching them.
🔨 Step-by-Step Instructions
Follow these steps in order:
Step 1: Remove the Passenger-Side Dashboard Trim
- Open the front passenger door and glove box.
- Use the plastic interior trim-removal tool to carefully release the passenger-side dashboard end panel and the trim surrounding the glove-box opening as needed.
- Work slowly around each retaining clip. Do not twist the panels sharply.
- Keep clips aligned to prevent breakage.
Step 2: Remove the Glove-Box Screws
- Use the LED flashlight to locate the Phillips screws around the upper and lower edges of the glove-box assembly.
- Use the Phillips #2 screwdriver to remove the glove-box retaining screws.
- Place every screw in a safe container so none are lost.
- Support the glove box with one hand while removing the final screw.
Step 3: Move the Glove-Box Assembly Aside
- Pull the glove-box assembly straight toward the passenger seat to release its retaining clips.
- If a glove-box lamp connector is attached, press its locking tab by hand and unplug it. Do not pull on the wires.
- Set the glove-box assembly on a clean surface.
- Do not touch any yellow connectors or wiring; those identify the airbag circuit.
Step 4: Open the Cabin-Filter Housing
- Use the LED flashlight to find the narrow vertical filter cover near the center-console side of the opening.
- Press the filter-cover locking tab by hand, then remove the cover.
- Note the old filter’s orientation before pulling it out.
Step 5: Remove the Old Filter
- Put on the nitrile work gloves and safety glasses.
- Pinch the old filter slightly and pull it through the narrow housing opening by hand.
- Remove it slowly so trapped leaves and dust do not spill into the blower housing.
- Use the household vacuum with crevice attachment to remove loose debris visible at the filter opening. Do not push the attachment deeply into the housing.
Step 6: Install the New Cabin Air Filter
- Check the markings printed on the new filter.
- If it has an UP arrow, install that arrow pointing upward. If it has an AIR FLOW arrow, position it toward the rear of your Altima.
- Compress the filter gently by hand and feed it into the narrow opening. It should unfold fully inside the housing.
- Make sure the pleats are not crushed, folded over, or caught outside the housing.
- Never force the filter into place.
Step 7: Reinstall the Filter Cover
- Position the cabin-filter cover over the housing by hand.
- Engage its fixed end first, then press the locking tab until it clicks securely.
- Check that the cover sits flush around its entire edge.
Step 8: Reinstall the Glove Box
- Reconnect the glove-box lamp connector by hand if it was unplugged.
- Align the glove-box assembly with its dashboard clips and press it evenly into position.
- Use the Phillips #2 screwdriver to reinstall all retaining screws.
- Tighten the screws only until snug. These screws secure plastic parts and do not have a published service torque; overtightening can crack the mounting points.
Step 9: Reinstall the Trim Panels
- Align each trim-panel clip with its corresponding dashboard opening.
- Press each panel into place by hand until all clips click securely.
- Open and close the glove box to verify smooth movement and proper latch operation.
✅ After Repair
- ✅ Start your Altima and run the blower at each speed.
- ✅ Select both fresh-air and recirculation modes and listen for rubbing, fluttering, or whistling.
- ✅ Confirm that airflow from the vents is strong and free of unusual odors.
- ✅ If airflow is restricted or noisy, switch the blower off and check that the filter unfolded fully and the housing cover is seated correctly.
- ✅ No scan-tool reset, battery registration, or infotainment procedure is required.
💰 DIY vs Shop Cost
Shop Cost: ₹1,500–₹3,500 (parts + labor)
DIY Cost: ₹600–₹1,800 (filter only)
You Save: ₹900–₹1,700 by doing it yourself!
Labor rates around Panipat vary. This repair takes a shop approximately 0.3–0.5 hour.
🎯 Ready to get started?
HowToo makes it easy: same-day/2-day shipping on every part, plus all the tools and specialty tools you need! Check out the parts and tools sections below to add everything to your cart.