

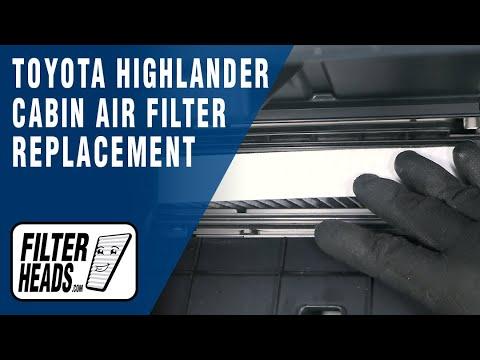




How to Replace the Cabin Air Filter in a 2008-2019 Toyota Highlander
Step-by-step glove box access, filter orientation, tools, and safety tips for 2008, 2009, 2010, 2011, 2012, 2013, 2014, 2015, 2016, 2017, 2018, 2019
How to Replace the Cabin Air Filter in a 2008-2019 Toyota Highlander
Step-by-step glove box access, filter orientation, tools, and safety tips for 2008, 2009, 2010, 2011, 2012, 2013, 2014, 2015, 2016, 2017, 2018, 2019


🔧 Highlander - Cabin Air Filter Replacement
The cabin air filter is behind the glove box. Replacing it improves airflow and helps keep dust, pollen, and odors out of your Highlander’s cabin.
Difficulty Level: Beginner | Estimated Time: 10-15 minutes
⚠️ Safety & Precautions
- ⚠️ Park on level ground, shift into Park, and turn the ignition off.
- 🧤 Wear gloves because the old filter may contain dust, leaves, and insects.
- 🔋 Battery disconnection is not required.
- 📦 Empty the glove box before lowering it.
🔧 Required Tools
You'll need the following tools for this repair:
- Nitrile work gloves
- LED flashlight
🔩 Required Parts
HowToo sells all the parts you need for this repair:
- Cabin air filter - Qty: 1
📋 Before You Begin
- 🚙 Park your Highlander on level ground and place the transmission in Park.
- 🔑 Turn off the ignition and remove the key from the vehicle.
- 📦 Open the passenger-side glove box and remove all stored items.
- 💡 Use an LED flashlight to view the glove-box damper and filter housing.
🔨 Step-by-Step Instructions
Follow these steps in order:
Step 1: Disconnect the Glove-Box Damper
- Open the glove box fully and use the LED flashlight to look along its right side.
- Find the small plastic damper arm attached to the glove box. The damper slows the glove box as it opens.
- Use gloved fingers to pull the damper arm gently sideways and off its mounting pin.
- Do not pry it with a screwdriver; the plastic can break.
Step 2: Lower the Glove Box
- Use both gloved hands to press the upper left and right sides of the glove box inward.
- Move the built-in stops past the dashboard opening.
- Carefully lower the glove box toward the floor. It can remain attached at its lower hinges.
- Press one side inward at a time.
Step 3: Remove the Filter Cover
- Use the LED flashlight to locate the rectangular cabin-filter housing behind the glove box.
- Use gloved fingers to release the retaining tabs on the filter cover.
- Pull the cover straight toward you and place it aside.
Step 4: Remove the Old Filter
- Use gloved fingers to slide the old filter straight out.
- Notice the direction marking before removing it completely.
- Keep the filter level so loose debris does not fall into the blower opening.
- Use the LED flashlight to inspect the housing. Remove loose leaves by hand without pushing debris deeper inside.
Step 5: Install the New Filter
- Use gloved hands to slide the new cabin air filter into the housing without crushing its pleats.
- If the filter is marked UP, install that arrow pointing upward.
- If it is marked AIR FLOW, install that arrow pointing downward because air travels from the top of the housing toward the blower.
- Confirm that the filter sits flat and completely inside the housing.
Step 6: Reinstall the Filter Cover
- Position the filter cover in its original orientation.
- Use gloved fingers to press the cover into place until its retaining tabs click securely.
- Gently pull on the cover to confirm it is locked.
Step 7: Reinstall the Glove Box
- Lift the glove box with both gloved hands.
- Press both sides inward and guide the upper stops back through the dashboard opening.
- Use gloved fingers to reconnect the damper arm to the pin on the right side.
- Open and close the glove box slowly to verify smooth operation.
- No fasteners are removed, so there are no torque specifications for this repair.
✅ After Repair
- 🌬️ Start your Highlander and operate the climate-control fan at each speed.
- 👂 Listen for rubbing, fluttering, or unusual blower noise. If present, switch the fan off and check that the filter is seated flat.
- ✅ Confirm that air flows normally from the dashboard vents.
- 🗓️ Inspect the filter about every 12 months or 15,000 miles. Replace it sooner in dusty conditions.
💰 DIY vs Shop Cost
Shop Cost: ₹1,500-₹3,000 (parts + labor)
DIY Cost: ₹600-₹1,500 (parts only)
You Save: ₹900-₹1,500 by doing it yourself!
Local labor and filter prices vary. This repair takes a shop approximately 0.2-0.3 hour.
🎯 Ready to get started?
HowToo makes it easy: same-day/2-day shipping on every part, plus all the tools and specialty tools you need! Check out the parts and tools sections below to add everything to your cart.