







How to Replace the Battery on a 2022 Ram 1500 Classic Pickup
Step-by-step 2022 Ram 1500 Classic battery change guide with tools, specs, safety tips, and post-install reset steps for 2019, 2020, 2021, 2022, 2023
How to Replace the Battery on a 2022 Ram 1500 Classic Pickup
Step-by-step 2022 Ram 1500 Classic battery change guide with tools, specs, safety tips, and post-install reset steps for 2019, 2020, 2021, 2022, 2023


1500 Classic - Battery Replacement 🔋
Got it—you want to change the main engine battery on your 1500 Classic. I’ll walk you through it step by step.
Safety First ⚠️
- 🛑 Engine off, key out, lights off, doors closed.
- 🛑 Wait 3–5 minutes after shutting off so modules go to sleep.
- 🛑 Don’t touch both battery terminals with metal tools at the same time.
- 🛑 If you feel unsure at any point, stop and ask—electricity can be dangerous.
Battery Location 🔍
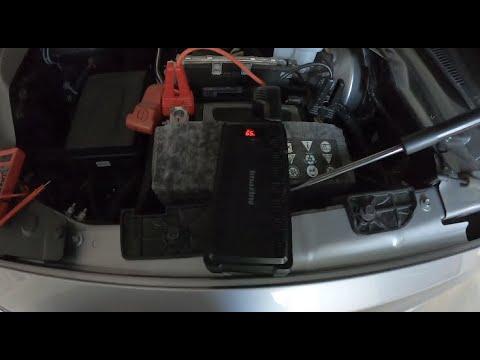
On your 1500 Classic, the main battery is in the engine bay on the right (passenger) side, near the firewall, under a plastic cover.
Parts You Need 🧩
- 🔧 Replacement battery:
- Group size typically 94R (H7) for this truck (verify on your existing battery label).
- Cold Cranking Amps (CCA): match or exceed what’s printed on your current battery.
- Top-post, standard polarity (positive and negative posts on top).
- 🔧 Optional:
- Battery terminal cleaner (wire brush or small battery brush).
- Anti-corrosion spray or a light coat of petroleum jelly for terminals.
Tools You Need 🛠️
- 🔧 10 mm socket + ratchet (for battery terminals and hold-down clamp).
- 🔧 13 mm socket (some trucks use this for the hold-down—have it ready).
- 🔧 Extension bar for the ratchet (helps reach the hold-down bolt).
- 🔧 Flat trim tool or flat screwdriver (to release plastic cover clips).
- 🔧 Gloves and safety glasses.
- 🔧 Memory saver (optional) – a small device that plugs into the OBD port or a 12V socket to keep radio presets and settings. If you don’t have one, it’s okay; you’ll just re-set your clock and preferences.
Before You Start 🧠
- 🔧 Park on level ground, set the parking brake, and put the shifter in PARK.
- 🔧 Open the hood and secure it with the prop rod.
- 🔧 If using a memory saver, plug it in now and turn it on.
Step 1 – Remove the Battery Cover 🧰
- 🧷 Find the plastic cover over the battery on the passenger side.
- 🧷 Release any clips or tabs with your fingers or a flat tool.
- 🧷 Lift the cover off and set it aside.
Step 2 – Disconnect the Battery Cables (Always Negative First) ➖➕
The negative terminal is usually black and marked “–”. The positive is red and marked “+”.
- ➖ Disconnect negative (-) cable:
- Use the 10 mm socket to loosen the clamp bolt on the negative terminal.
- Twist the clamp gently and lift it off the battery post.
- Move the cable aside so it cannot spring back onto the terminal (tuck it to the side).
- ➕ Disconnect positive (+) cable:
- Flip open the red plastic cover if there is one.
- Use the 10 mm socket to loosen the clamp bolt.
- Lift the clamp off and move it aside, away from the battery.
Step 3 – Remove the Battery Hold-Down 🔩
The hold-down is a metal or plastic bracket at the base of the battery that keeps it from moving.
- 🔧 Look at the bottom front or side of the battery for a bracket with a bolt.
- 🔧 Use a 10 mm or 13 mm socket with an extension to remove the hold-down bolt.
- 🔧 Lift the hold-down bracket out and set it aside.
Step 4 – Remove the Old Battery 🧱
- 💪 Batteries are heavy (around 20–25 kg). Lift with your legs, not your back.
- 💪 Grab the battery by the built-in handle (if it has one) or from the sides.
- 💪 Lift it straight up and out of the tray. Move it to a safe spot on the ground.
Step 5 – Clean the Battery Tray and Terminals 🧼
- 🧽 Check the tray for dirt or corrosion. Wipe it out with a rag.
- 🧽 If the cable clamps have white/green crust, use a battery brush or small wire brush to clean the inside of the clamps.
- 🧽 Do not get debris into your eyes—wear safety glasses.
Step 6 – Install the New Battery 🆕
- 📐 Make sure the new battery’s positive (+) and negative (-) posts are in the same positions as the old one before you drop it in.
- 📐 Lower the new battery into the tray carefully, keeping it level.
- 📐 Ensure it sits flat and fully in the tray.
Step 7 – Reinstall the Hold-Down 🔧
- 🔧 Put the hold-down bracket back in place at the base of the battery.
- 🔧 Install the bolt and tighten it snugly:
- Hold-down bolt torque: about 13 N·m (115 in-lb) is typical for this setup. If you don’t have a torque wrench, tighten it firmly but do not overtighten.
- 🔧 Check that the battery does not move when you push it.
Step 8 – Reconnect the Cables (Always Positive First) 🔁
- ➕ Connect positive (+) cable:
- Place the positive clamp on the positive post.
- Press it down fully, then tighten the 10 mm clamp bolt.
- Terminal clamp torque: about 5–6 N·m (45–55 in-lb). If no torque wrench, tighten until it does not twist by hand.
- Close the red cover over the terminal if equipped.
- ➖ Connect negative (-) cable:
- Place the negative clamp on the negative post.
- Tighten the 10 mm clamp bolt to the same torque.
- 🧴 Optional: Lightly spray anti-corrosion spray or apply a thin film of petroleum jelly on the terminals.
Step 9 – Refit the Battery Cover 🧩
- 🧷 Place the plastic cover back over the battery.
- 🧷 Snap all clips or tabs back into place.
Step 10 – Post-Installation Checks ✅
- 🔑 Get in the truck and turn the key to RUN (or press the start button without starting, if equipped).
- 🔑 Check that:
- Interior lights work.
- Radio powers on.
- Instrument cluster lights up normally.
- 🚚 Start the engine. It may crank slightly longer the first time; that’s normal.
Step 11 – Resetting Settings & Features 📻
Your 1500 Classic does not require battery “registration” with a scan tool like some European cars, but you may need to:
- 🕒 Set the clock:
- On the Uconnect screen, go to Settings → Clock & Date and adjust time/date.
- 📻 Re-enter radio presets and Bluetooth pairings if they were lost.
- 🪟 If any window auto-up/down doesn’t work, hold the switch to fully down, then fully up and hold for 2–3 seconds to relearn.
Battery Disposal 🌍
- ♻️ Do not throw the old battery in the trash.
- ♻️ Take it to an auto parts store or recycling center; most give a small credit for the old battery.
Need Help With Anything Specific? 🤔
If you can, tell me what’s printed on your current battery label (group size and CCA), and I can confirm the exact spec you should buy and whether an AGM (Absorbent Glass Mat) upgrade makes sense for your use.
HowToo makes it easy: below this answer you’ll see recommended batteries, terminal cleaners, and the sockets/ratchets you need. You can add them to your cart right from the parts section for fast shipping.