

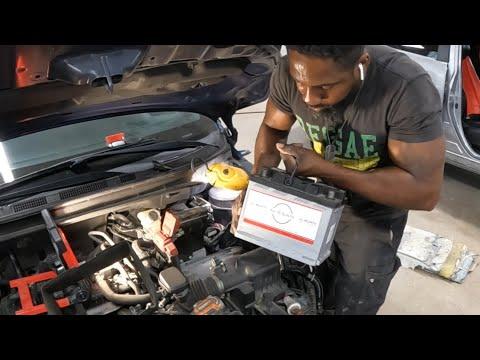






How to Replace the Battery on a 2018-2025 Nissan Kicks (Engine: Inline 4 1.6L)
Step-by-step 12V battery replacement guide with tools, parts, torque specs, and safety tips for 2018, 2019, 2020, 2021, 2022, 2023, 2024
How to Replace the Battery on a 2018-2025 Nissan Kicks (Engine: Inline 4 1.6L)
Step-by-step 12V battery replacement guide with tools, parts, torque specs, and safety tips for 2018, 2019, 2020, 2021, 2022, 2023, 2024


🔧 Kicks - 12V Battery Replacement
Replacing the 12-volt battery on your Kicks is a beginner-friendly job. The battery sits under the hood, and the main goal is to remove the old battery safely, install the new one securely, and prevent sparks or loose connections.
Difficulty Level: Beginner | Estimated Time: 20-40 minutes
⚠️ Safety & Precautions
- ⚠️ Wear safety glasses and gloves because batteries contain acid and can release explosive gas.
- ⚠️ Always remove the negative terminal first and reconnect it last to reduce spark risk.
- ⚠️ Keep metal tools away from both battery posts at the same time.
- ⚠️ Do not smoke or create sparks near the battery.
- ⚠️ Your Kicks may lose radio presets, clock settings, and some learned idle settings when the battery is disconnected.
- ⚠️ Battery registration is not required for your Kicks.
🔧 Required Tools
You'll need the following tools for this repair:
- 10mm wrench
- 10mm socket
- 3/8-inch ratchet
- 6-inch socket extension
- Battery terminal brush
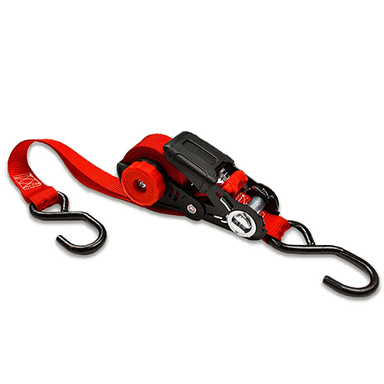
- Battery carrying strap
- Battery terminal puller (specialty)
- Digital multimeter
- Nitrile gloves
- Safety glasses
🔩 Required Parts
HowToo sells all the parts you need for this repair:
- 12V battery - Qty: 1
- Battery terminal protectant spray - Qty: 1
- Battery terminal anti-corrosion washers - Qty: 2
📋 Before You Begin
- 🅿️ Park your Kicks on level ground, shift to Park, and apply the parking brake.
- 🔑 Turn the ignition fully OFF and remove the key from the vehicle.
- ⏱️ Wait at least 3 minutes before disconnecting the battery so vehicle modules can go to sleep.
- 🧠 A memory saver is optional. A memory saver keeps power to the car during battery replacement, but it is not required for this repair.
- 📱 Write down radio presets or settings you care about before disconnecting the battery.
🔨 Step-by-Step Instructions
Follow these steps in order:
Step 1: Open the Hood and Locate the Battery
- Use the interior hood release, then open the hood and support it with the hood prop rod.
- The battery is in the engine bay, near the front side of the compartment.
- Use safety glasses and nitrile gloves before touching the battery.
- Keep tools away from both posts.
Step 2: Identify the Battery Terminals
- Find the negative terminal marked with a minus sign -. It usually has a black cable.
- Find the positive terminal marked with a plus sign +. It usually has a red cover or red cable.
- A terminal is the metal clamp that connects the vehicle cable to the battery post.
Step 3: Disconnect the Negative Terminal First
- Use a 10mm wrench to loosen the nut on the negative terminal clamp.
- Twist the clamp gently by hand and lift it off the battery post.
- If the clamp is stuck, use a battery terminal puller. A battery terminal puller gently lifts the clamp without damaging the battery post.
- Move the negative cable aside so it cannot spring back and touch the battery post.
Step 4: Disconnect the Positive Terminal
- Lift the red protective cover if equipped.
- Use a 10mm wrench to loosen the nut on the positive terminal clamp.
- Twist the clamp gently by hand and lift it off the battery post.
- Move the positive cable aside and keep it from touching metal parts.
Step 5: Remove the Battery Hold-Down Bracket
- Use a 10mm socket, 3/8-inch ratchet, and 6-inch socket extension to remove the battery hold-down fasteners.
- The hold-down bracket is the metal piece that locks the battery in place so it cannot slide around.
- Remove the bracket and set it aside.
- Do not lose the hold-down hardware.
Step 6: Lift Out the Old Battery
- Use a battery carrying strap to lift the battery straight up and out.
- A battery carrying strap hooks to the battery and gives you a safer handle.
- Keep the battery upright at all times.
- Batteries are heavy, so use both hands and lift slowly.
Step 7: Clean the Cable Clamps and Battery Tray
- Use a battery terminal brush to clean the inside of both cable clamps.
- Use the same battery terminal brush to lightly clean the new battery posts if needed.
- Check the battery tray for dirt, corrosion, or loose pieces.
- If you see white or green crust, avoid touching it with bare skin because it can be acidic.
Step 8: Install the New Battery
- Use a battery carrying strap to lower the new battery into the tray.
- Make sure the positive and negative posts are on the same sides as the old battery.
- Confirm the battery sits flat in the tray.
- Do not force the cables to fit.
Step 9: Reinstall the Battery Hold-Down Bracket
- Install the battery hold-down bracket by hand first.
- Use a 10mm socket, 3/8-inch ratchet, and 6-inch socket extension to tighten the hold-down fasteners.
- Tighten until the battery cannot move by hand.
- Torque to 4-6 Nm (35-53 in-lbs) if using a torque tool.
- Do not overtighten, because the battery case can crack.
Step 10: Connect the Positive Terminal First
- Install one battery terminal anti-corrosion washer over the positive battery post.
- Place the positive cable clamp fully down onto the positive battery post.
- Use a 10mm wrench to tighten the clamp nut.
- Torque to 5-7 Nm (44-62 in-lbs).
- Close the red protective cover if equipped.
Step 11: Connect the Negative Terminal Last
- Install one battery terminal anti-corrosion washer over the negative battery post.
- Place the negative cable clamp fully down onto the negative battery post.
- Use a 10mm wrench to tighten the clamp nut.
- Torque to 5-7 Nm (44-62 in-lbs).
- A small spark at the final connection can be normal.
Step 12: Protect the Terminals
- Use battery terminal protectant spray on the installed terminal clamps.
- Spray a light coating only after both terminals are tight.
- Do not spray into electrical connectors or fuse boxes.
Step 13: Check Battery Voltage
- Use a digital multimeter set to DC volts.
- Touch the red meter lead to the positive battery post and the black meter lead to the negative battery post.
- A fully charged battery should read about 12.4-12.8 volts with the engine off.
- Start the engine and check again. Charging voltage should be about 13.5-14.8 volts.
✅ After Repair
- ✅ Start your Kicks and let it idle for a few minutes.
- ✅ Turn the steering wheel gently left and right if warning lights appear, then drive slowly a short distance to let systems relearn.
- ✅ Reset the clock and radio presets if needed.
- ✅ Check that the battery is secure by trying to move it by hand. It should not slide or tip.
- ✅ Recheck the terminals after your first drive. They should still be tight and clean.
- ♻️ Recycle the old battery at a parts store or recycling center. Do not throw it in household trash.
💰 DIY vs Shop Cost
Shop Cost: $180-$320 (parts + labor)
DIY Cost: $120-$220 (parts only)
You Save: $60-$100 by doing it yourself!
Shop labor rates vary but typically run $100-$150/hour. This repair takes a shop approximately 0.3-0.6 hours.
🎯 Ready to get started?
HowToo makes it easy: same-day/2-day shipping on every part, plus all the tools and specialty tools you need! Check out the parts and tools sections below to add everything to your cart.