

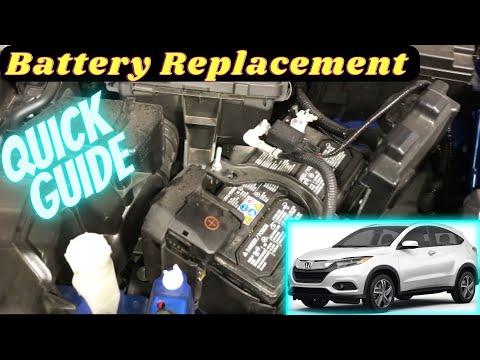






How to Replace the Battery on a 2016-2021 Honda HR-V (Engine: Inline 4 1.8L)
Step-by-step DIY guide with Group 51R battery, tools, torque specs, and safety tips for 2016, 2017, 2018, 2019, 2020, 2021
How to Replace the Battery on a 2016-2021 Honda HR-V (Engine: Inline 4 1.8L)
Step-by-step DIY guide with Group 51R battery, tools, torque specs, and safety tips for 2016, 2017, 2018, 2019, 2020, 2021


🔧 HR-V - Battery Replacement
Your HR-V’s 12-volt battery sits under the hood and can be replaced with basic hand tools. The job is simple, but the battery is heavy and the cable order matters so you do not accidentally short anything.
Difficulty Level: Beginner | Estimated Time: 20-40 minutes
⚠️ Safety & Precautions
- ⚠️ Always remove the negative cable first and install it last. This reduces the chance of sparks.
- ⚠️ Do not let metal tools touch both battery terminals at the same time.
- ⚠️ Wear safety glasses and gloves. Battery acid can burn skin and eyes.
- ⚠️ Keep flames, cigarettes, and sparks away from the battery.
- ⚠️ Your HR-V does not require battery registration or coding after replacement.
🔧 Required Tools
You'll need the following tools for this repair:
- 10mm socket
- 3/8-inch ratchet
- 3/8-inch extension, 6-inch
- 10mm wrench
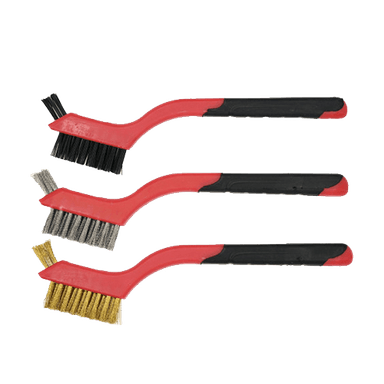
- Battery terminal cleaning brush
- Torque wrench, inch-pound
- Battery carrier strap (specialty)
- Memory saver, OBD-II style (specialty)
- Nitrile gloves
- Safety glasses
🔩 Required Parts
HowToo sells all the parts you need for this repair:
- 12-volt battery, BCI Group 51R - Qty: 1
- Battery terminal protectant spray - Qty: 1
- Battery terminal anti-corrosion washers - Qty: 2
📋 Before You Begin
- Park your HR-V on level ground, shift to Park, and set the parking brake.
- Turn the ignition off and remove the key/fob from the vehicle.
- Open the hood and let the vehicle sit for at least 3 minutes so control modules can go to sleep.
- If using a memory saver, plug it into the OBD-II port before disconnecting the battery. A memory saver keeps small power supplied so radio presets and learned settings are less likely to reset.
- If you do not use a memory saver, you may need to reset the clock, radio presets, and auto window function afterward.
🔨 Step-by-Step Instructions
Follow these steps in order:
Step 1: Open the Hood and Find the Battery
- Use the hood release inside your HR-V, then lift the hood and secure it with the prop rod.
- The battery is located in the engine bay near the front corner.
- Put on safety glasses and nitrile gloves before touching the battery.
Step 2: Disconnect the Negative Cable
- Find the negative terminal. It is marked with a minus symbol, -, and usually has a black cable.
- Use a 10mm wrench to loosen the negative terminal nut.
- Twist the cable end gently and lift it off the battery post.
- Move the cable away from the battery so it cannot spring back and touch the terminal.
- Negative off first, always.
Step 3: Disconnect the Positive Cable
- Open the red protective cover on the positive terminal.
- The positive terminal is marked with a plus symbol, +.
- Use a 10mm wrench to loosen the positive terminal nut.
- Lift the positive cable off the battery post and move it aside.
- Do not let the positive cable touch metal body parts.
Step 4: Remove the Battery Hold-Down Bracket
- The hold-down bracket keeps the battery from moving while driving.
- Use a 10mm socket, 3/8-inch ratchet, and 6-inch extension to loosen the two hold-down nuts.
- Remove the bracket and J-hooks carefully. J-hooks are the long hooked rods that clamp the battery down.
- Set the bracket, nuts, and hooks somewhere safe.
Step 5: Remove the Old Battery
- Attach a battery carrier strap to the old battery if available.
- Lift the battery straight up and out of the tray.
- Keep the battery upright at all times.
- Batteries are heavy, so use both hands and do not lean it against the fender.
Step 6: Clean the Battery Cable Ends
- Use a battery terminal cleaning brush to clean the inside of both cable ends.
- Clean until the metal looks bright and free of white or green corrosion.
- If corrosion dust is present, avoid breathing it and keep your gloves on.
Step 7: Install the New Battery
- Place the new BCI Group 51R battery into the battery tray.
- Make sure the positive and negative posts are in the same position as the old battery.
- The battery must sit flat in the tray and not rock side to side.
Step 8: Reinstall the Hold-Down Bracket
- Install the J-hooks and hold-down bracket over the new battery.
- Use a 10mm socket, 3/8-inch ratchet, and 6-inch extension to snug the nuts evenly.
- Use a torque wrench, inch-pound to tighten the hold-down nuts to Torque to 10 Nm (7 ft-lbs).
- Do not overtighten. The battery case can crack.
Step 9: Connect the Positive Cable First
- Install one battery terminal anti-corrosion washer on the positive battery post if supplied.
- Push the positive cable fully down onto the positive post.
- Use a 10mm wrench to tighten the terminal nut.
- Use a torque wrench, inch-pound if access allows and tighten to Torque to 5 Nm (44 in-lbs).
- Close the red positive terminal cover.
Step 10: Connect the Negative Cable Last
- Install one battery terminal anti-corrosion washer on the negative battery post if supplied.
- Push the negative cable fully down onto the negative post.
- Use a 10mm wrench to tighten the terminal nut.
- Use a torque wrench, inch-pound if access allows and tighten to Torque to 5 Nm (44 in-lbs).
- A small spark may happen when connecting the negative cable. That is normal.
Step 11: Protect the Terminals
- Lightly spray the cable ends and battery posts with battery terminal protectant spray.
- Do not soak the terminals. A light coating is enough.
- Gently tug each cable by hand to confirm it is tight.
Step 12: Start the Vehicle
- Remove the memory saver if one was used.
- Start your HR-V and let it idle.
- Check that the battery warning light turns off after the engine starts.
- If the idle feels slightly different at first, let the engine idle for a few minutes with accessories off.
✅ After Repair
- ✅ Confirm the engine starts normally and the battery light is off.
- ✅ Reset the clock and radio presets if they were lost.
- ✅ If the driver auto window does not work, run the window fully down, then fully up, and hold the switch up for about 2 seconds.
- ✅ Turn the steering wheel fully left and right, then drive normally for a short distance if any steering or stability lights appear after battery disconnect.
- ✅ Recycle the old battery properly. Most parts stores accept the old battery as a core return.
💰 DIY vs Shop Cost
Shop Cost: $180-$320 (parts + labor)
DIY Cost: $120-$220 (parts only)
You Save: $60-$100 by doing it yourself!
Shop labor rates vary but typically run $100-$150/hour. This repair takes a shop approximately 0.3-0.5 hours.
🎯 Ready to get started?
HowToo makes it easy: same-day/2-day shipping on every part, plus all the tools and specialty tools you need! Check out the parts and tools sections below to add everything to your cart.