

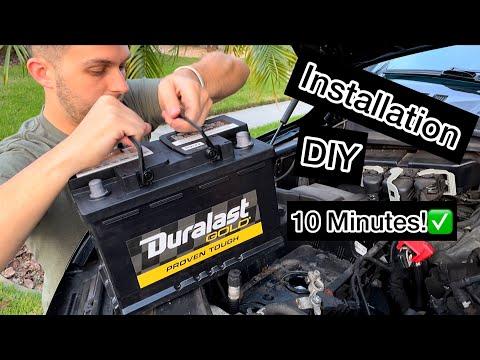





How to Replace the Battery on a 2015-2025 Ford F-150 (Trim: XL | Engine: V6 3.5L)
Step-by-step 12-volt battery installation with tools, parts, torque specs, and safety tips for 2015, 2016, 2017, 2018, 2019, 2020, 2021, 2022, 2023, 2024, 2025
How to Replace the Battery on a 2015-2025 Ford F-150 (Trim: XL | Engine: V6 3.5L)
Step-by-step 12-volt battery installation with tools, parts, torque specs, and safety tips for 2015, 2016, 2017, 2018, 2019, 2020, 2021, 2022, 2023, 2024, 2025


🔧 F-150 - Battery Replacement
Replacing the battery on your F-150 is a beginner-friendly job. You’ll remove the old 12-volt battery, clean the terminals if needed, install the new battery, and make sure it is secured so it cannot move while driving.
Difficulty Level: Beginner | Estimated Time: 20-40 minutes
⚠️ Safety & Precautions
- ⚠️ Wear safety glasses and gloves. Car batteries contain acid and can spark if handled incorrectly.
- ⚠️ Always disconnect the negative cable first. This reduces the chance of a short circuit.
- ⚠️ Do not let tools touch both battery terminals at the same time.
- ⚠️ Keep flames, cigarettes, and sparks away from the battery.
- ⚠️ The battery is heavy. Lift with both hands and keep it upright.
- ⚠️ Battery disconnect will temporarily reset some stored settings, such as clock and auto window memory.
🔧 Required Tools
You'll need the following tools for this repair:
- 10mm socket
- 8mm socket
- 3/8-inch drive ratchet
- 3/8-inch drive extension
- Battery terminal puller (specialty)
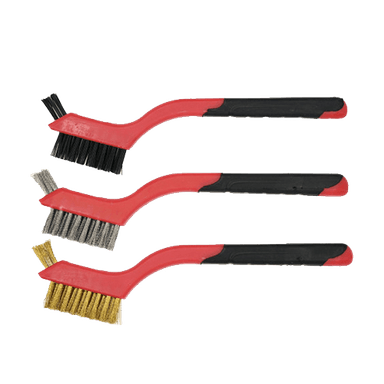
- Battery terminal cleaning brush
- Torque wrench inch-pound
- Memory saver 12-volt OBD-II (specialty)
- Shop towels
- Nitrile gloves
- Safety glasses
🔩 Required Parts
HowToo sells all the parts you need for this repair:
- 12-volt automotive battery - Qty: 1
- Battery terminal anti-corrosion protectant - Qty: 1
- Battery terminal felt washers - Qty: 2
📋 Before You Begin
- 🅿️ Park your F-150 on level ground, shift to Park, and set the parking brake.
- 🔑 Turn the ignition off and remove the key.
- ⏱️ Wait at least 3 minutes before disconnecting the battery so vehicle modules can go to sleep.
- 🔌 Optional: Connect a 12-volt OBD-II memory saver. A memory saver keeps low power to the truck so radio presets and some learned settings are not lost.
- 📍 The battery is under the hood on the passenger-side front area of the engine bay.
🔨 Step-by-Step Instructions
Follow these steps in order:
Step 1: Open the Hood
- Use your hand to pull the hood release inside the cab.
- Use your hand to release the secondary hood latch at the front of the hood.
- Raise the hood fully and make sure it is supported.
- Good lighting helps a lot.
Step 2: Locate the Battery Terminals
- Use safety glasses and nitrile gloves before touching the battery.
- Find the negative terminal, marked with a minus sign - and usually connected to a black cable.
- Find the positive terminal, marked with a plus sign + and usually protected by a red cover.
Step 3: Disconnect the Negative Cable First
- Use a 10mm socket, 3/8-inch drive ratchet, and 3/8-inch drive extension to loosen the negative battery terminal nut.
- Twist the negative cable end gently by hand and lift it off the battery post.
- If it is stuck, use a battery terminal puller. A terminal puller gently lifts the cable end without damaging the battery post.
- Move the negative cable away from the battery so it cannot spring back and touch the post.
- Negative cable always comes off first.
Step 4: Disconnect the Positive Cable
- Open the red positive terminal cover by hand if equipped.
- Use a 10mm socket, 3/8-inch drive ratchet, and 3/8-inch drive extension to loosen the positive battery terminal nut.
- Lift the positive cable end off the battery post by hand.
- If it is stuck, use the battery terminal puller.
- Move the positive cable away from the battery.
Step 5: Remove the Battery Hold-Down
- Look at the base of the battery for the hold-down clamp. The hold-down clamp keeps the battery from sliding around.
- Use an 8mm socket, 3/8-inch drive ratchet, and 3/8-inch drive extension to remove the hold-down bolt.
- Remove the hold-down clamp by hand and set it aside.
Step 6: Remove the Old Battery
- Use both hands to lift the battery straight up and out of the tray.
- Keep the battery upright to avoid acid leakage.
- Place the old battery on cardboard or a stable surface.
- Batteries are heavier than they look.
Step 7: Clean the Battery Tray and Cable Ends
- Use shop towels to wipe dirt from the battery tray.
- Use a battery terminal cleaning brush to clean the inside of both cable ends if there is white, green, or gray corrosion.
- If corrosion is heavy, clean slowly and avoid breathing dust.
- Make sure the cable ends are dry before installing the new battery.
Step 8: Install the New Battery
- Use both hands to lower the new 12-volt automotive battery into the tray.
- Make sure the positive and negative posts are in the same positions as the old battery.
- Make sure the battery sits flat in the tray.
Step 9: Reinstall the Hold-Down Clamp
- Install the hold-down clamp by hand.
- Use an 8mm socket, 3/8-inch drive ratchet, and torque wrench inch-pound to tighten the hold-down bolt.
- Torque to 9 Nm (80 in-lbs)
- Try to move the battery by hand. It should not slide or lift.
Step 10: Connect the Positive Cable First
- Install one battery terminal felt washer over the positive battery post if using felt washers.
- Push the positive cable end fully down onto the positive post by hand.
- Use a 10mm socket and torque wrench inch-pound to tighten the positive terminal nut.
- Torque to 6 Nm (53 in-lbs)
- Close the red positive terminal cover by hand.
Step 11: Connect the Negative Cable Last
- Install one battery terminal felt washer over the negative battery post if using felt washers.
- Push the negative cable end fully down onto the negative post by hand.
- Use a 10mm socket and torque wrench inch-pound to tighten the negative terminal nut.
- Torque to 6 Nm (53 in-lbs)
- Apply battery terminal anti-corrosion protectant to the terminal areas after tightening.
- Positive on first, negative on last.
Step 12: Start the Truck
- Use the key to start your F-150.
- Let it idle for 1-2 minutes.
- Check that the battery warning light turns off after startup.
- Use your hand to gently wiggle each cable end. They should not move.
✅ After Repair
- ✅ Reset the clock and radio presets if they were lost.
- ✅ If the driver window auto-up feature does not work, initialize it: close the window fully, hold the switch up for 2 seconds, lower it fully, then raise it fully again.
- ✅ Drive normally for a few trips. The idle may feel slightly different while the engine computer relearns.
- ✅ Recycle the old battery at a parts store or recycling center. Do not throw it in household trash.
- ✅ If the battery light stays on, the charging system should be tested before driving far.
💰 DIY vs Shop Cost
Shop Cost: $220-$420 (parts + labor)
DIY Cost: $150-$300 (parts only)
You Save: $70-$120 by doing it yourself!
Shop labor rates vary but typically run $100-$150/hour. This repair takes a shop approximately 0.3-0.6 hours.
🎯 Ready to get started?
HowToo makes it easy: same-day/2-day shipping on every part, plus all the tools and specialty tools you need! Check out the parts and tools sections below to add everything to your cart.