

![[HOW TO] Replace the battery on a 2015-2022 Chevy Colorado/GMC Canyon (Gas & Diesel)](/_next/image?url=https%3A%2F%2Fimg.youtube.com%2Fvi%2FEuUAoJwFq9o%2Fhqdefault.jpg&w=3840&q=75)





How to Replace the Battery on a 2015-2022 GMC Canyon (Engine: Inline 4 2.5L)
Step-by-step DIY guide with tools, parts, torque specs, safety tips, and cost savings for 2015, 2016, 2017, 2018, 2019, 2020, 2021, 2022
How to Replace the Battery on a 2015-2022 GMC Canyon (Engine: Inline 4 2.5L)
Step-by-step DIY guide with tools, parts, torque specs, safety tips, and cost savings for 2015, 2016, 2017, 2018, 2019, 2020, 2021, 2022


🔧 Canyon - Battery Replacement
Changing the battery on your Canyon means removing the old 12-volt starting battery and installing a new one with the correct size, hold-down fit, and terminal layout. This restores reliable starting power and helps prevent low-voltage warning lights or no-start issues.
Difficulty Level: Beginner | Estimated Time: 20-40 minutes
⚠️ Safety & Precautions
- ⚠️ Wear safety glasses and gloves. Car batteries can leak acid and create sparks if handled incorrectly.
- ⚠️ Turn the ignition fully OFF and remove the key before starting.
- ⚠️ Always disconnect the negative cable first. This lowers the chance of a tool causing a short circuit.
- ⚠️ Do not let a wrench touch both battery terminals, or the positive terminal and body metal, at the same time.
- ⚠️ A battery is heavy. Lift with both hands and keep it upright.
- ⚠️ Battery disconnect is required for this repair.
🔧 Required Tools
You'll need the following tools for this repair:
- 10mm socket
- 13mm socket
- 3/8-inch ratchet
- 6-inch extension
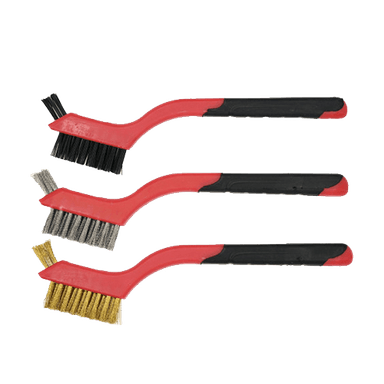
- Battery terminal cleaner brush
- Battery carrier strap
- Torque wrench rated 5-50 Nm
- Nitrile gloves
- Safety glasses
🔩 Required Parts
HowToo sells all the parts you need for this repair:
- 12-volt AGM or flooded starting battery - Qty: 1
- Battery terminal protectant - Qty: 1
- Battery anti-corrosion washers - Qty: 2
📋 Before You Begin
- 🚗 Park your Canyon on level ground and set the parking brake.
- 🔑 Turn the ignition OFF and remove the key from the vehicle.
- ⏱️ Wait at least 2 minutes before disconnecting the battery so vehicle modules can power down.
- 💾 Note that radio presets, clock, and some driver settings may reset after the battery is disconnected.
- 📍 The battery is under the hood on the passenger-side/front area of the engine bay.
- 📘 A “hold-down” is the bracket that clamps the battery in place so it cannot move while driving.
- 📘 A “terminal” is the metal post connection on top of the battery where the cable attaches.
🔨 Step-by-Step Instructions
Follow these steps in order:
Step 1: Open the hood and locate the battery
- Use the hood release inside the cabin, then lift the hood and secure it with the prop rod if equipped.
- Use safety glasses and nitrile gloves before touching the battery area.
- Identify the negative terminal marked “-” and the positive terminal marked “+”.
- Negative comes off first.
Step 2: Disconnect the negative battery cable
- Use a 10mm socket and 3/8-inch ratchet to loosen the negative cable clamp nut.
- Twist the cable clamp gently by hand and lift it off the negative battery post.
- Move the negative cable aside so it cannot spring back and touch the battery post.
Step 3: Disconnect the positive battery cable
- Open the red positive terminal cover by hand if equipped.
- Use a 10mm socket and 3/8-inch ratchet to loosen the positive cable clamp nut.
- Lift the positive cable clamp off the positive battery post and move it away from the battery.
- Do not let the 10mm socket or ratchet touch body metal while it is on the positive terminal.
Step 4: Remove the battery hold-down
- Look at the lower edge of the battery tray for the battery hold-down clamp.
- Use a 13mm socket, 6-inch extension, and 3/8-inch ratchet to remove the hold-down bolt.
- Lift the hold-down clamp out and set it aside.
- Do not lose the hold-down bolt.
Step 5: Remove the old battery
- Attach a battery carrier strap to the battery if the battery has no built-in handle.
- Lift the battery straight up and out of the tray using both hands.
- Keep the battery upright the entire time.
- Set it on the ground carefully, away from children, pets, and flames.
Step 6: Clean the cable terminals and tray
- Use a battery terminal cleaner brush to clean the inside of both cable clamps.
- Use the battery terminal cleaner brush to clean any light corrosion from the battery tray area.
- If you see heavy white or green powder, avoid breathing it and keep it off your skin.
- Clean metal gives better starts.
Step 7: Install the new battery
- Use both hands or a battery carrier strap to lower the new battery into the tray.
- Make sure the positive post is on the same side as the positive cable and the negative post is on the same side as the negative cable.
- Make sure the battery sits flat in the tray and does not rock.
Step 8: Reinstall the battery hold-down
- Place the hold-down clamp back at the base of the battery.
- Use a 13mm socket, 6-inch extension, and torque wrench rated 5-50 Nm to tighten the hold-down bolt.
- Torque to 18 Nm (13 ft-lbs).
- Try moving the battery by hand. It should not slide or tip.
Step 9: Connect the positive battery cable
- Install one battery anti-corrosion washer over the positive battery post if using washers.
- Push the positive cable clamp fully down onto the positive battery post.
- Use a 10mm socket and torque wrench rated 5-50 Nm to tighten the positive terminal nut.
- Torque to 6 Nm (53 in-lbs).
- Close the red positive terminal cover by hand if equipped.
Step 10: Connect the negative battery cable
- Install one battery anti-corrosion washer over the negative battery post if using washers.
- Push the negative cable clamp fully down onto the negative battery post.
- Use a 10mm socket and torque wrench rated 5-50 Nm to tighten the negative terminal nut.
- Torque to 6 Nm (53 in-lbs).
- Apply a light coat of battery terminal protectant to both terminals after tightening.
Step 11: Verify basic electrical operation
- Use your key to turn the ignition to ON without starting the engine.
- Check that the dash lights, headlights, and interior lights work normally.
- Start the engine and let it idle for 2-3 minutes.
- If the idle feels slightly uneven at first, allow the engine to relearn idle speed.
✅ After Repair
- ✅ Confirm the battery warning light turns off after the engine starts.
- ✅ Reset the clock and radio presets if needed.
- ✅ Turn the steering wheel slowly left and right once if any steering-related warning appears after battery reconnect.
- ✅ Drive normally for 10-15 minutes so the vehicle can relearn idle and charging behavior.
- ♻️ Recycle the old battery at a parts store or recycling center. Do not throw it in household trash.
💰 DIY vs Shop Cost
Shop Cost: $220-$380 (parts + labor)
DIY Cost: $150-$280 (parts only)
You Save: $70-$100 by doing it yourself!
Shop labor rates vary but typically run $100-$150/hour. This repair takes a shop approximately 0.3-0.6 hours.
🎯 Ready to get started?
HowToo makes it easy: same-day/2-day shipping on every part, plus all the tools and specialty tools you need! Check out the parts and tools sections below to add everything to your cart.