

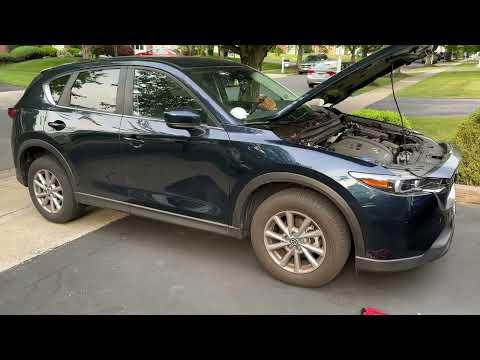






How to Replace the Battery on a 2013-2025 Mazda CX-5 (Engine: Inline 4 2.5L)
Step-by-step 12V AGM battery replacement guide with tools, parts, torque specs, and safety tips for 2013, 2014, 2015, 2016
How to Replace the Battery on a 2013-2025 Mazda CX-5 (Engine: Inline 4 2.5L)
Step-by-step 12V AGM battery replacement guide with tools, parts, torque specs, and safety tips for 2013, 2014, 2015, 2016


🔧 CX-5 - 12V Battery Replacement
This repair replaces the 12-volt starting battery in your CX-5. A weak battery can cause slow cranking, warning lights, i-ACTIVSENSE messages, keyless-entry problems, and stop/start system issues.
Difficulty Level: Beginner | Estimated Time: 20-40 minutes
⚠️ Safety & Precautions
- ⚠️ Wear safety glasses and gloves. Battery acid can burn skin and eyes.
- ⚠️ Do not let tools touch both battery terminals at the same time. This can cause sparks or a short circuit.
- ⚠️ Always remove the negative cable first and install it last.
- ⚠️ Keep flames, cigarettes, and sparks away from the battery area.
- ⚠️ Your CX-5 has battery monitoring and electronic modules. A memory saver helps preserve settings, but the battery can still be changed without one.
- ⚠️ Disconnecting the battery may reset auto window, clock, and infotainment settings.
🔧 Required Tools
You'll need the following tools for this repair:
- 10mm socket
- 10mm wrench
- Ratchet handle 3/8-inch drive
- Socket extension 6-inch 3/8-inch drive
- Battery terminal puller (specialty)
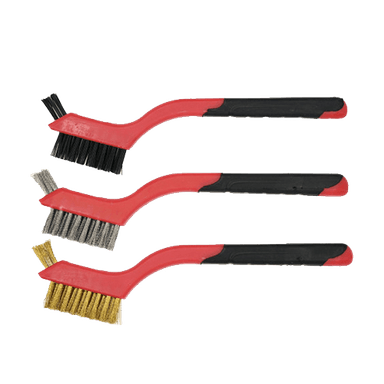
- Battery terminal cleaning brush
- Battery carrier strap
- Memory saver 12V OBD-II (specialty)
- Torque wrench inch-pound 3/8-inch drive
- Nitrile gloves
- Safety glasses
🔩 Required Parts
HowToo sells all the parts you need for this repair:
- 12V AGM battery Group Size 35 - Qty: 1
- Battery terminal protector spray - Qty: 1
- Battery anti-corrosion felt washers - Qty: 2
📋 Before You Begin
- Park your CX-5 on level ground, shift to Park, and apply the parking brake.
- Turn the ignition OFF and keep the key fob at least 15 feet away from the vehicle.
- Open the hood and support it fully.
- If using a memory saver, plug it into the OBD-II port under the driver-side dashboard before disconnecting the battery. A memory saver is a small backup power supply that helps keep radio, window, and module memory alive.
- Wait at least 3 minutes after turning the ignition OFF before disconnecting the battery so vehicle modules can go to sleep.
🔨 Step-by-Step Instructions
Follow these steps in order:
Step 1: Locate the Battery
- Open the hood and look at the front-left area of the engine bay.
- Use safety glasses and nitrile gloves before touching the battery.
- Identify the negative terminal marked - and the positive terminal marked +.
- Take a photo before removal.
Step 2: Remove the Negative Battery Cable
- Use a 10mm wrench or 10mm socket to loosen the negative terminal clamp nut.
- Twist the clamp gently and lift it off the negative battery post.
- If it is stuck, use a battery terminal puller. A terminal puller lifts the clamp without damaging the battery post.
- Move the negative cable aside so it cannot spring back and touch the battery post.
Step 3: Remove the Positive Battery Cable
- Lift the red plastic cover from the positive terminal.
- Use a 10mm wrench or 10mm socket to loosen the positive terminal clamp nut.
- Lift the positive cable off the battery post and move it aside.
- Do not let the positive cable touch metal body parts.
Step 4: Remove the Battery Hold-Down Bracket
- Use a 10mm socket, ratchet handle 3/8-inch drive, and socket extension 6-inch 3/8-inch drive to loosen the battery hold-down fasteners.
- Remove the upper hold-down bracket and set it aside.
- Keep the bracket and hardware together so nothing gets lost.
Step 5: Remove the Old Battery
- Attach a battery carrier strap to the battery if available.
- Lift the battery straight up and out of the tray using both hands.
- The battery is heavy. Keep your back straight and lift with your legs.
- Set the old battery upright on cardboard or a safe flat surface.
Step 6: Clean the Battery Tray and Cable Ends
- Use a battery terminal cleaning brush to clean the inside of both cable clamps.
- Use the same battery terminal cleaning brush to clean any light corrosion from the tray area.
- If there is white or blue powdery corrosion, avoid breathing the dust and wipe it carefully with a damp disposable cloth.
- Clean terminals help prevent no-starts.
Step 7: Install the New Battery
- Place the new 12V AGM battery Group Size 35 into the tray with the positive and negative posts in the same positions as the old battery.
- Make sure the battery sits flat and does not rock in the tray.
- Install the hold-down bracket using the 10mm socket, ratchet handle 3/8-inch drive, and socket extension 6-inch 3/8-inch drive.
- Tighten the hold-down evenly with the torque wrench inch-pound 3/8-inch drive.
- Torque to 4-6 Nm (35-53 in-lbs)
Step 8: Install Anti-Corrosion Washers
- Place one battery anti-corrosion felt washer over the positive battery post.
- Place one battery anti-corrosion felt washer over the negative battery post.
- Push each washer down until it sits flat on top of the battery case.
Step 9: Connect the Positive Cable First
- Install the positive cable clamp onto the positive battery post.
- Push the clamp fully down on the post.
- Use the 10mm socket and torque wrench inch-pound 3/8-inch drive to tighten the terminal clamp nut.
- Torque to 4-6 Nm (35-53 in-lbs)
- Close the red plastic terminal cover.
Step 10: Connect the Negative Cable Last
- Install the negative cable clamp onto the negative battery post.
- Push the clamp fully down on the post.
- Use the 10mm socket and torque wrench inch-pound 3/8-inch drive to tighten the terminal clamp nut.
- Torque to 4-6 Nm (35-53 in-lbs)
- Spray a light coat of battery terminal protector spray on both terminals.
Step 11: Remove the Memory Saver
- If used, unplug the memory saver 12V OBD-II from the OBD-II port.
- Make sure no tools are left in the engine bay.
- Close the hood securely.
✅ After Repair
- Start your CX-5 and let it idle for 2-3 minutes.
- Check that the battery warning light turns off after startup.
- If the power windows lost auto-up/auto-down function, initialize each affected window: turn ignition ON, fully lower the window, then fully raise it and hold the switch up for about 2 seconds.
- Reset the clock and infotainment preferences if needed.
- Drive normally for 10-15 minutes so the vehicle can relearn idle and charging behavior.
- Recycle the old battery properly. Most parts stores accept it as a core return.
💰 DIY vs Shop Cost
Shop Cost: $250-$430 (parts + labor)
DIY Cost: $170-$290 (parts only)
You Save: $80-$140 by doing it yourself!
Shop labor rates vary but typically run $100-$150/hour. This repair takes a shop approximately 0.5-1.0 hours.
🎯 Ready to get started?
HowToo makes it easy: same-day/2-day shipping on every part, plus all the tools and specialty tools you need! Check out the parts and tools sections below to add everything to your cart.