







How to Replace the Battery on a 1997-2019 Honda CR-V (Engine: Inline 4 1.5L)
Step-by-step 12V Group 51R battery guide with tools, torque specs, and safety tips for 1997, 1998, 1999, 2000, 2001
How to Replace the Battery on a 1997-2019 Honda CR-V (Engine: Inline 4 1.5L)
Step-by-step 12V Group 51R battery guide with tools, torque specs, and safety tips for 1997, 1998, 1999, 2000, 2001


🔧 CR-V - 12V Battery Replacement
This job replaces the 12-volt starting battery in your CR-V. A weak battery can cause slow cranking, warning lights, no-start issues, and electronic glitches.
Difficulty Level: Beginner | Estimated Time: 20-40 minutes
⚠️ Safety & Precautions
- ⚠️ Wear safety glasses and gloves. Car batteries contain acid and can spark if shorted.
- ⚠️ Always remove the negative cable first and install it last. This lowers the chance of an accidental short.
- ⚠️ Keep metal tools away from both battery terminals at the same time.
- ⚠️ Do not tip the battery. It is heavy and may leak corrosive acid if damaged.
- ⚠️ Battery disconnect is required for this repair.
🔧 Required Tools
You'll need the following tools for this repair:
- 10mm socket
- 10mm wrench
- 3/8-inch ratchet
- 6-inch socket extension
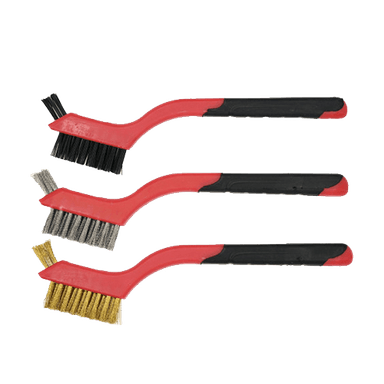
- Battery terminal brush
- Battery carrier strap
- Memory saver 12V OBD-II adapter (specialty)
- Digital multimeter
- Nitrile gloves
- Safety glasses
🔩 Required Parts
HowToo sells all the parts you need for this repair:
- 12V AGM battery, Group 51R - Qty: 1
- Battery terminal protectant - Qty: 1
- Battery hold-down hardware - Qty: 1 set, if corroded or damaged
📋 Before You Begin
- 🚗 Park your CR-V on level ground, shift to Park, and set the parking brake.
- 🔑 Turn the ignition off and keep the key fob at least 10 feet away from the vehicle.
- ⏱️ Wait at least 3 minutes before disconnecting the battery so control modules can go to sleep.
- 💾 A memory saver is optional. A memory saver is a small power supply that keeps basic vehicle settings alive while the battery is disconnected.
- 📻 If you do not use a memory saver, some settings may reset, including clock, radio presets, auto window learning, and idle learning.
🔨 Step-by-Step Instructions
Follow these steps in order:
Step 1: Open the Hood and Locate the Battery
- Use the interior hood release, then lift the hood and secure it with the prop rod.
- The 12V battery is in the engine bay on the driver-side front area.
- Use safety glasses and nitrile gloves before touching the battery.
Step 2: Connect the Memory Saver
- Use the memory saver 12V OBD-II adapter and plug it into the OBD-II port under the driver-side dash.
- Make sure the memory saver has power before removing the battery cables.
- Skip this if you do not have one.
Step 3: Remove the Negative Battery Cable
- Use a 10mm wrench to loosen the nut on the negative battery terminal clamp.
- The negative terminal is marked with a minus sign, -.
- Twist the clamp gently and lift it off the battery post.
- Move the cable aside so it cannot spring back and touch the battery.
Step 4: Remove the Positive Battery Cable
- Flip open the red protective cover over the positive terminal.
- Use a 10mm wrench to loosen the positive terminal clamp nut.
- The positive terminal is marked with a plus sign, +.
- Lift the clamp off the battery post and move it aside carefully.
Step 5: Remove the Battery Hold-Down Bracket
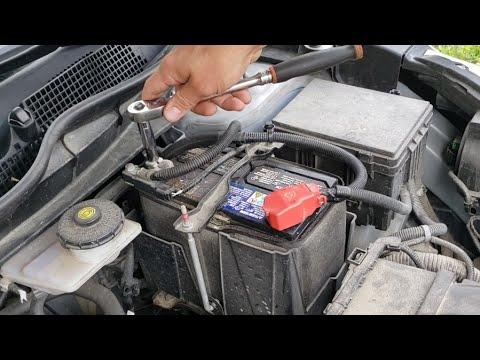
- Use a 10mm socket, 3/8-inch ratchet, and 6-inch socket extension to loosen the hold-down nuts.
- Remove the top hold-down bracket and set it aside.
- Do not drop the J-hooks. J-hooks are the long hooked rods that clamp the battery down.
- Take a photo before removing parts.
Step 6: Lift Out the Old Battery
- Use a battery carrier strap to lift the old battery straight up and out.
- Keep the battery upright the entire time.
- Set it on the ground gently. Do not place it on painted surfaces.
Step 7: Clean the Battery Tray and Cable Ends
- Use a battery terminal brush to clean the inside of both cable clamps.
- Use the same battery terminal brush to clean corrosion from the battery tray area.
- If you see white or blue-green powder, avoid breathing it and wipe it away carefully with gloves on.
Step 8: Install the New Battery
- Use the battery carrier strap to lower the new Group 51R battery into the tray.
- Make sure the positive and negative posts are in the same positions as the old battery.
- The battery must sit flat in the tray.
Step 9: Reinstall the Battery Hold-Down
- Use the 10mm socket, 3/8-inch ratchet, and 6-inch socket extension to reinstall the hold-down bracket.
- Tighten the hold-down evenly so the battery cannot move.
- Torque to 7 Nm (62 in-lbs)
- Do not overtighten. The battery case can crack.
Step 10: Connect the Positive Battery Cable
- Use the 10mm wrench to install the positive cable first.
- Push the clamp fully down onto the positive battery post.
- Tighten the terminal nut until snug.
- Torque to 5 Nm (44 in-lbs)
- Close the red protective cover.
Step 11: Connect the Negative Battery Cable
- Use the 10mm wrench to install the negative cable last.
- Push the clamp fully down onto the negative battery post.
- Tighten the terminal nut until snug.
- Torque to 5 Nm (44 in-lbs)
- A small spark may happen when connecting the negative cable. That can be normal.
Step 12: Apply Terminal Protectant
- Use battery terminal protectant on both connected battery terminals.
- Apply a light coating only after the clamps are fully tightened.
Step 13: Check Battery Voltage
- Use a digital multimeter set to DC volts.
- Touch the red probe to the positive terminal and the black probe to the negative terminal.
- A fully charged new battery should read about 12.6 volts with the engine off.
- Start the engine and check again. Charging voltage should usually read about 13.5-14.8 volts.
✅ After Repair
- ✅ Start your CR-V and let it idle without accessories for a few minutes.
- ✅ If the idle feels rough, let the engine warm up fully and idle for about 5 minutes with headlights, A/C, and rear defroster off.
- ✅ Reset the clock and radio presets if needed.
- ✅ Test the driver window auto-up/auto-down. If it lost auto function, run the window fully down, then fully up, and hold the switch up for 2 seconds.
- ✅ Confirm there are no warning lights after a short drive.
- ♻️ Recycle the old battery at a parts store or battery recycler. Do not throw it in the trash.
💰 DIY vs Shop Cost
Shop Cost: $220-$380 (parts + labor)
DIY Cost: $150-$260 (parts only)
You Save: $70-$120 by doing it yourself!
Shop labor rates vary but typically run $100-$150/hour. This repair takes a shop approximately 0.3-0.7 hours.
🎯 Ready to get started?
HowToo makes it easy: same-day/2-day shipping on every part, plus all the tools and specialty tools you need! Check out the parts and tools sections below to add everything to your cart.