

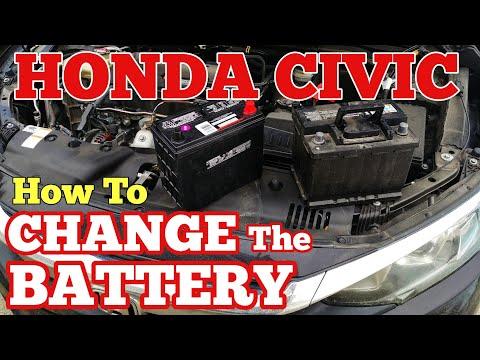






How to Replace the Battery in a 2016-2025 Honda Civic (Trim: Si | Engine: Inline 4 1.5L)
Step-by-step DIY instructions with required tools, torque specs, and safety tips for 2016, 2017, 2018
How to Replace the Battery in a 2016-2025 Honda Civic (Trim: Si | Engine: Inline 4 1.5L)
Step-by-step DIY instructions with required tools, torque specs, and safety tips for 2016, 2017, 2018


🔧 Civic - Battery Replacement
Easy job on your Civic. The key is disconnecting the negative terminal first, then reconnecting it last. The battery aisle is open with fitment-matched options.
Difficulty Level: Beginner | Estimated Time: 20-30 minutes
⚠️ Safety & Precautions
- ⚠️ Turn the ignition completely off and keep sparks, cigarettes, and flames away.
- ⚠️ Wear safety glasses and gloves. Battery acid can cause burns.
- ⚠️ Remove metal jewelry before touching the battery.
- ⚠️ Never let a metal tool touch both battery terminals.
- ⚠️ Disconnect negative first and reconnect negative last.
- ⚠️ Don’t unplug or pull on the small battery-sensor connector attached to the negative cable.
- ⚠️ Keep the battery upright. It’s heavy, so lift with both hands.
🔧 Required Tools
You'll need the following tools for this repair:
- 10mm socket
- 1/4-inch drive ratchet
- 3-inch socket extension
- 10mm combination wrench
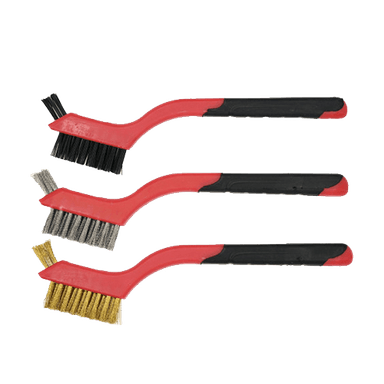
- Battery terminal cleaning brush
- Inch-pound torque wrench rated from 25-60 in-lbs
- Safety glasses
- Chemical-resistant work gloves
🔩 Required Parts
HowToo sells all the parts you need for this repair:
- Fitment-matched 12-volt vehicle battery - Qty: 1
- Battery terminal cleaner - Qty: 1
- Battery terminal protectant - Qty: 1
📋 Before You Begin
- 📋 Park your Civic on level ground, apply the parking brake, and select neutral.
- 📋 Turn off the headlights, climate control, audio system, and every accessory.
- 📋 Open the driver’s window so a lock or electrical issue can’t trap the keys inside.
- 📋 Open and support the hood securely.
- 📋 Wait at least three minutes after switching the car off before disconnecting the negative terminal.
- 📋 Expect the clock, radio presets, and automatic window functions to need resetting.
🔨 Step-by-Step Instructions
Follow these steps in order:
Step 1: Locate and inspect the battery
- Find the battery in the engine compartment and identify the black negative terminal and red-covered positive terminal.
- Check for white or green corrosion around the clamps.
- Look at the battery’s positive and negative post positions before removing it. The replacement must match.
Step 2: Disconnect the negative terminal
- Use the 10mm socket and 1/4-inch drive ratchet to loosen the negative clamp nut.
- Grip the metal clamp, not the attached battery-sensor connector, and lift the clamp straight off.
- Move the cable aside where it cannot spring back onto the post.
- Negative first keeps stray tool contact safer.
Step 3: Disconnect the positive terminal
- Lift the red protective cover.
- Use the 10mm socket and 1/4-inch drive ratchet to loosen the positive clamp nut.
- Lift the clamp straight off and position it away from the battery post.
Step 4: Remove the battery hold-down
- Use the 10mm deep socket, extension, and ratchet to loosen both hold-down nuts evenly.
- Unhook the two J-shaped rods and remove the upper battery bracket.
- Note the bracket and insulating cover positions for reassembly.
Step 5: Lift out the old battery
- Use both hands or the battery handle to lift it straight upward.
- Keep it upright and place it on a stable surface.
- Inspect the tray for corrosion, cracks, or trapped debris.
Step 6: Clean the tray and clamps
- Wear safety glasses and chemical-resistant gloves.
- Use the battery terminal cleaning brush and terminal cleaner to remove corrosion from the cable clamps.
- Wipe the battery tray clean and allow everything to dry completely.
Step 7: Install the new battery
- Place the replacement battery upright in the tray with the posts facing the same direction as the original.
- Confirm it sits flat and doesn’t pinch any wiring.
- Reinstall the insulating cover, upper bracket, and J-shaped rods.
- Use the 10mm socket and ratchet to tighten both hold-down nuts evenly until the battery cannot move.
- Don’t overtighten or bend the hold-down bracket. Honda specifically warns against deforming it. hocivic.com
- A crushed battery case ruins everyone’s afternoon.
Step 8: Connect the positive terminal
- Push the positive clamp fully down onto the positive post.
- Use the 10mm socket and inch-pound torque wrench to tighten the clamp nut to 2.9-5.9 Nm (26-52 in-lbs).
- Close the red protective cover.
Step 9: Connect the negative terminal
- Push the negative clamp and attached battery sensor fully onto the negative post.
- Use the 10mm socket and inch-pound torque wrench to tighten the clamp nut to 2.9-5.9 Nm (26-52 in-lbs). Honda’s service information specifies positive first and negative last during reconnection. hocivic.com)
- Don’t twist, unplug, or place leverage against the small battery sensor.
Step 10: Protect and check the connections
- Apply a light coating of battery terminal protectant around the assembled clamps.
- Try rotating each clamp by hand. Neither clamp should move.
- Confirm no tools remain in the engine compartment, then close the hood.
✅ After Repair
- ✅ Start the engine and confirm it cranks normally.
- ✅ Warning messages may appear immediately after power is restored. Turn the steering wheel fully left, then fully right, center it, and drive carefully for several minutes.
- ✅ Reset the clock and radio presets if needed.
- ✅ Reset each automatic window by lowering it completely, then raising and holding the switch for another two seconds.
- ✅ Recheck that the battery cannot slide or rock in its tray.
- ✅ Recycle the old battery. Don’t place it in household trash.
💰 DIY vs Shop Cost
Shop Cost: $220-$450 (parts + labor)
DIY Cost: $145-$360 (parts only)
You Save: $60-$150 by doing it yourself!
Shop labor rates vary but typically run $100-$150/hour. This repair takes a shop approximately 0.3-0.5 hour.
🎯 Ready to get started?
HowToo makes it easy: same-day/2-day shipping on every part, plus all the tools and specialty tools you need! Check out the parts and tools sections below to add everything to your cart.