

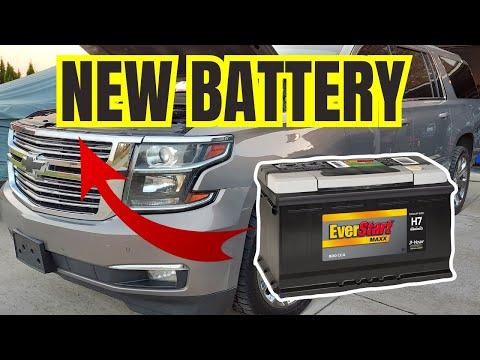






How to Replace the Battery in a 2015-2026 Chevrolet Suburban (Engine: V8 5.3L)
Step-by-step AGM battery installation with tools, safety tips, and torque specs for 2015, 2016, 2017, 2018, 2019, 2020, 2021, 2022, 2023, 2024, 2025, 2026
How to Replace the Battery in a 2015-2026 Chevrolet Suburban (Engine: V8 5.3L)
Step-by-step AGM battery installation with tools, safety tips, and torque specs for 2015, 2016, 2017, 2018, 2019, 2020, 2021, 2022, 2023, 2024, 2025, 2026


🔧 Suburban - 12-Volt Battery Replacement
The battery is located under the hood on the passenger side. Replacement involves disconnecting the cables, removing the battery retainer, and installing a correctly sized AGM battery.
Difficulty Level: Beginner | Estimated Time: 0.5-1 hour
⚠️ Safety & Precautions
- 🧤 Wear gloves and safety glasses because batteries contain corrosive acid.
- 🔥 Keep sparks, cigarettes, and open flames away from the battery.
- 🔑 Switch off the ignition and keep the key fob away from your Suburban.
- ➖ Disconnect the negative cable first and reconnect it last.
- ➕ Never allow a tool to touch the positive terminal and metal bodywork simultaneously.
- 🏋️ The battery weighs approximately 20-25 kg; use a battery carrier or get assistance.
- ⚡ Do not connect a memory saver through the diagnostic port unless it is specifically designed and fused for this purpose.
🔧 Required Tools
You'll need the following tools for this repair:
- 10mm socket
- 13mm socket
- 3/8-inch-drive ratchet
- 3/8-inch-drive 150mm extension
- 3/8-inch-drive torque wrench (5-30 Nm range)
- Battery terminal cleaning brush
- Battery lifting strap (specialty)
- Nitrile mechanic gloves
- ANSI Z87.1 safety glasses
🔩 Required Parts
HowToo sells all the parts you need for this repair:
- Group 48/H6 AGM 12-volt battery (minimum 730 CCA) - Qty: 1
- Battery terminal protector spray - Qty: 1
📋 Before You Begin
- 🅿️ Park your Suburban on level ground, engage the parking brake, and open the hood.
- 🔌 Turn off the lights, climate control, audio system, and every other electrical accessory.
- ⏱️ Switch off the ignition, remove the key fob from the vehicle, and wait at least two minutes before disconnecting the battery.
- 📱 Record saved radio stations and personal settings because some settings may be lost.
- 🔋 Verify that the replacement is a Group 48/H6 AGM battery with the same terminal orientation and at least the original battery’s cold-cranking amperage.
🔨 Step-by-Step Instructions
Follow these steps in order:
Step 1: Locate and Inspect the Battery
- Find the battery at the rear passenger side of the engine compartment.
- Put on the nitrile mechanic gloves and ANSI Z87.1 safety glasses.
- Check the battery for swelling, cracking, or leaking acid. Do not handle a damaged battery; have it professionally removed.
Step 2: Disconnect the Negative Cable
- Use the 10mm socket and 3/8-inch-drive ratchet to loosen the negative terminal clamp marked “−”.
- Lift the clamp straight off the battery post. Move it aside so it cannot spring back into contact.
- Do not pry against the battery current sensor attached to the negative cable. The sensor monitors battery charging.
- Negative comes off first and goes on last.
Step 3: Disconnect the Positive Cable
- Open the red positive-terminal cover.
- Use the 10mm socket and 3/8-inch-drive ratchet to loosen the positive terminal clamp marked “+”.
- Lift the clamp straight off the post and position it away from the battery.
- Keep the 10mm socket from touching surrounding metal while it contacts the positive terminal.
Step 4: Remove the Battery Retainer
- Locate the hold-down block at the base of the battery.
- Use the 13mm socket, 150mm extension, and 3/8-inch-drive ratchet to remove the hold-down bolt and block.
- Place the bolt and block somewhere clean so they cannot fall into the engine compartment.
Step 5: Remove the Old Battery
- Attach the battery lifting strap securely to the battery.
- Lift the battery vertically from the tray. Keep it upright to prevent electrolyte leakage.
- Use assistance if the battery is too heavy to lift while maintaining safe control.
Step 6: Clean and Inspect the Connections
- Use the battery terminal cleaning brush to clean the inside of both cable clamps.
- Inspect the battery tray, cables, and clamps for corrosion, looseness, or damage.
- Do not install the battery if a cable clamp is cracked or cannot tighten securely.
Step 7: Install the New Battery
- Use the battery lifting strap to lower the new battery into the tray with the terminals in the original orientation.
- Make sure the battery sits completely flat and does not trap either cable underneath it.
- Reinstall the hold-down block and bolt using the 13mm socket, extension, and torque wrench.
- Torque the battery hold-down bolt to 25 Nm (18 ft-lbs).
- Confirm that the battery cannot slide or rock in the tray.
Step 8: Connect the Positive Cable
- Push the positive cable clamp fully down over the positive battery post.
- Use the 10mm socket and torque wrench to tighten the terminal nut.
- Torque the positive terminal nut to 6 Nm (53 in-lbs).
- Apply a light coating of battery terminal protector spray, then close the red cover.
- Do not overtighten the nut; excessive force can damage the battery post or clamp.
Step 9: Connect the Negative Cable
- Push the negative cable clamp fully down over the negative battery post.
- Use the 10mm socket and torque wrench to tighten the terminal nut.
- Torque the negative terminal nut to 6 Nm (53 in-lbs).
- Apply a light coating of battery terminal protector spray.
- Check both clamps by hand. Neither clamp should rotate on its post.
✅ After Repair
- 🚙 Start the engine and confirm that it cranks normally.
- 💡 Confirm that the charging-system warning light turns off after the engine starts.
- 🖥️ Set the clock and restore any lost radio or vehicle settings.
- 🪟 If a one-touch window feature stops working, fully lower that window, then fully raise it and hold the switch for approximately two seconds.
- 🛞 A temporary steering or stability-control message may clear after turning the steering wheel from side to side and driving a short distance.
- 🔍 Recheck the battery to ensure it is firmly retained and both terminal covers are correctly positioned.
- ♻️ Return the old battery to a battery retailer or authorized recycler; never place it in household waste.
- 🔧 Battery registration or programming is not normally required on your Suburban.
💰 DIY vs Shop Cost
Shop Cost: ₹22,000-₹38,000 (parts + labor)
DIY Cost: ₹18,000-₹32,000 (parts only)
You Save: ₹4,000-₹6,000 by doing it yourself!
Pricing in the Sonīpat area varies with AGM battery brand, warranty, availability, and imported-vehicle service rates. This repair takes a shop approximately 0.5-1 hour.
🎯 Ready to get started?
HowToo makes it easy: same-day/2-day shipping on every part, plus all the tools and specialty tools you need! Check out the parts and tools sections below to add everything to your cart.